System Graphics
KODE OS now provides an innovative tool for creating System drawings with ease and efficiency. With this feature, users can effortlessly design intricate system graphics tailored to their needs.
Simplified System Schematics
Drag-and-Drop Library: Access a comprehensive library of pre-made drawings representing common system components like pipes, valves, pumps and more. Simply drag and drop these Elements from the Basics menu onto your workspace to build your schematic.
Modular Components: Each drawing represents a single component, allowing for easy customization and arrangement.
Visualize Your System: Build your system layout by dragging and dropping components to create a clear and concise representation.
Enhanced Usability
Grouping Functionality: Group related components together for better organization and management of complex drawings.
Additional Options: Explore further options designed to improve your workflow and make system drawing a breeze.
Besides this, you can also make edits using an existing System Graphic file similar to how it is
done for Device Graphics.
Drawing a System Graphic
To draw a System using the KODE OS Graphics module, you can follow one of two paths, as is the
case for Area and Device graphics.
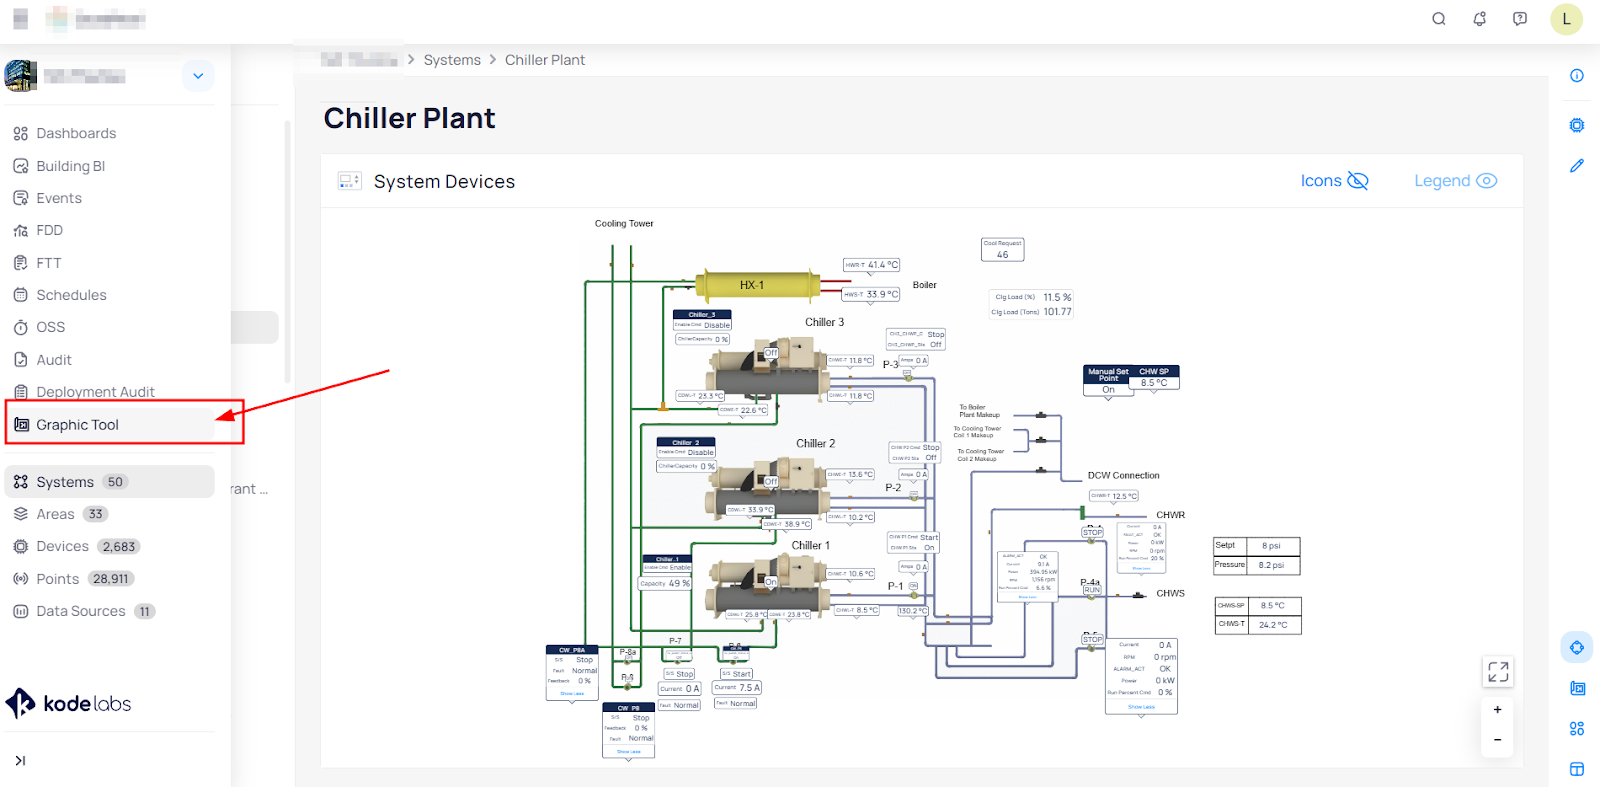
You can simply go directly to the Graphics module from the main left side menu bar. Select “Graphic Tool” and then select “New System Graphic”.
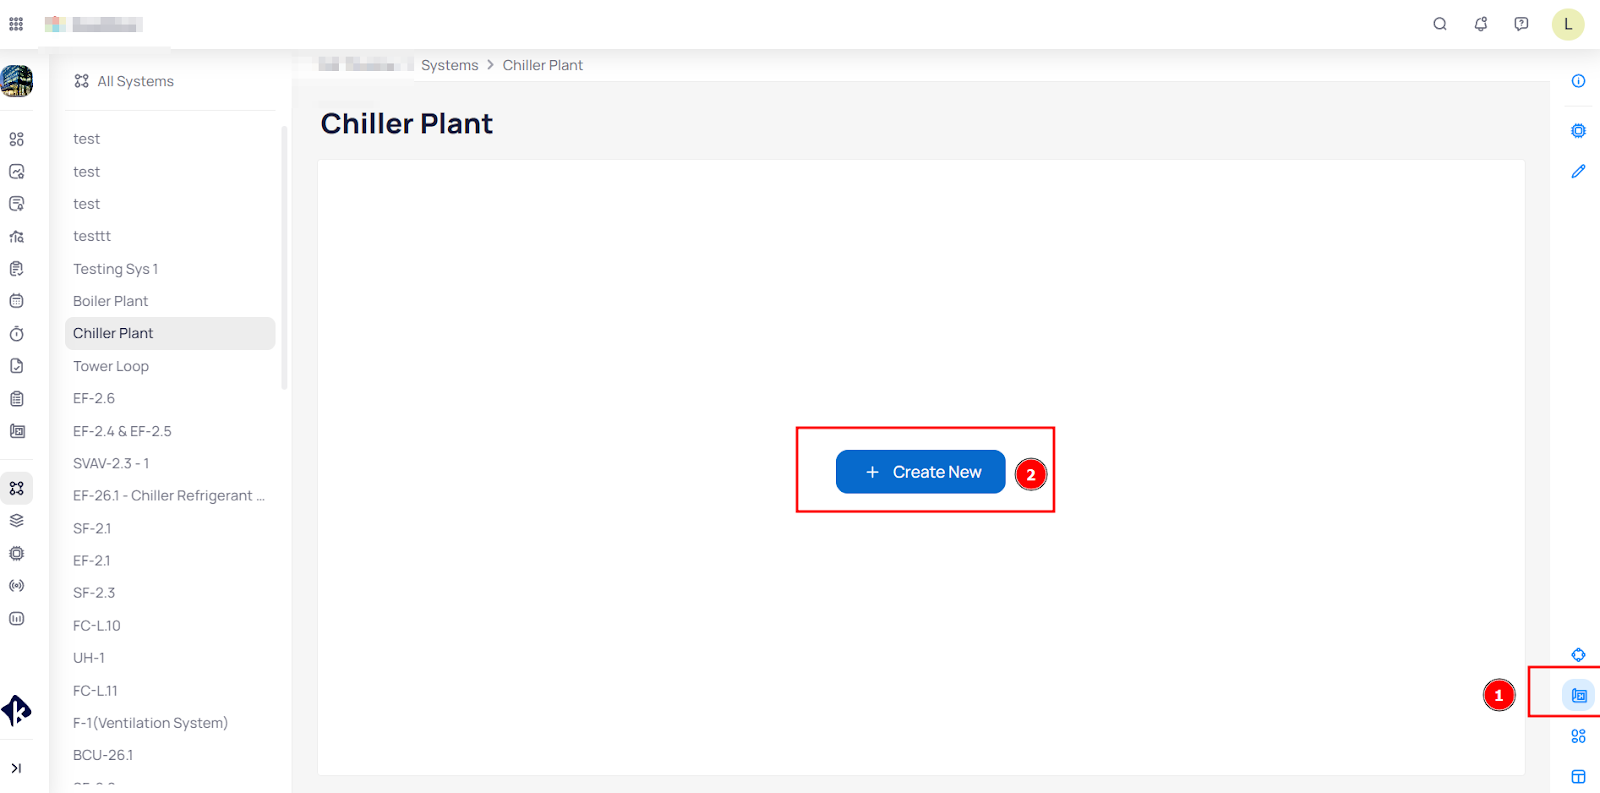
or once you are in the device details you can click “Graphic View” on the lower right side of the screen and then click the “Create New” button.
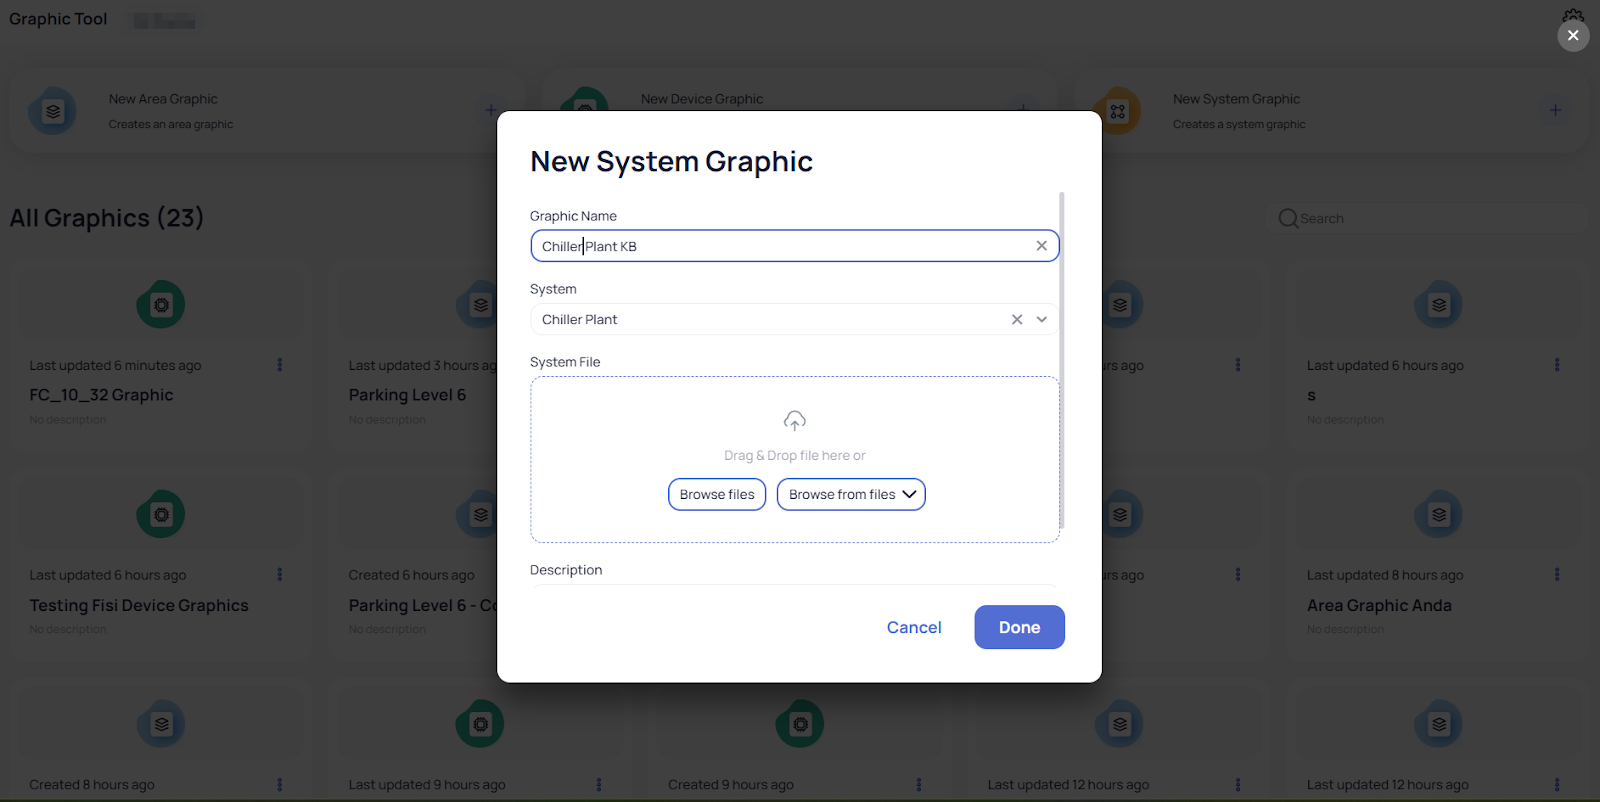
Both paths will bring you to the main dialog where the KODE platform asks you for the System Name
(If you followed the first approach, you will need to select a System
If you followed the second approach, the System will be assigned automatically since you went there from the System record.
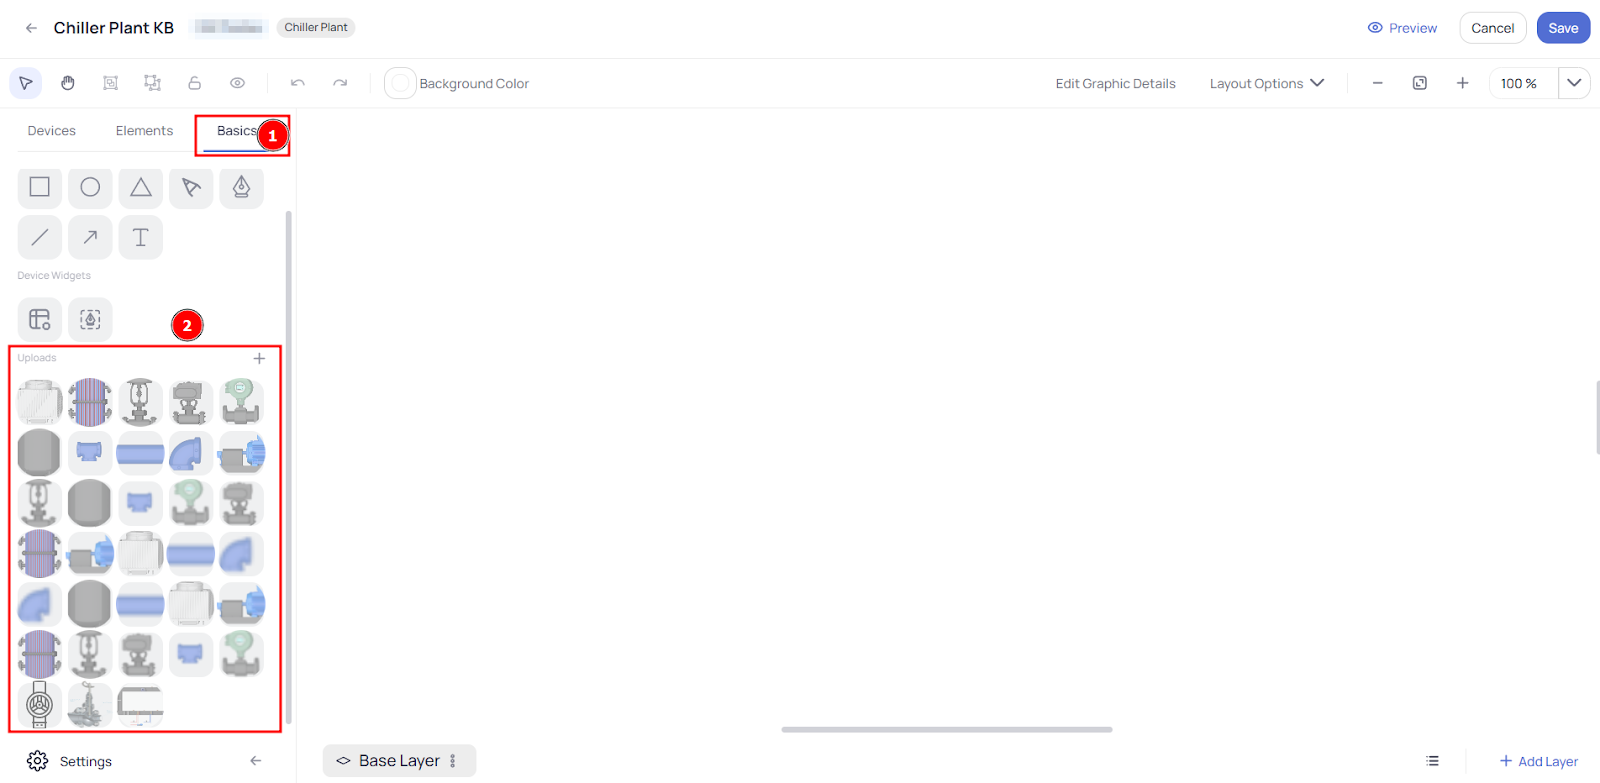
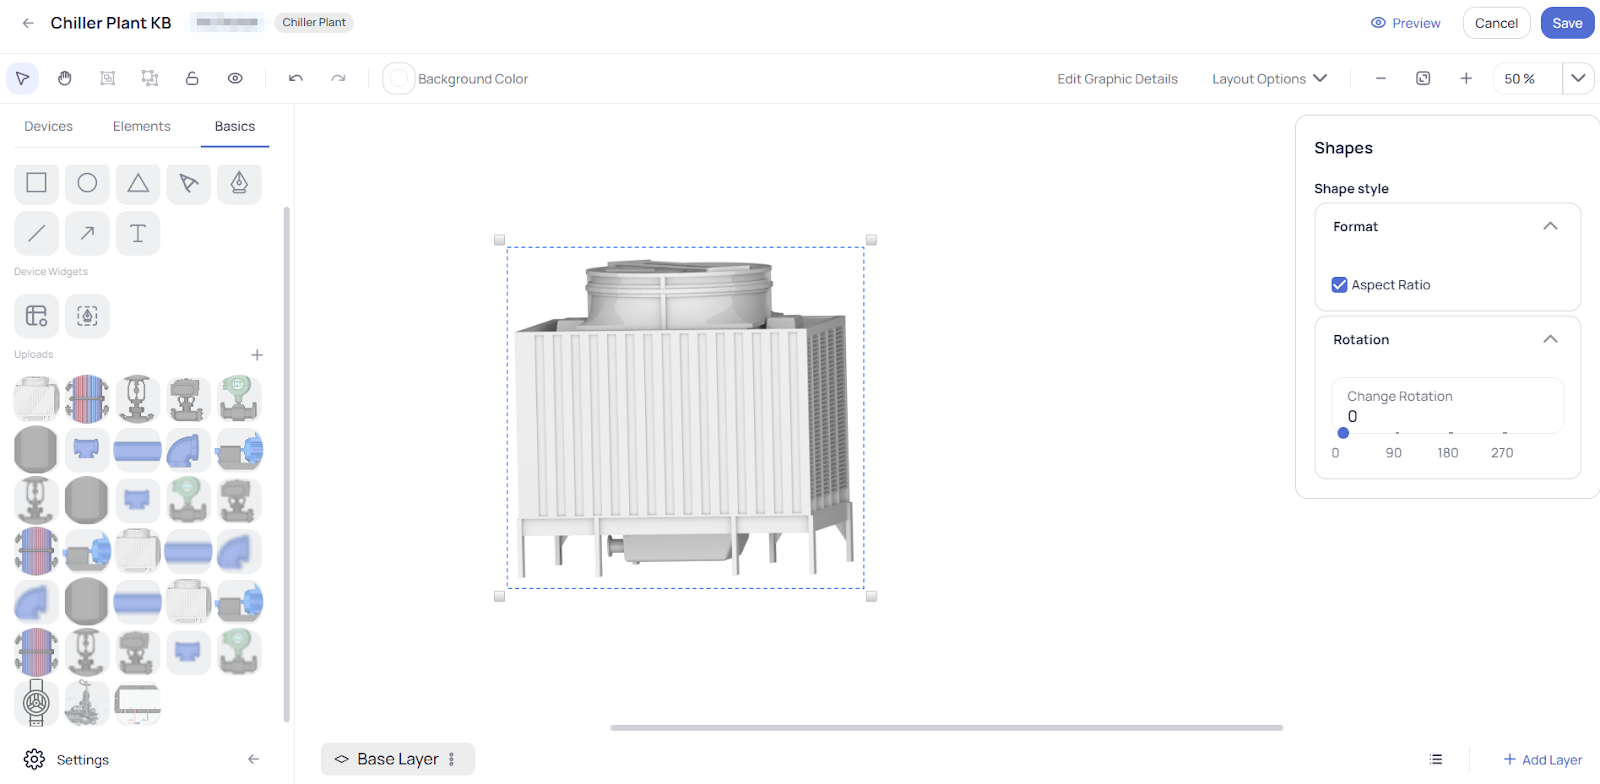
To continue assembling your System graphic, navigate to the “Basics” pane and under the “Uploads” section you will find different component parts already included within Graphic Tool which can be used to draw the System:
Simply choose the part, then drag and drop it on the work area.
While the part is selected you can resize it and also rotate it according to your needs.
Continue placing and resizing components to assemble an accurate representation of your System.
As components are placed and sized on the work area, you can select different elements and group them by right clicking with the mouse to create a sub-assembly in the graphic. This group can then be moved and rotated more easily and in a more organized way.

Editing and adding points to the System Graphic
After you finish drawing a System Graphic (or choose one available), you can add different Markers
and Icons to it for a better monitoring and control of the System directly from the graphic view.
To do this, simply choose a System and open it with the “Graphic Tool”.
From the Devices tab of the left side menu, just like when working with Device Graphics, simply drag and drop the desired Points to the corresponding place on the System Graphic.
Customize the style and behavior per your needs.
For more information on this please view “Customizing Markers and Icons".

Related Articles
Graphics Summary
Module summary We’re thrilled to announce that Graphics creation as we know it has been completely transformed. There’s a graphics builder we’ve been cooking that gives you the ability to build System and Device Graphics and customize floor plans ...Accessing the Graphics module
The Graphics module is a permission-based component of the KODE OS platform. Users authorized to create and/or modify graphics can access the Graphics module in two ways: You can find it by selecting the building of your choice. From the main left ...System Configuration
KODE OS allows you to review, monitor and see all details of major systems. Select the building of your choice by clicking “Sites” on the left Main Navigation bar. From the left main menu select “Systems”. A page with the list of all Systems will ...Area Graphics
To create an Area graphic, if you start from an Area, and select “New Graphic” widget, you will see the following prompt: After this the system will pop up a window asking you (if there are any previously graphic files found for the selected area) to ...Device Graphics
The Graphics module also has an option to create a New Device Graphic directly within the tool. You can also create Templates that can be applied to a Device in Device Details or on Device Batch Update. Accessing the Device Graphic To create a ...