Navigating to Floor Plan Insights
To gain a comprehensive visual overview of device placement across different floors and areas, along with the ability to interact directly with these devices, Floor Plans serve as an invaluable tool. Each area is equipped with its own dedicated Dashboard featuring a variety of widgets.
To access Floor Plan Insights, follow these steps:
Navigate to the “Site Dashboard” of the desired building by selecting it from the main left menu.
Click on "Areas" in the left menu to display the list of floors within the building. The numerical indicator next to the "Area" button showcases the total count of floors and/or distinct areas in the building.
Choose an area from the list, starting from the lowest (e.g., Basement) to the highest (e.g., Rooftop). Alternatively, use the search bar atop the menu for quicker access.
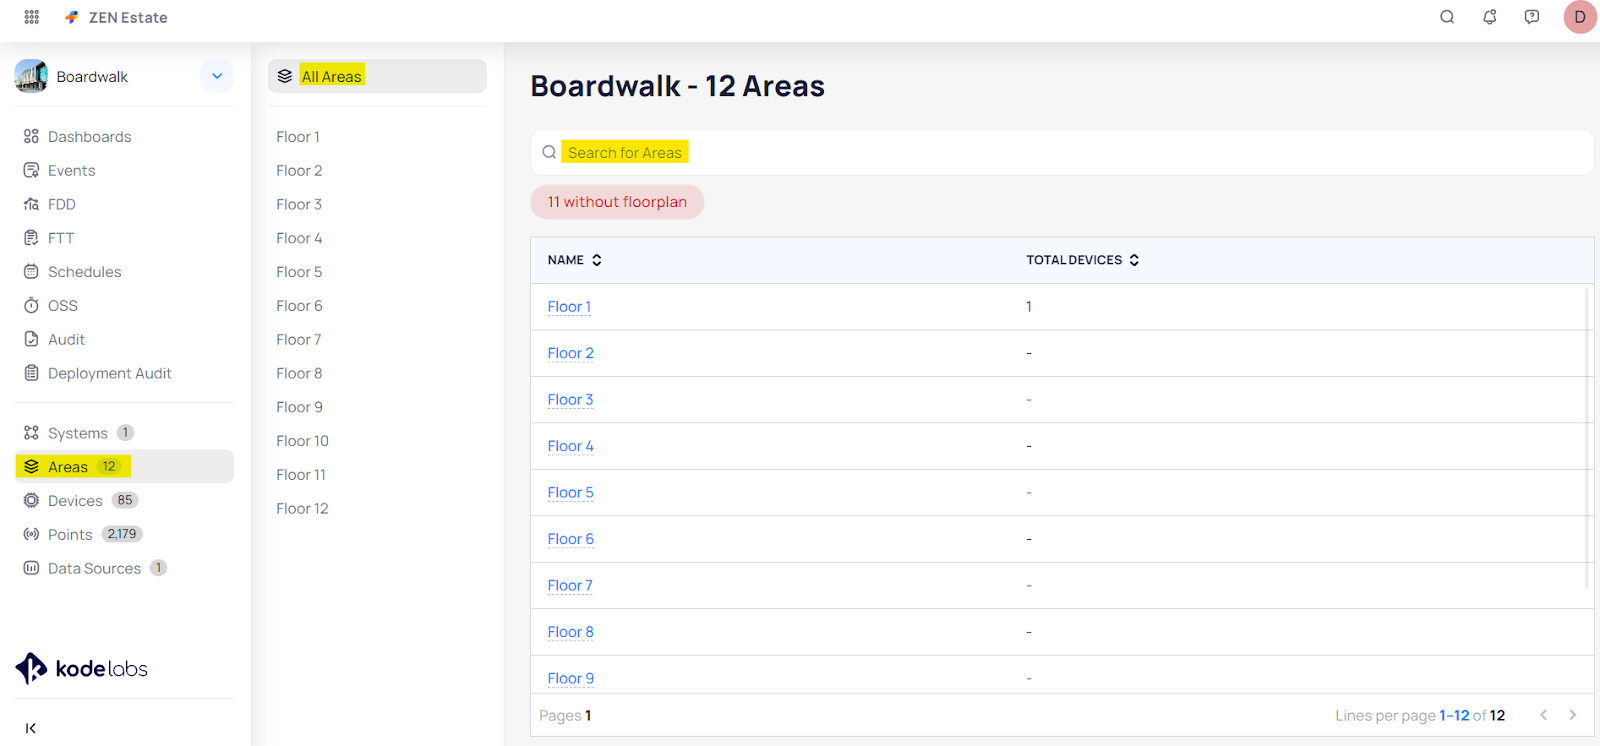
Upon selecting an area, you will be directed to its personalized Dashboard view.
You can customize the dashboard by creating widgets on a per area basis to display data such as temperature histories, occupancy data, air quality, device and system summaries, events, cameras, etc., all on the same page.
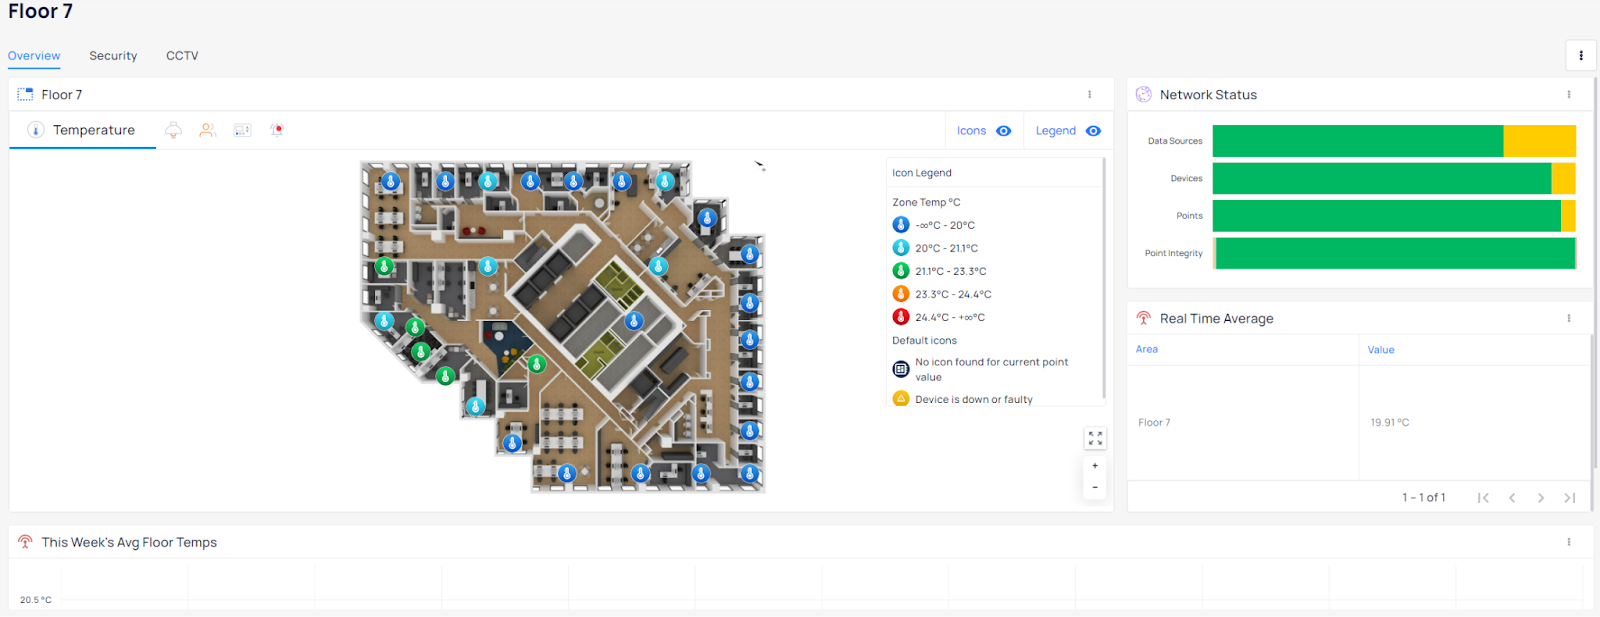
Floor Plan Widget
The Floor Plan Widget provides a graphical representation of the floor, displaying devices in a realistic layout. To add a Floor Plan Widget, follow these steps:
Click on the three dots at the top right of the Area Dashboard page.
From the dropdown menu select Add Widgets.
From the Add Widget Window select Floor Plan and then click on Add.
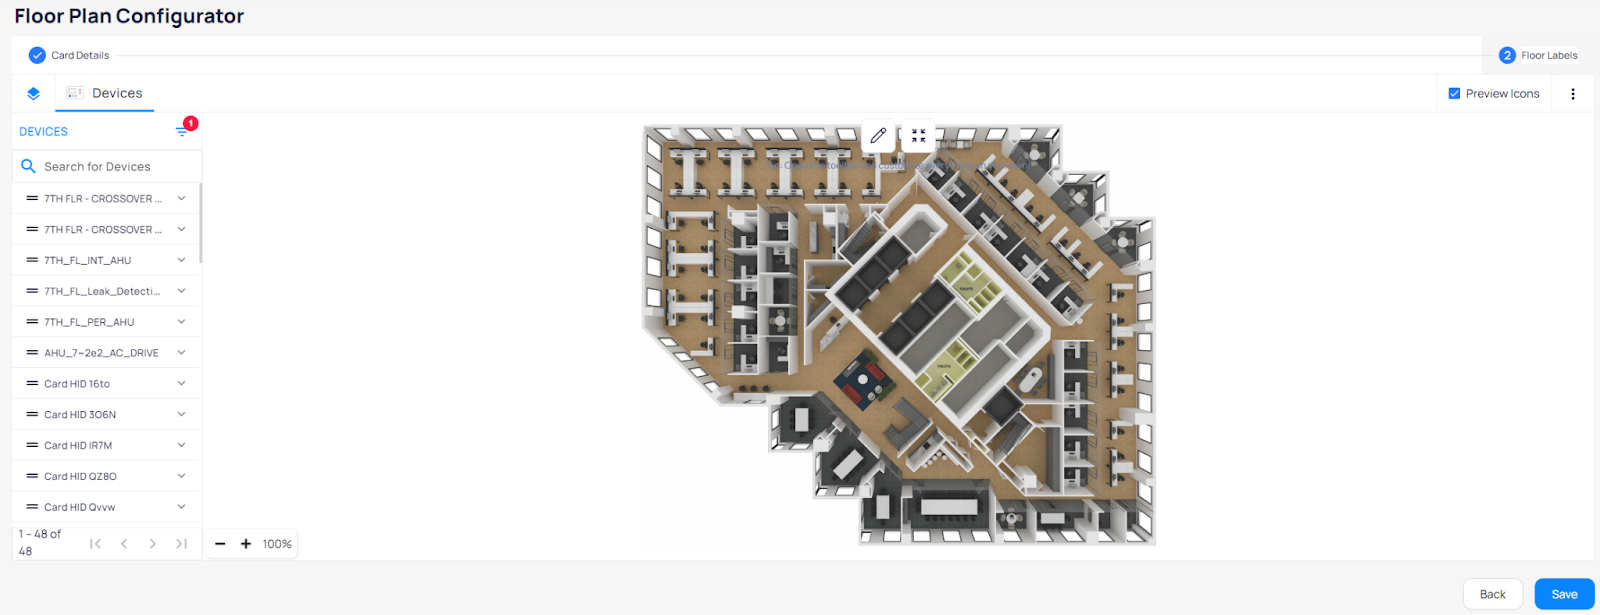
On the Floor Plan Configurator insert the widget name and select the Floor Plan file from the dropdown provided, which you can upload through:
Setting module from the portfolio left main navigation bar > Buildings > choose a building > Files.
Click on the three dots at the top right of the Files page > + Add Floor Plan > from where you can do batch uploading or single uploading.
Click Next to go to the Floor Labels section, where you can select devices which you would like to add to the file you have uploaded.
Related Articles
Floor Plans Options and Features
Once you are in the Floor Plan view you will be prompted with several options and features that you can benefit in order to enhance your experience. Depending on the type of devices in a building, on the floor plan widget, you will see tabs for each ...Placing devices into floor plans
The goal of floor plan placement is to put each of the equipment in its intended location in the building for quick and easy viewing. Follow the below steps for further instructions. Navigate to a building of your choice through the Sites feature in ...System and Floor Plan Graphic Customization
You can add texts into floor plans with different fonts, draw custom shapes using the pen tool, add images and different colors to create gorgeous graphics that you can customize with powerful features. You can enhance the design of a layout in a ...Customizing Markers and Icons
The Graphic Tool feature provides different tools which allow you to optimize and make floor plans more intensive from where you can view and spot devices’ performance with a single sight. This will give you an overall visual perspective of what is ...Navigating through Device Details
Device Details helps you to determine device performance, status, history and allows you to interact with devices in order to adjust their functioning with the aim of increasing optimum performance. There are a few ways on how you can get to device ...