Manage roles and permissions
Dynamic Roles are built into Launchpad for the purpose of controlling permissions for various modules and features on KODE OS.
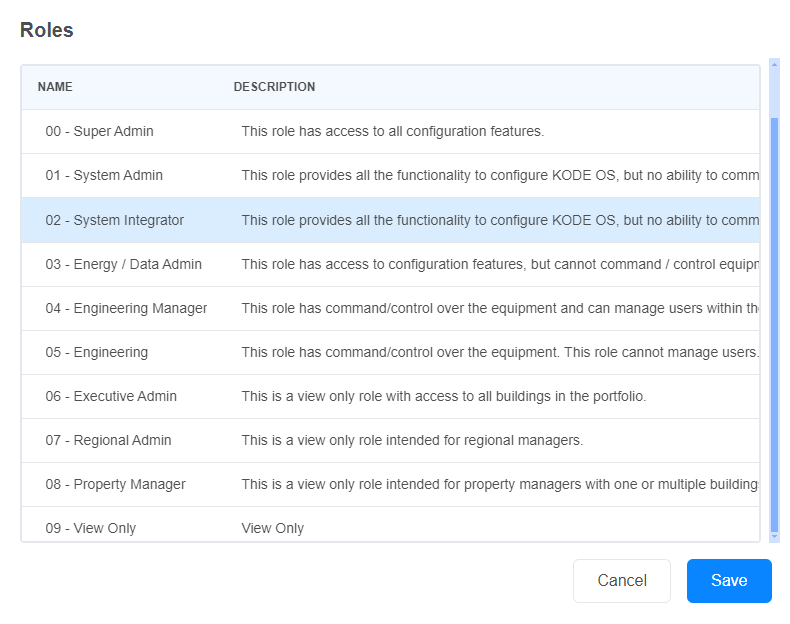
In Launchpad you will find a default set of Roles and Permissions. An Administrator can grant or revoke various permissions from the role if the defaults are not appropriate, or create a new role and assign permissions from scratch.
To modify permissions for dynamic roles go to Launchpad > navigate to the Apps module from the left main navigation bar > from the Apps page select KODE OS > go to Roles tab.
On the Roles list you will see the available roles Name, a short Description and the number of Permissions assigned for each role.

Clicking on each of the roles, further details regarding that role will be shown into your screen, while at the top right corner you can find the following options:
Edit - from where you can edit role Details and Permissions
Delete - from where you can Delete the role
 Note: You can not delete a role if there are still users assigned to the respective role.
Clicking on Edit you will be directed to the Edit Role page from where you can grant or revoke various permissions from the role. The Permissions Section is divided into 4 main modules with various submodules, outlined below:
Building BI
Dashboards
Datasources
Sharings
Templates
Buildings
General
Areas
Dashboards
Datasources
Devices
Miscellaneous
Points
Systems
Tags
Modules
Access Request
Admin
Audit
Dashboards
Data Connectors
Deployment Audit
Energy Dashboard
Events
FDDV2
Fire Dashboard
FTT
GraphicsV1
GraphicsV2
Marker Icons
Mass Write
OSS
ScheduleV2
Users
General
There are 2 types of main permission for each module and submodule:
Read Permissions - grants the ability to view the respective module or feature
Write Permissions - grants the ability to modify the respective module or feature
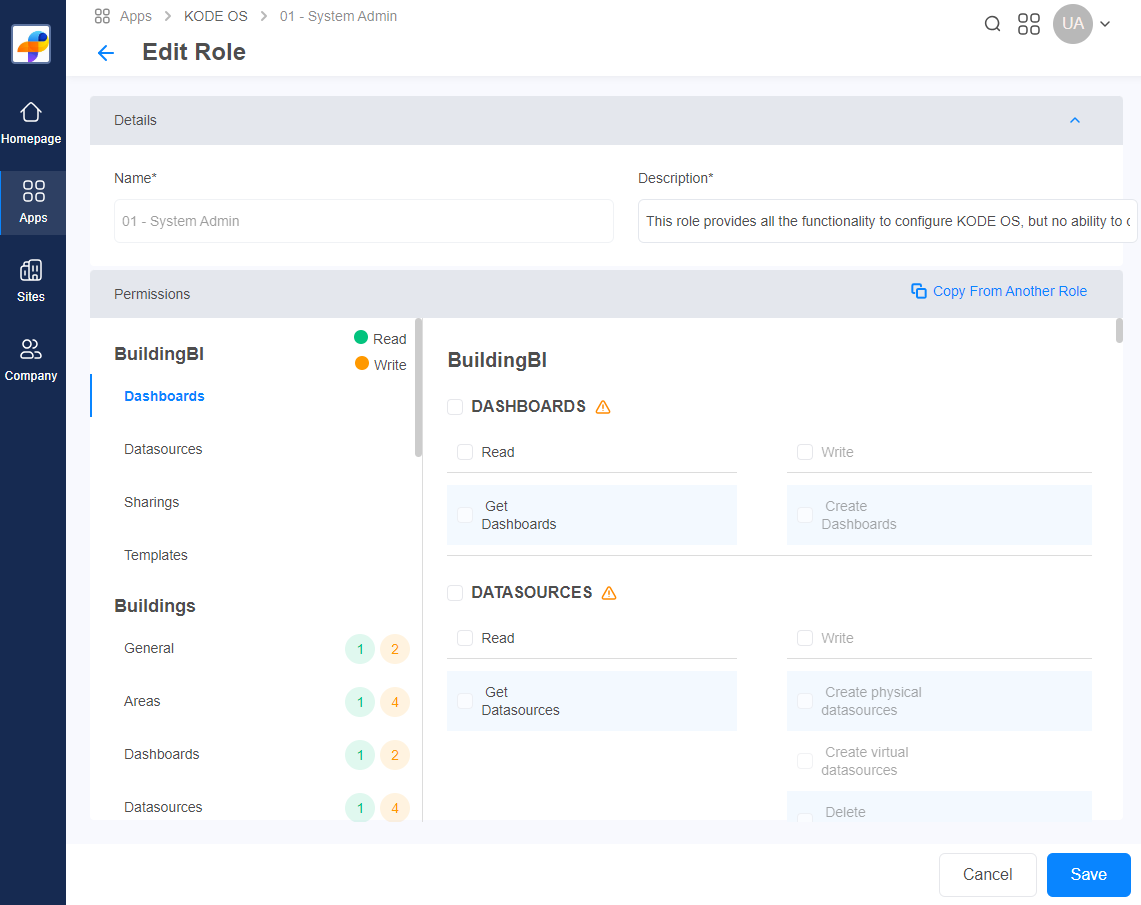
Copy From Another Role
If you want to create/edit a role based on another role but add or remove some permissions you can do so by clicking on the "Copy From Another Role" button at the top right hand corner of the Permissions section.
From the Roles page you can select a role to copy the permissions from and use them for another user that you are creating on editing.
Creating a New Role
To create a new role from scratch go to Launchpad > navigate to the Apps module from the left main navigation bar > from the Apps page select KODE OS > go to Roles tab > click on the +Add Role button at the top of the page.
On the Add Role page type in the Role Name, give the role a Description and select the permissions you want to add to the new role.
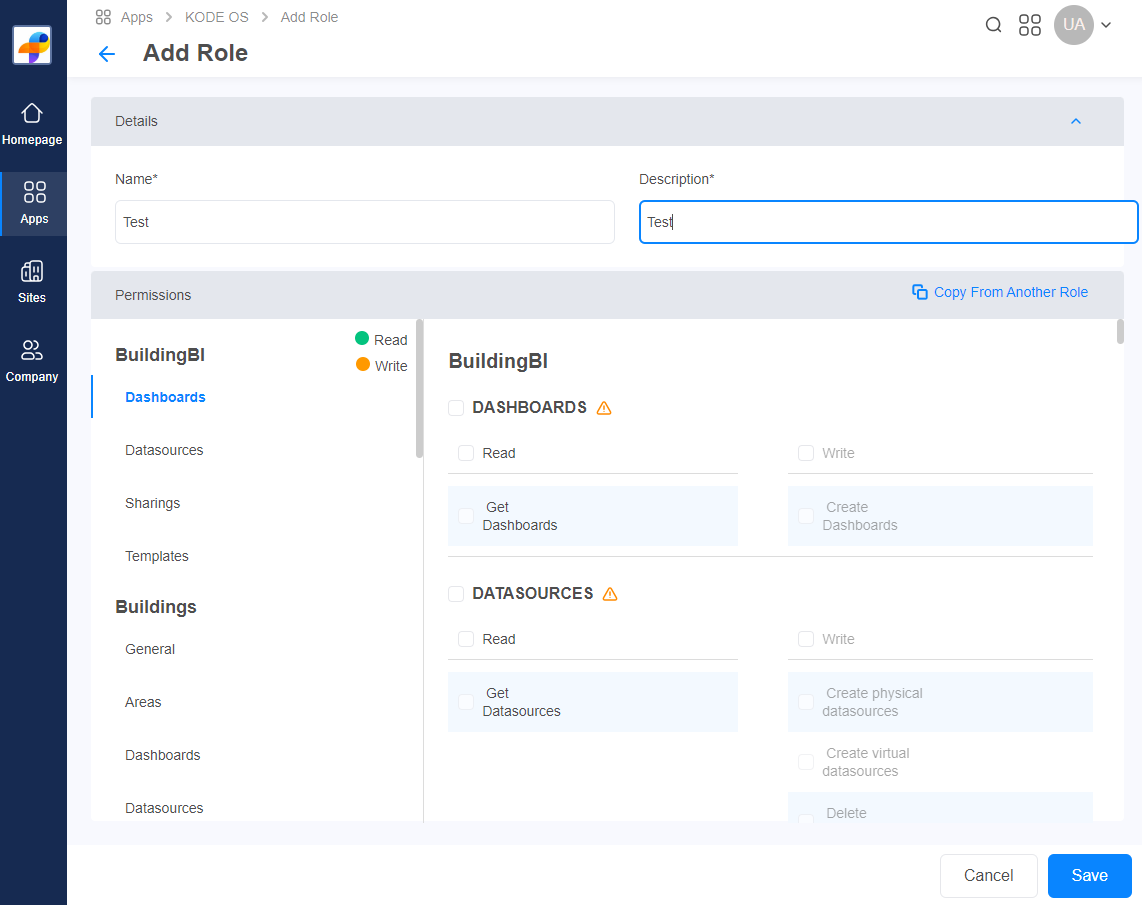
You can use the Copy From Another Permission button if you want to create a role based on another role but add or remove some specific permissions.
Click on Save and now you have successfully created a new role which you can assign users to while creating a new user or update an exiting one.

Related Articles
Map user roles
KODE Labs allows client user permissions to automatically be passed through from identity provider platforms as part of the integration. Before you add new role mappings, you must add the “roles” attributes in the “Attribute Mappings” section in your ...Configure permissions for User Management in KODE OS
KODE OS handles user management based on the conditions we set for each role in Launchpad. Follow these steps to configure who can add what user to KODE OS: Log in to Launchpad Go to Apps module and select KODE OS app Go to Roles tab > select the ...Navigate Launchpad as a user
Introduction Welcome to the KODE OS Launchpad! After reading this short user guide, you will be able to manage your users, products, and access for anything related to KODE OS. The Launchpad will enable you to ensure that all of your users can have a ...Navigate to Launchpad Homepage
In order to access Launchpad you will need to access a link that will be provided to you by KODE Labs or one of its channel partners. Once you login to Launchpad you will be directed to the Homepage section from the left main navigation bar. Homepage ...Product enablement for buildings
Introducing Product Enablement by Site This feature empowers Channel Partners with control, flexibility, and visibility over product access. With this feature, managing product deployments becomes more efficient and scalable. Instead of applying ...