Workflows Page
KODE gives you a pre-configured library of workflows that you can use to configure your own systems more quickly and easily and eliminates the need to create new routines or workflows from scratch.
To meet your use cases, the Workflows page allows you to view and design algorithms or logical flows that can be applied to devices of one or more buildings in the FTT page.
To go to the FTT Workflows:
Go to KODE OS and select a site.
Choose FTT from the main left sidebar.
Click on the three dots at the top right hand corner of the screen.
From the drop down menu select Workflows.
On the Workflow Page you will see the list of all created workflows and their Name, Description, Device Types and Device References.
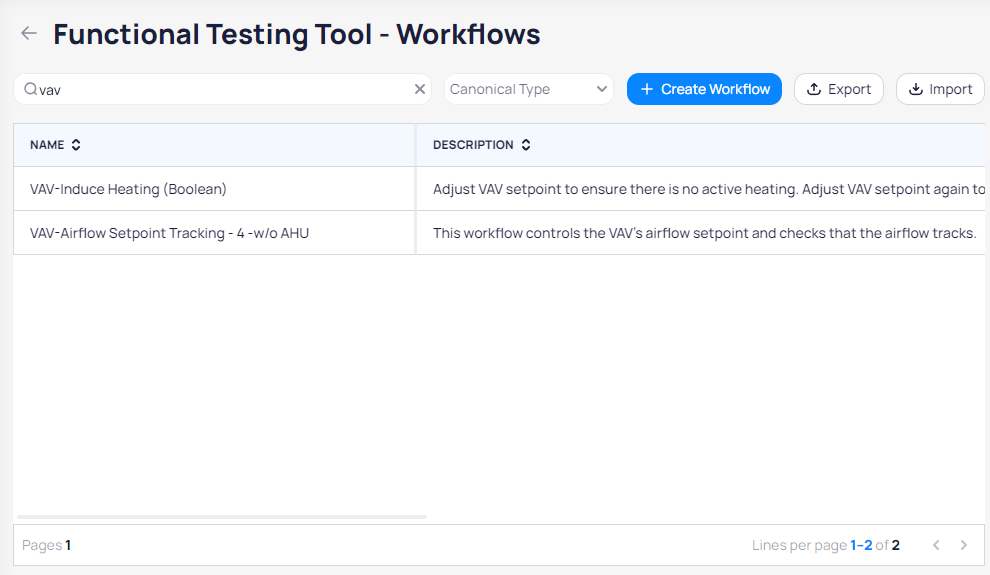
To create a new Workflow Click on the "+ Create Workflow" button.
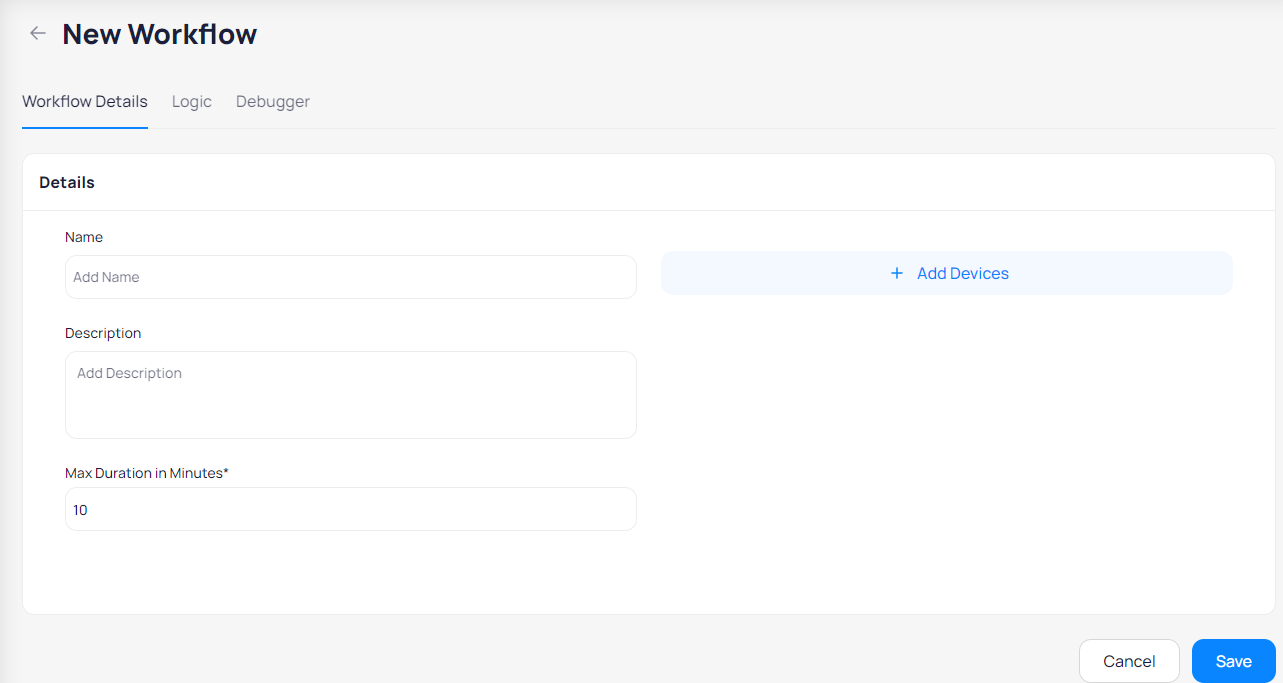
In the "Workflow Details" page fill in the required information, Workflow name, put a description, select Canonical Types and Entities of Base Devices and Reference Devices, and Set the Max Duration of the test in Minutes.
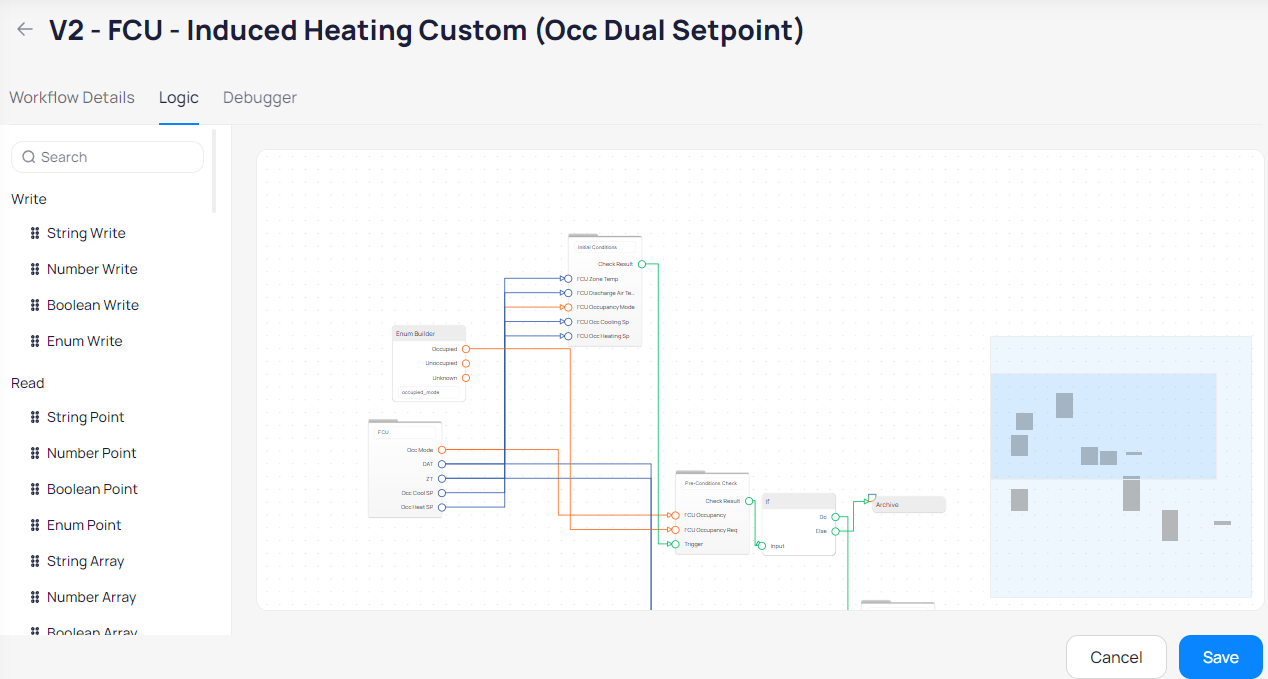
Go to the "Logic" tab, and from the left section drag and drop the fields to create the logical path of the testing.
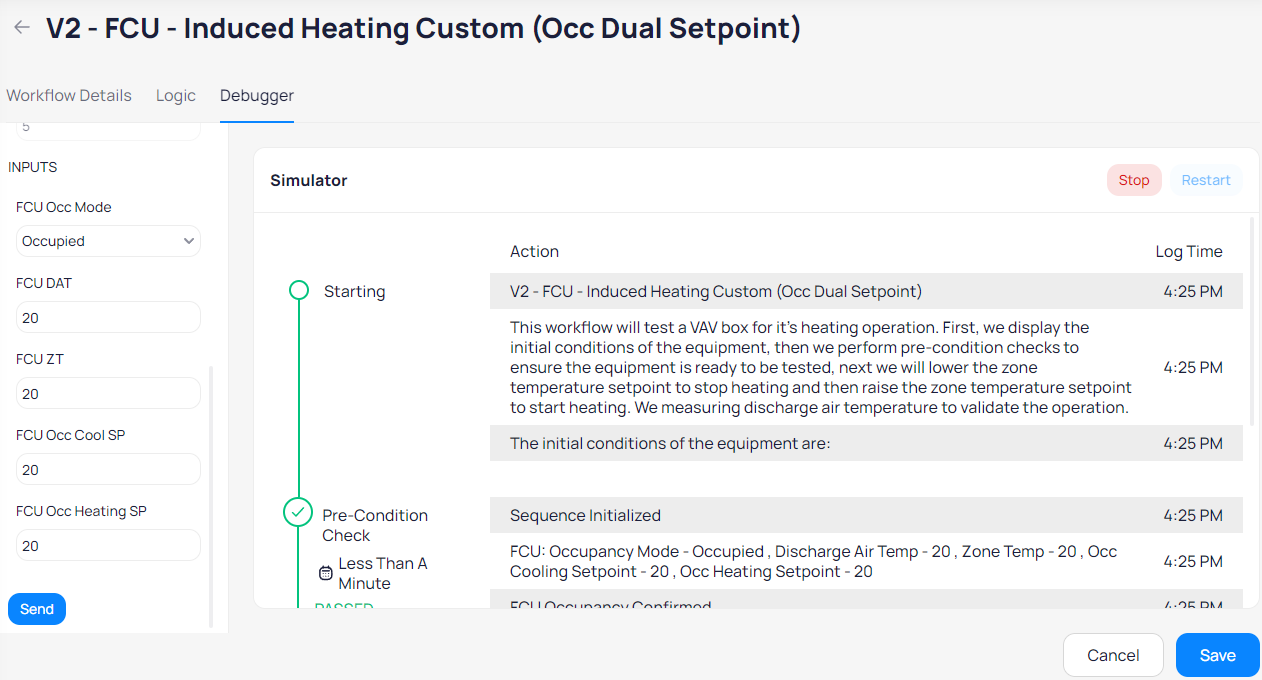
Go to the "Debugger" tab to test your created sequences, end-user-facing parameter names and help text.
How it works
After building out the logic, you will move on to the Debugger tab where you will see the parameters and inputs you defined on the left side bar, and the container for the simulator output on the main part of the screen.
Verify Parameters (PARAMS)
Under this section you will see the parameters defined in the sequence that are adjustable when configuring the routine or workflow on a project. You are also able to adjust them here to help aid in tuning these parameters while testing.
Start the Simulator
In the center of the screen, click the “Start Simulation” button.
How the Simulator Works
Once the button is clicked, the engine will go through the workflow as it would on a device, following it step by step and adhering to the parameters defined on the left, listening for input values.

Send Input Values
With the simulator running, update the INPUT values under the parameters and when satisfied, click Send. These values will be provided in the sequence as data input for their respective read blocks.

Verify expected response from the simulator
If the response is not as expected, return to the logic builder to troubleshoot the cause.
Saving the Workflow
After you set up the workflow click ‘Save’ and your workflow will appear on the Workflows list.
Clicking on the three dots at the end of each Workflow row from the list view, you will be able to Edit, Duplicate and Delete a Workflow.

Related Articles
Functional Testing Tool Creators Guide
Introduction This guide serves as an end to end walkthrough for users looking to create their own Functional Testing Workflows inside of KODE OS. We will introduce the concept of functional testing, showcase goals and examples, provide a scalable ...FTT PROJECTS USER GUIDE
Hello there ? If you’re reading this, then you’re well on your way to functionally testing your building. To get started, enter the main FTT page from the left sidebar on KODE OS. In the 3 dots, you will see projects. FTT Projects are a new concept ...FTT - Functional Testing Tool
Introduction The Functional Testing Tool allows you to use the Workflows Engine to define procedures and steps for testing any Mechanical Device and running Digital Commissioning. Depending on your needs, these workflows can be scheduled to run ...Workflow Logic Blocks
Write Blocks Write Blocks are how you can write (override) a point's value. A write action must be triggered by another block. Read Blocks Read blocks are how you bring in point data into your FDD Routine or FTT Workflow. Field To assign a field to ...FTT User Manual
Understanding Functional Testing Traditionally, functional testing is a process that occurs during the commissioning phase of a building new construction or retrofit. When a building is commissioned, every piece of equipment must be inspected and ...