Navigating to the Sites Menu
The Sites Menu is where you can overview details on a property basis. It is here that you will
be able to view and interact with:
Location & Address of the Property
Floors and Areas within the building
Team members assigned to that site
Systems associated with the site
Device Profiles of the site
Gateways
Devices
Integration Architecture
List of attachments of the site
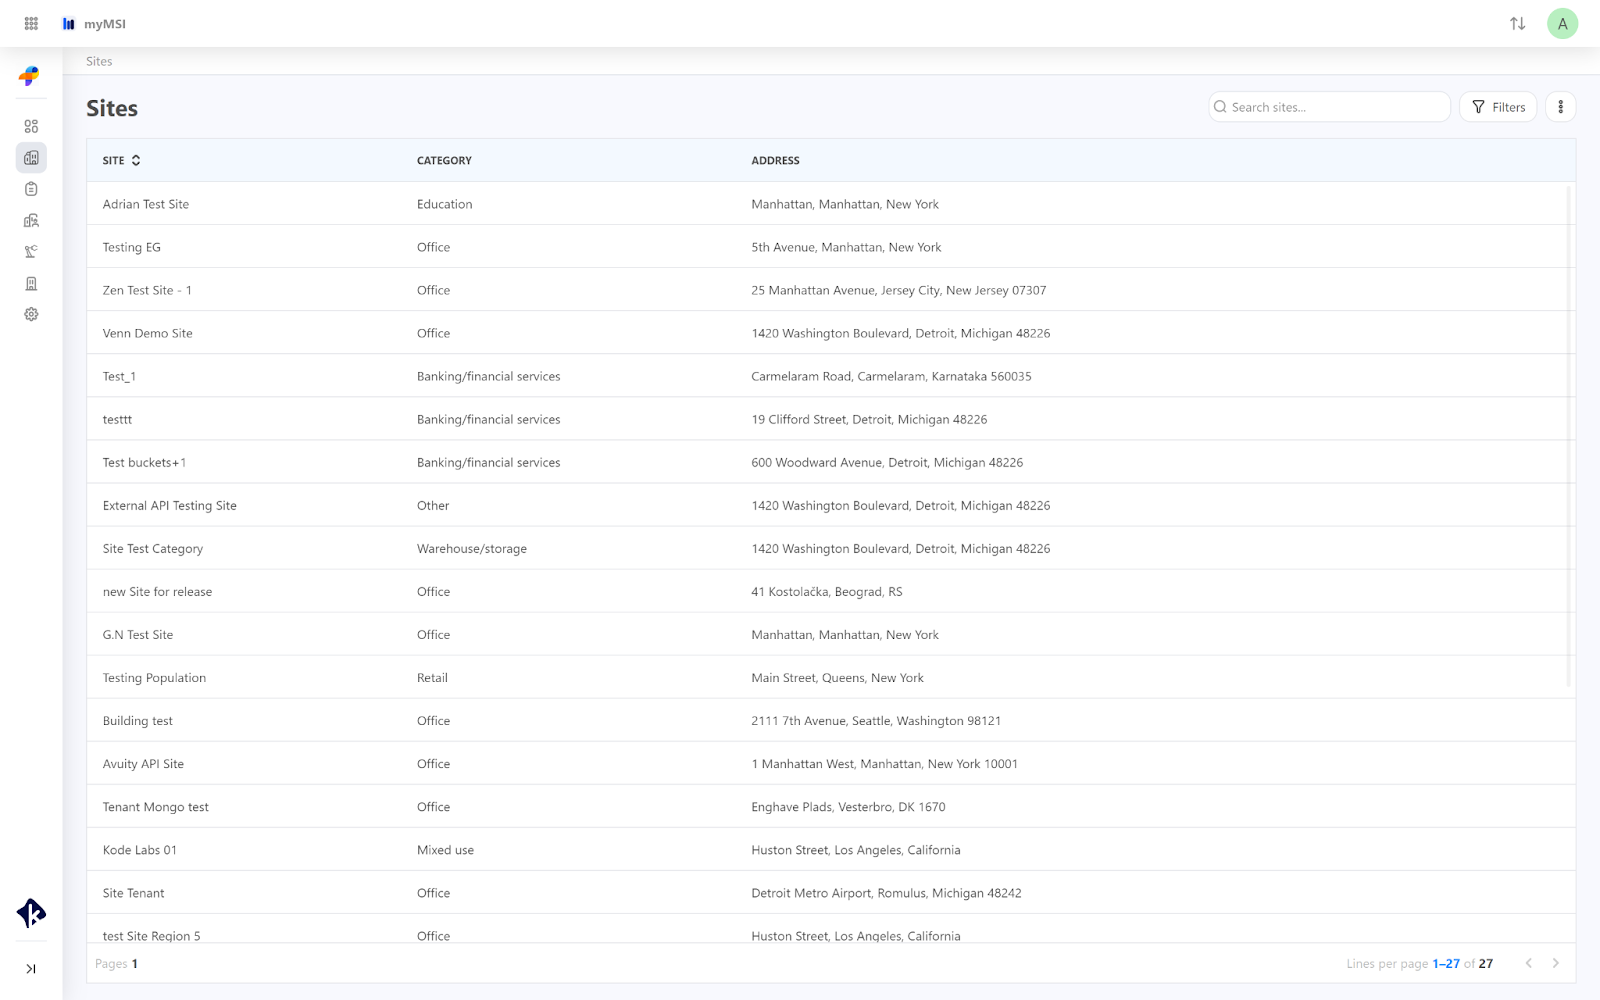
To be able to see your sites and their details on myMSI and interact with site project details go to the Sites Section on the main left navigation bar.
The first view will show you the list of all existing Sites, their Category, and Addresses. From there, you can search for a site and filter by State, City, or Category. You can also check the Show archived Sites box to include archived sites in the list view.

Details
 Note: Details are reflected from Launchpad app and cannot be edited in myMSI
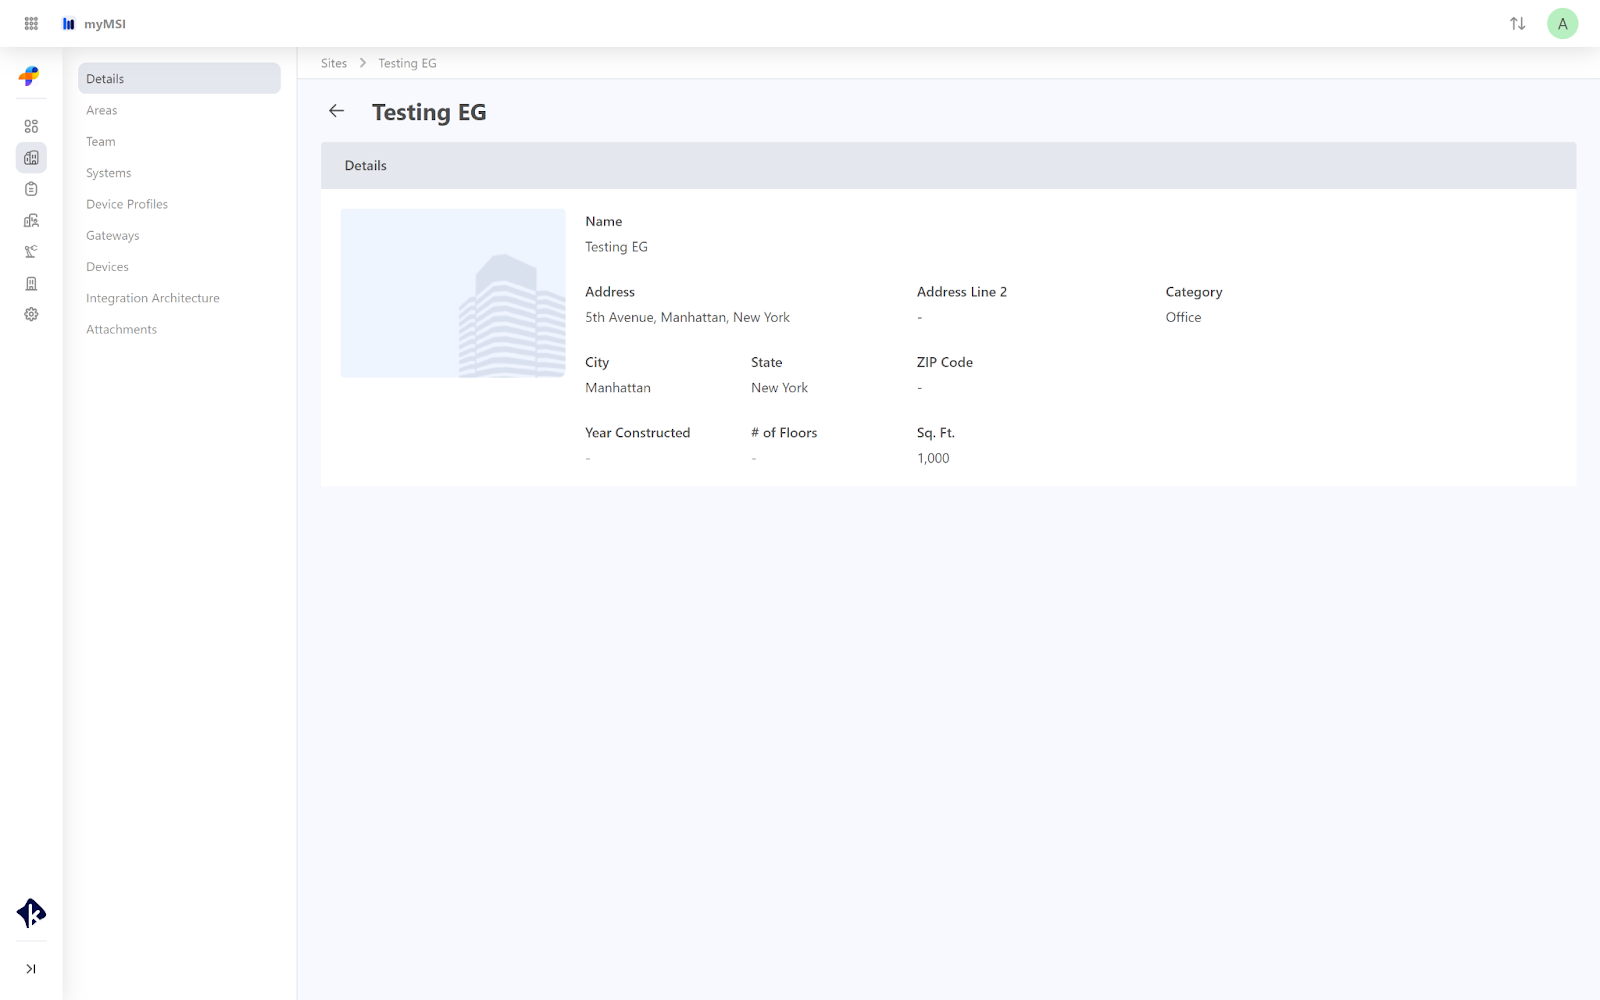
Areas
In the Areas section, you will be able to see all existing areas, edit the area's name, delete them, as well as add a new area by clicking the Add Area button at the top right corner of your screen.

Add New Area
In the Areas tab click the +Add Area button.

Choose the method you want to add Area, Single method, or Multiple method.
- Single method lets you add one area at a time. At the Name tab write down the area name (e.g. Floor 1) and then click Save.
- Multiple method lets you add multiple areas at a time. At the Prefix field write down the name (e.g. Floor), at From and To fields add the number of floors (e.g. 1 - 10).
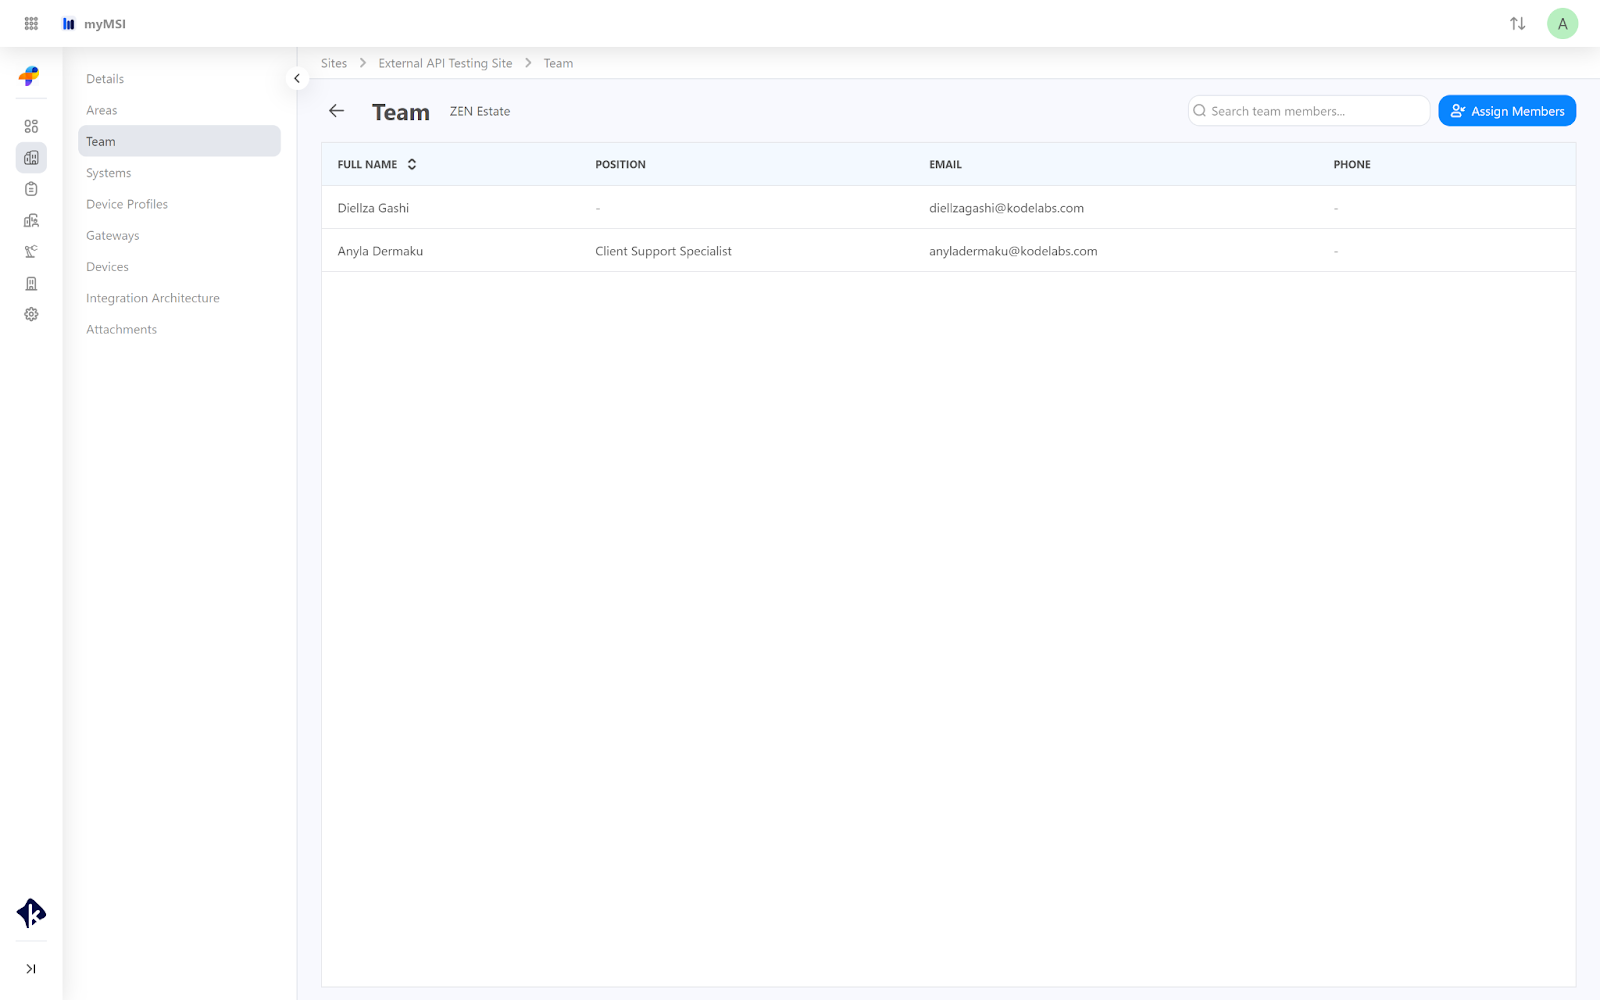
Team
In the Team section, you will see the list of all users and you can assign new members by Clicking on +Assign Member on the top right corner, choosing the user(s) from the list, and clicking on the "Save" button to save the user.

Systems
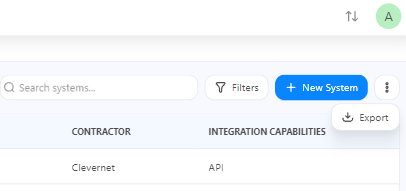
The Systems section displays a list of all System names, types, manufacturers, models, installation dates, contractors, and integration capabilities for the site.
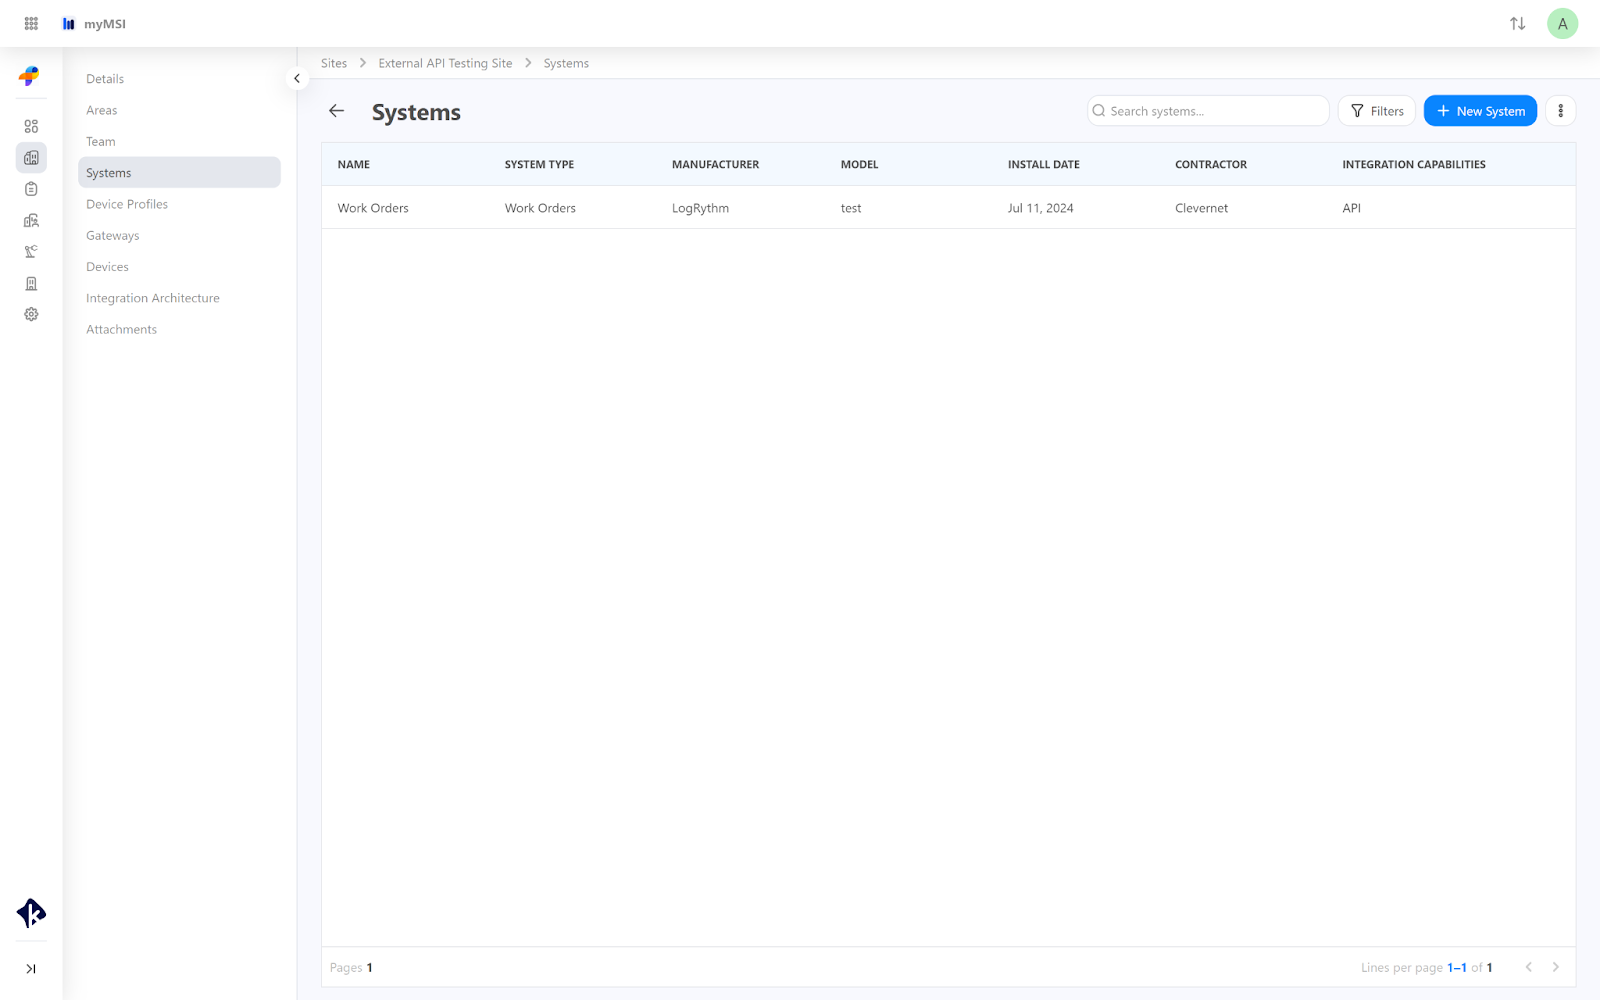
To add a new System, click the +New System button at the top right of your screen. Additionally, you can filter the listed systems using the Filter button located next to the +New System button.

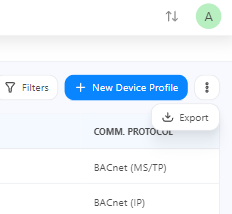
You also have the option to export all the system details by clicking on the three dots at the top right.
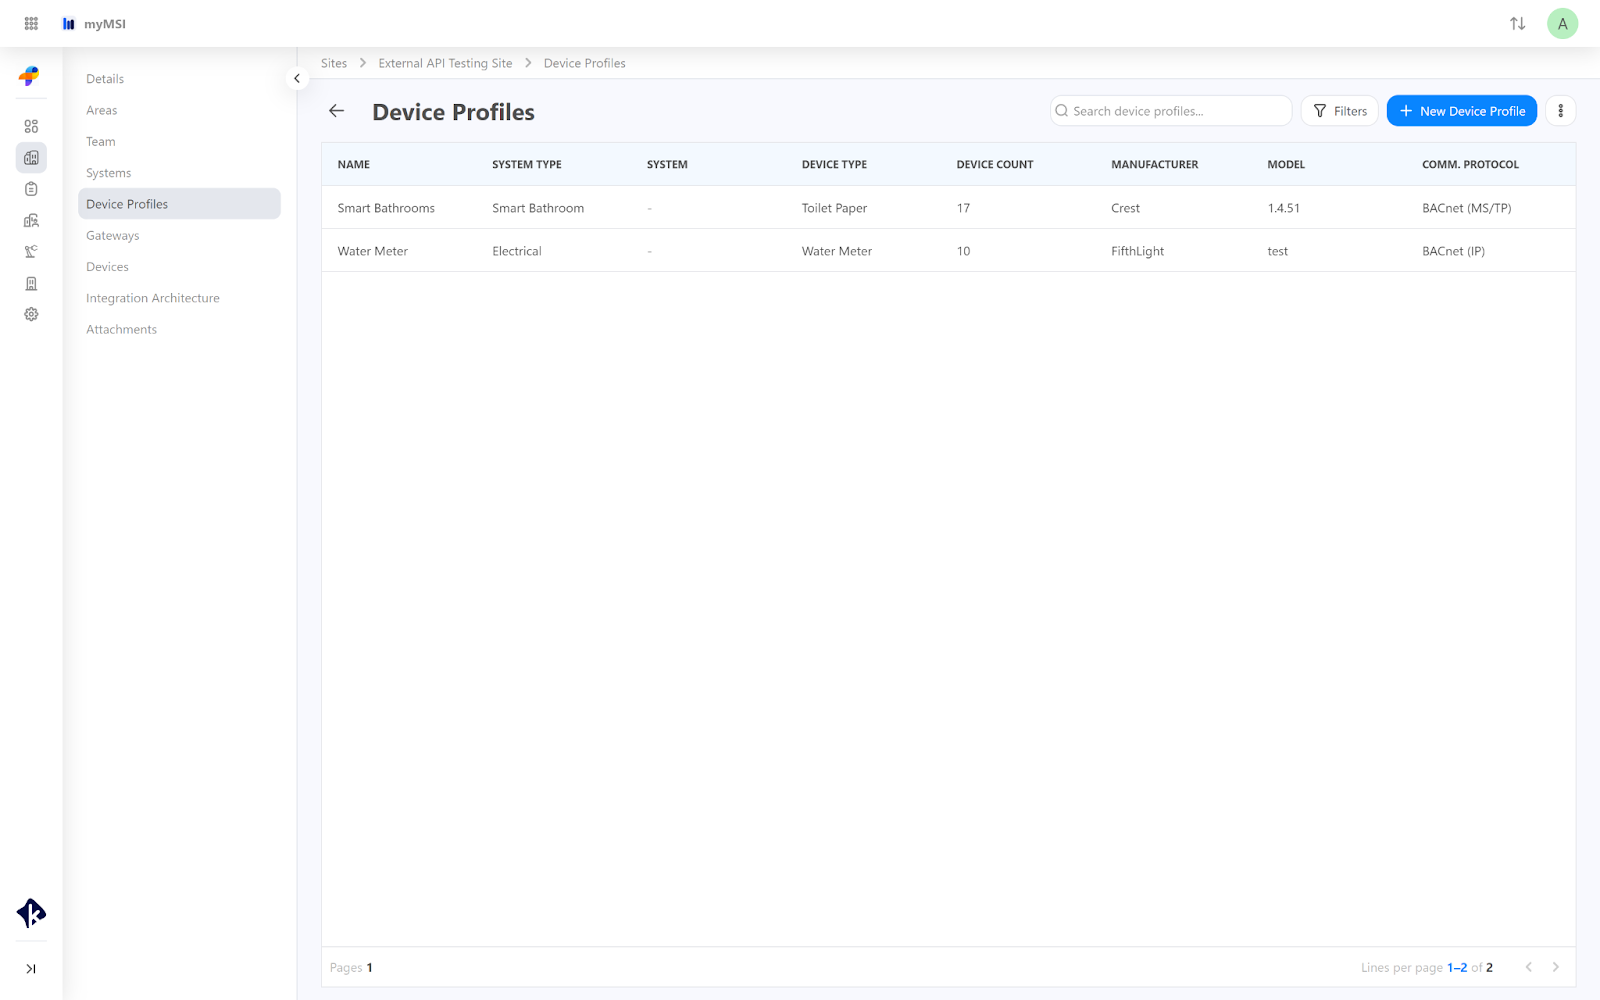
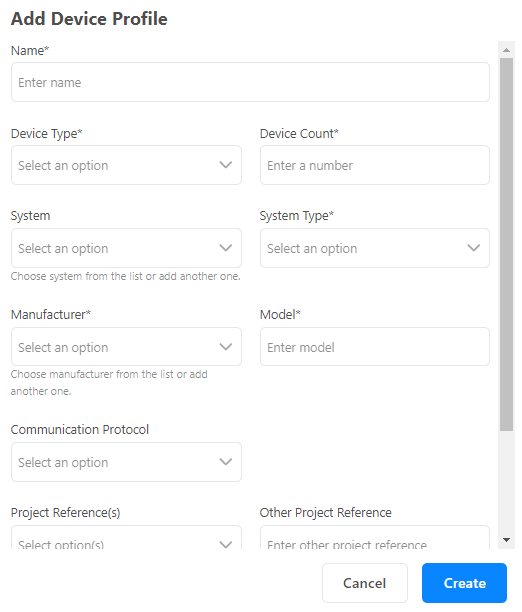
Device Profiles
Similar to the system page, the Device Profiles section allows you to filter the listed devices using the filter button next to the "New Device Profile" button.
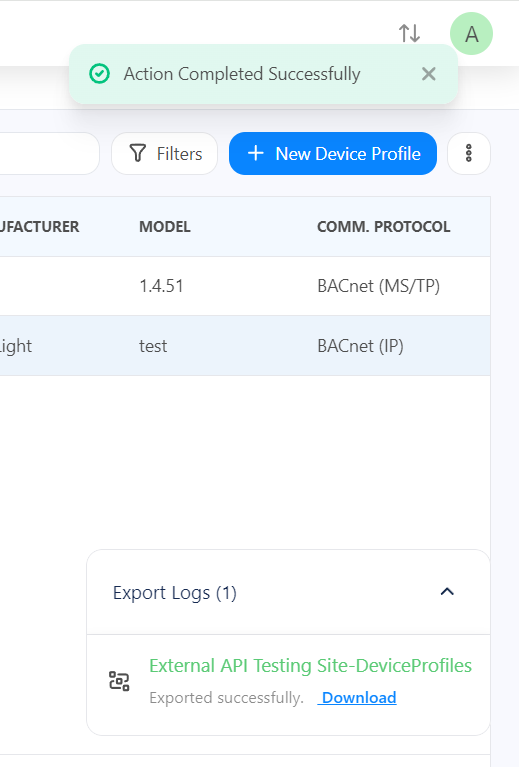
A popup will appear at the bottom right of your screen, informing you that your list has been exported successfully. Click Download, and the list of your Devices Profiles will be saved to your default download location.
To add a new device profile, click the "New Device Profile" button, fill in the required fields, and then click "Create."
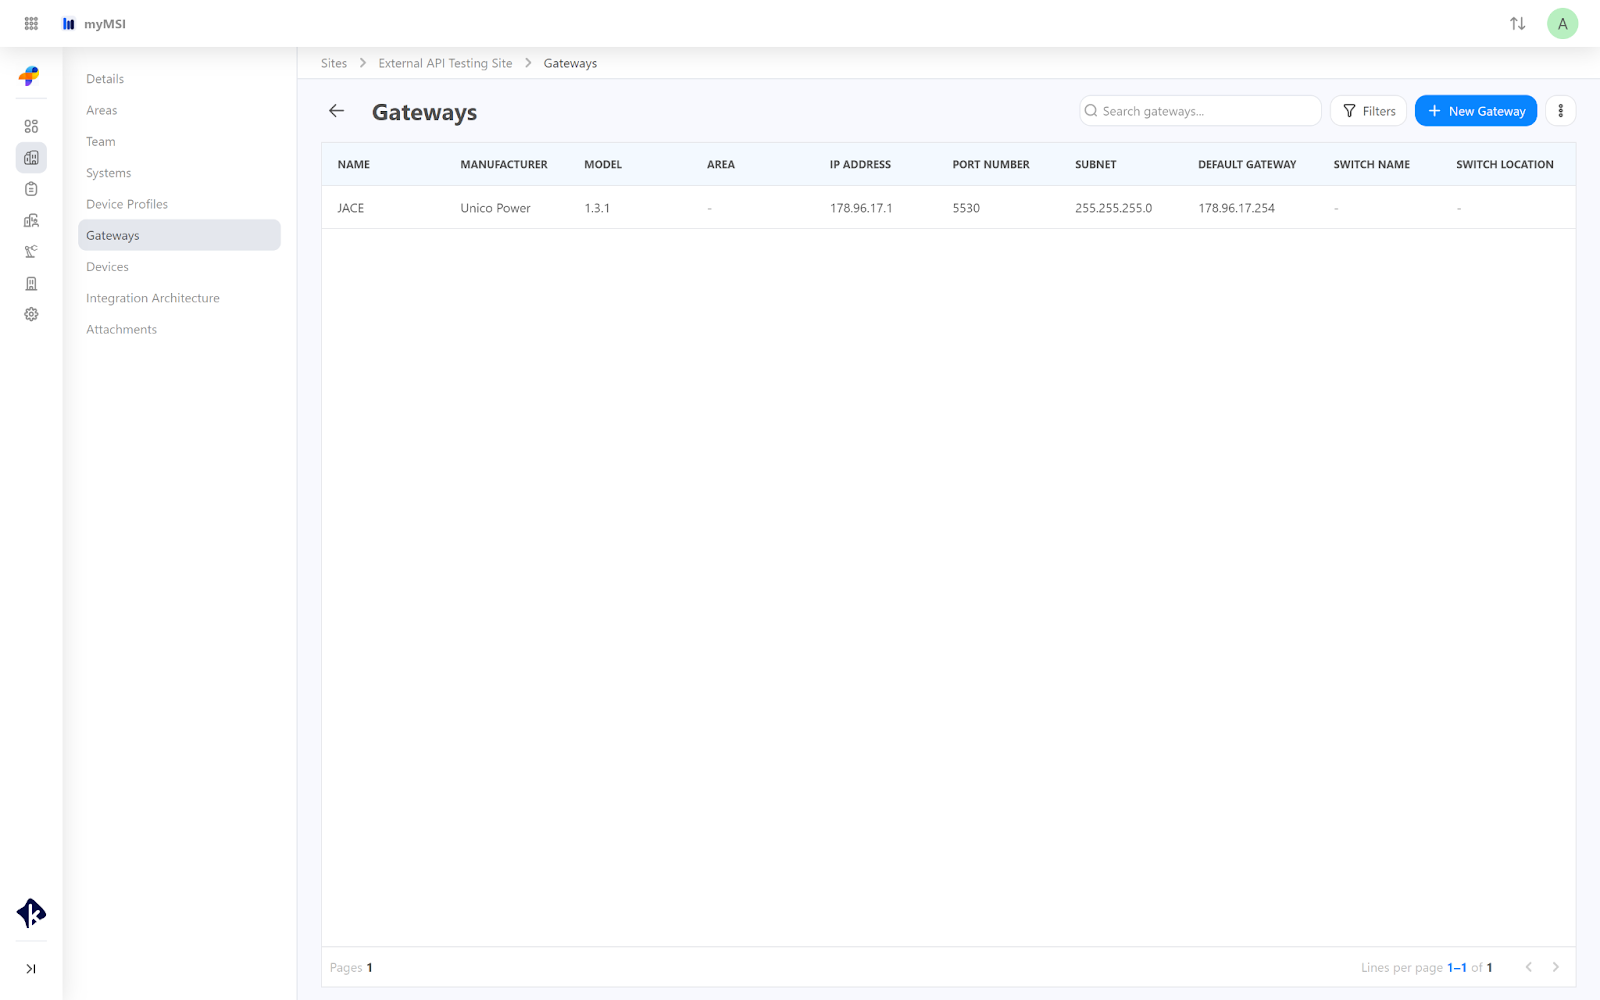
Gateways
You will see all gateways associated with the site in the Gateway section. If different gateways are added to a project, all of them will show up on this page with all the network information. Also, the Gateway section allows you to filter the listed gateways using the filter button next to the "New Gateway" button.
Devices
In the Devices section, you will see the list of all devices installed on the site from completed projects and their details.
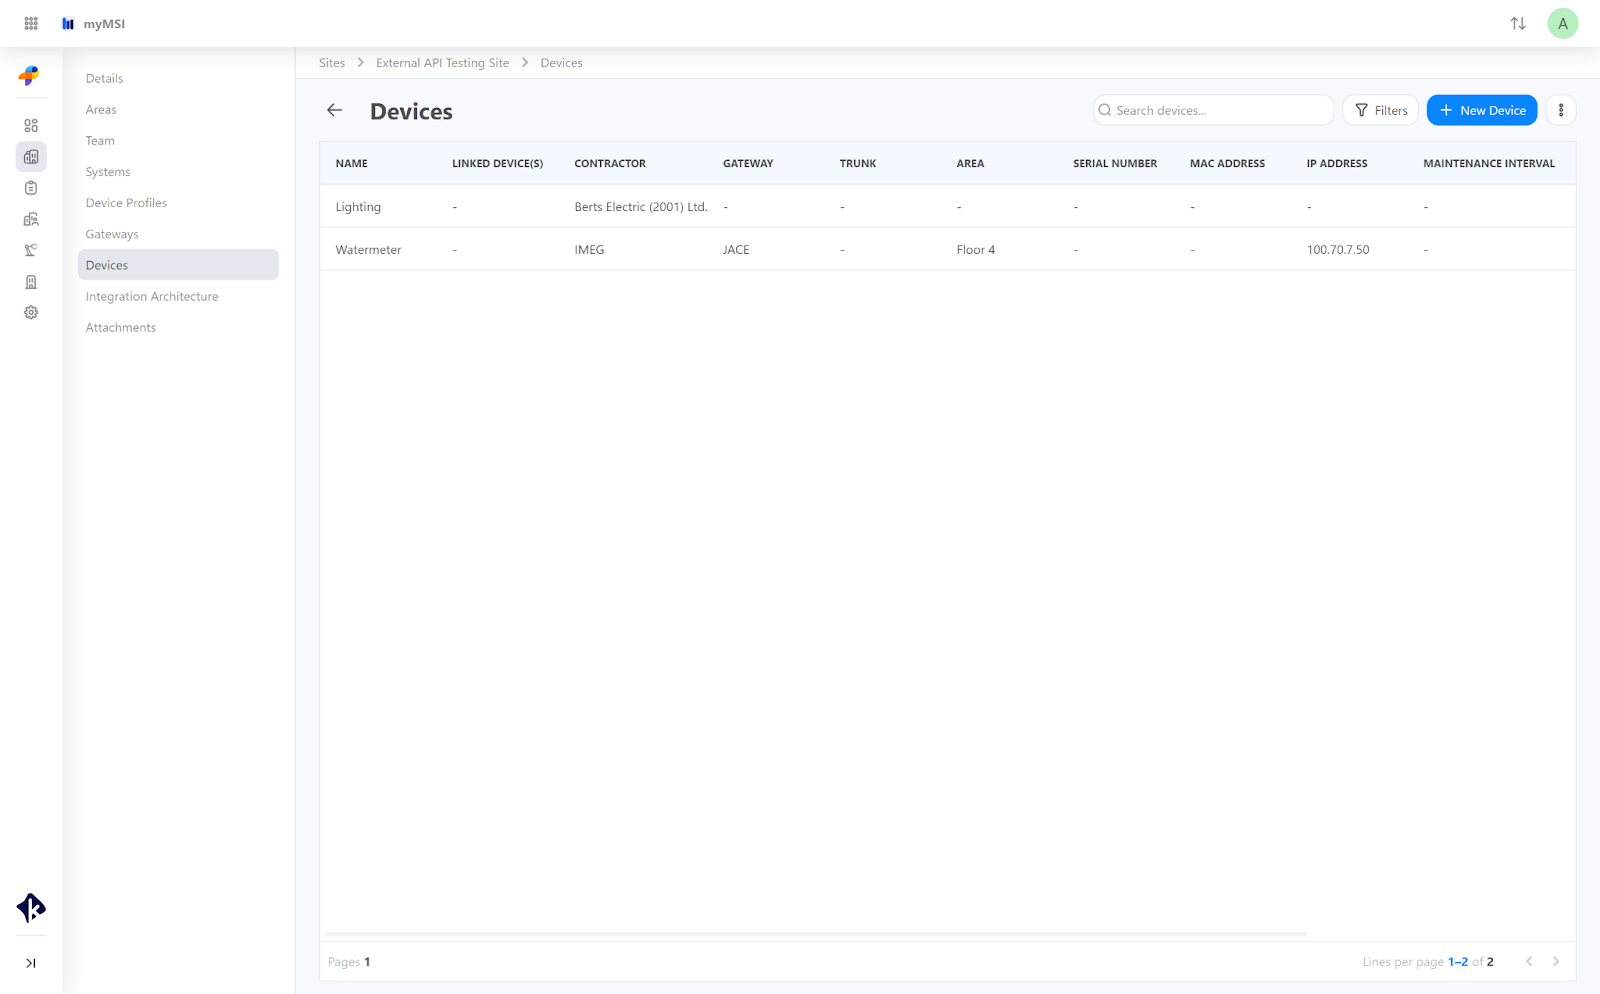
Same as the Device Profile page mentioned earlier, you can filter, add new devices, and export them using the same steps.
Integration Architecture
In the Integration Architecture, you can visualize the gateways, systems, and device profiles that are added to the specific site you are currently viewing.
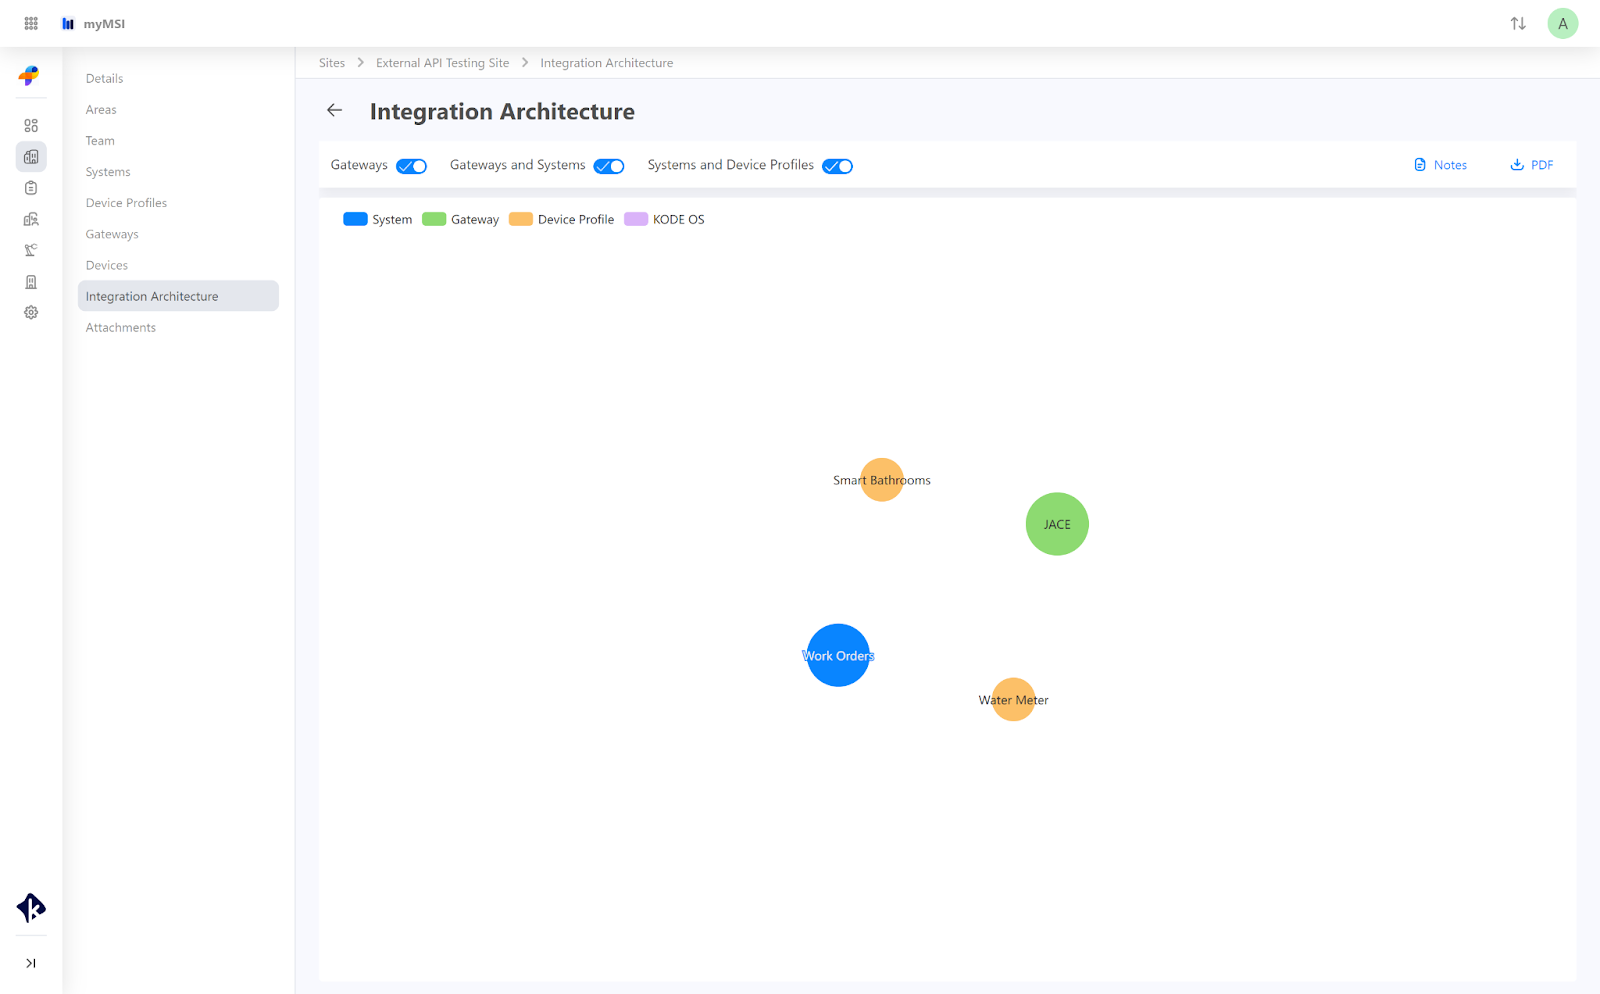
Additionally, on the right side, you can download the entire Integration Architecture as a PDF. Simply click on it, and the PDF will be downloaded to your computer. If you want to leave any notes, click on the "Notes" option located at the top right, next to the PDF download.
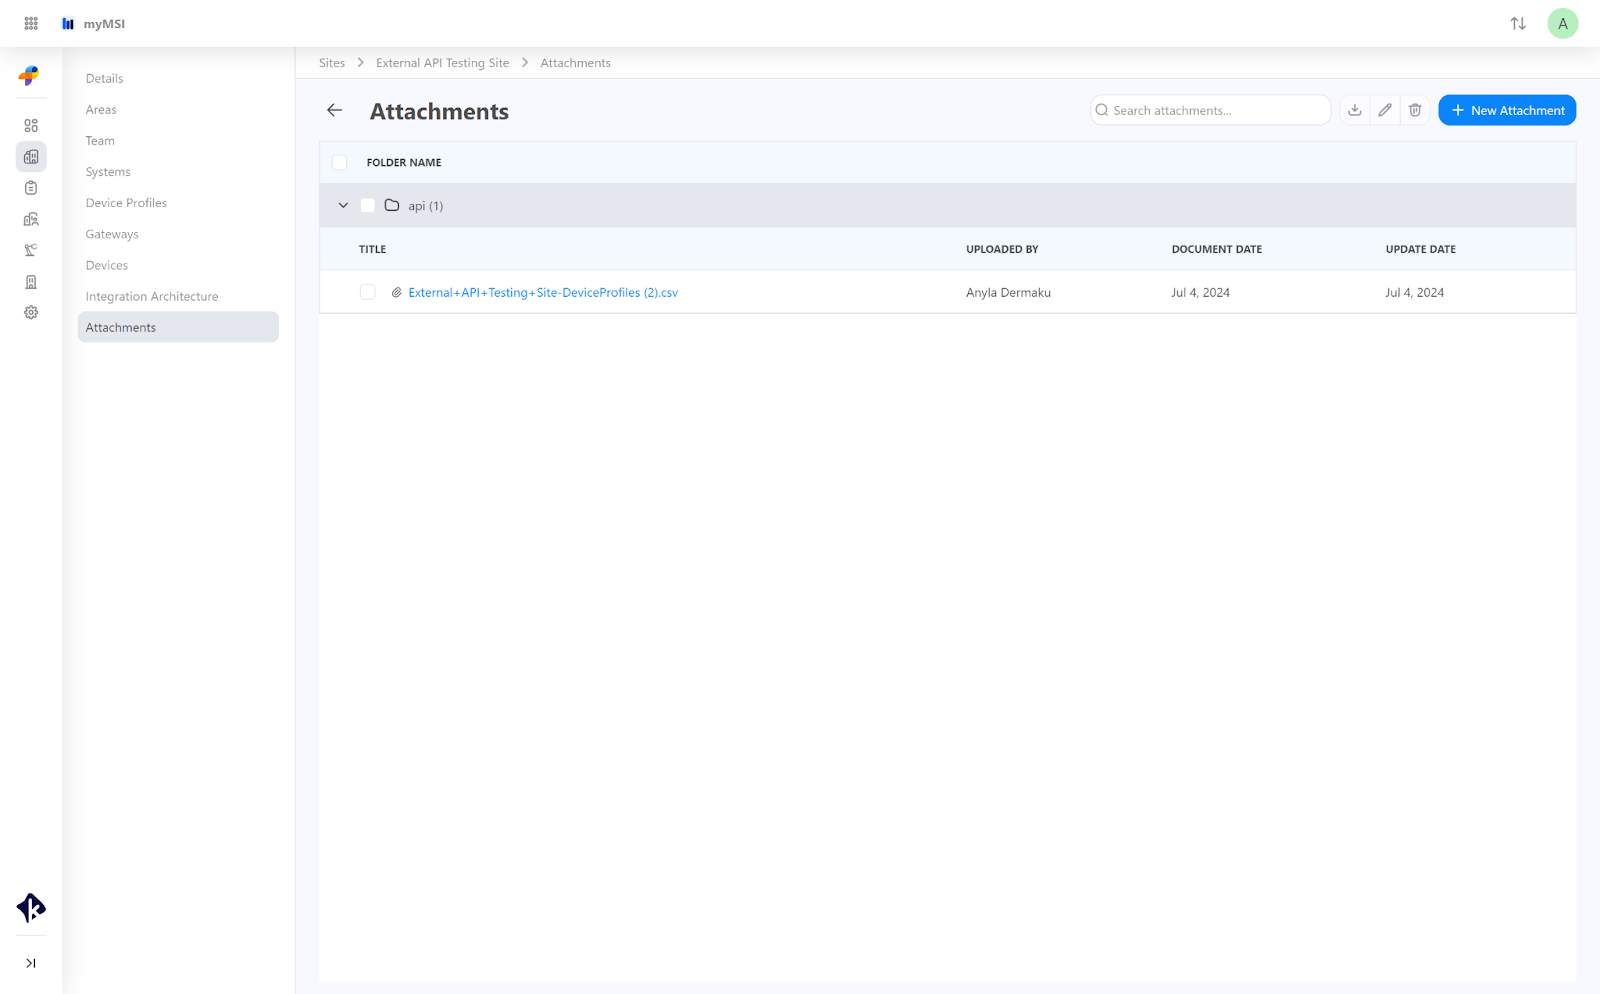
Attachments
On the Attachments layer you will access all imported files together with their attachments.
Add New Attachments
Click New Attachment at the top right-hand corner of your screen, to add or drop a new file/s from your computer.
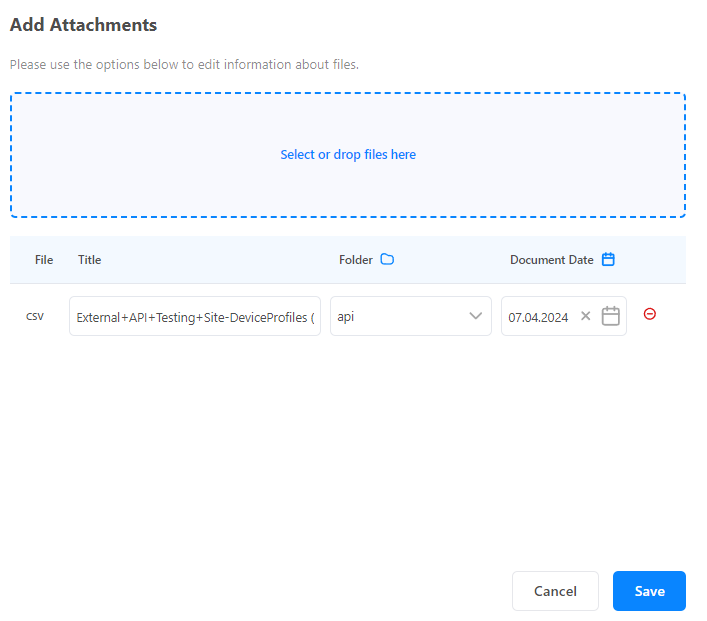
You can upload or drop files by clicking on the Select or drop files here section.
Add one or multiple files at once > Choose Folders Name( click on an actual folder or create a new one) > Pick up a Date > Click Save and the file/s will be uploaded.
To unselect the file from this view simply click on the Minus Icon in red.
Edit, Delete and Download Attachments
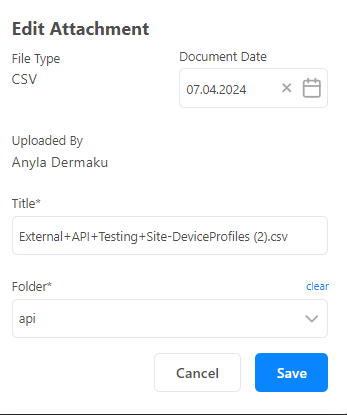
To edit, delete, or download the existing attachment, click on the three dots at the end of the row of the respective attachment.
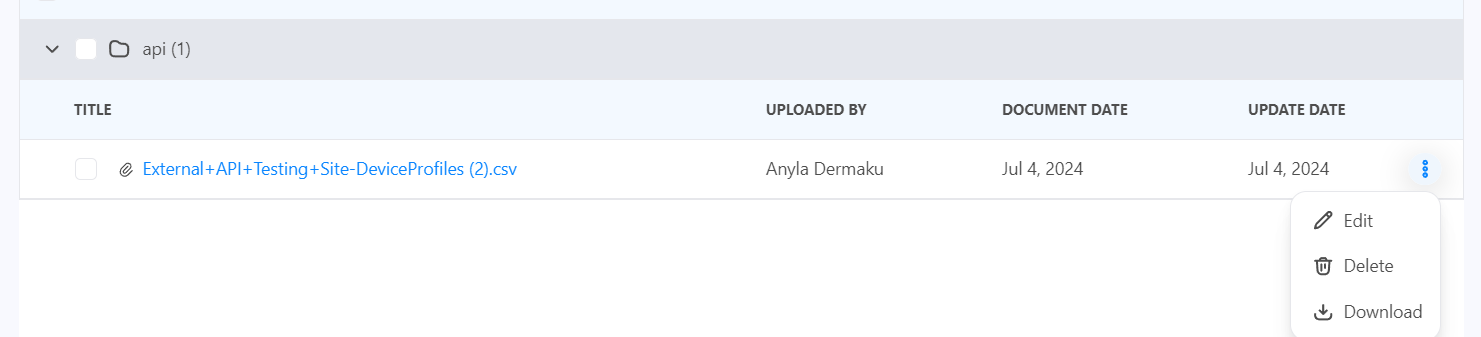
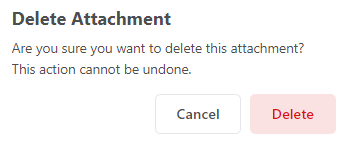
To delete an existing attachment Click Delete > in the box that opens up, and choose the Yes, Delete button.
If you want to download the file, simply click Download and the file will be saved on your computer.
Related Articles
Navigating to the Company Menu
Within the Company menu, you can access comprehensive information about a company, including its details, the associated user list, and any attached documents relevant to the company. Details The Details section provides key information such as the ...Navigating to myMSI dashboard
The initial section presented in the myMSI environment is the "Dashboard”. Upon entering, you will have access to the project information. Project Status A circular graphic provides insights into the current standing of the project, describing areas ...Navigating through a myMSI Project
The Projects feature of myMSI allows you to create, manage, monitor, and control your projects. This will include project details, project team, planning, scope, new integrations, contractors, and additional attachments. Accessing Projects To access ...Navigating to Admin Panel
The goal of the Admin Panel is to show your Project details. From here you can see System and Device Types for Subcontractors, Communication Protocols, and you can add Task Templates, and Custom Fields. Click on the profile icon to navigate to the ...Exploring myMSI
Managing projects and organizational tasks requires a structured approach, and myMSI offers a design to simplify complex workflows. This article dives into each component of the myMSI, highlighting their functionalities and benefits for effective ...