Planning Page
Planning Page
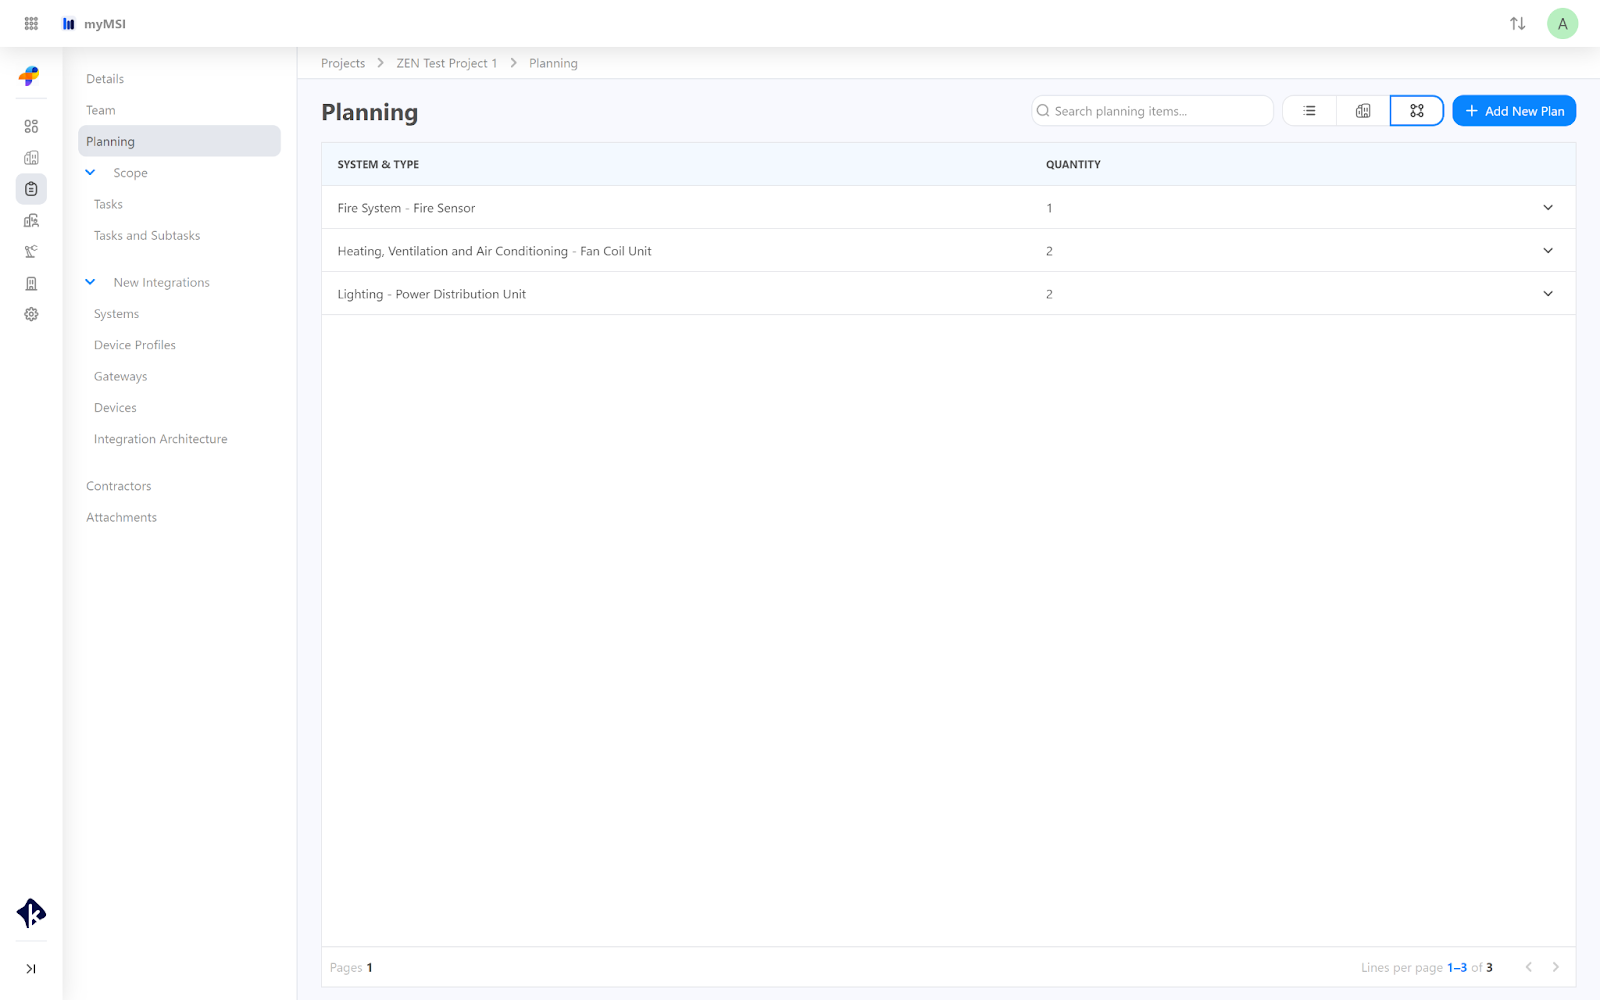
The "Planning" section is where initial project planning is performed. Here you will have the ability to view and modify the types of equipment that are planned for integration on each floor.
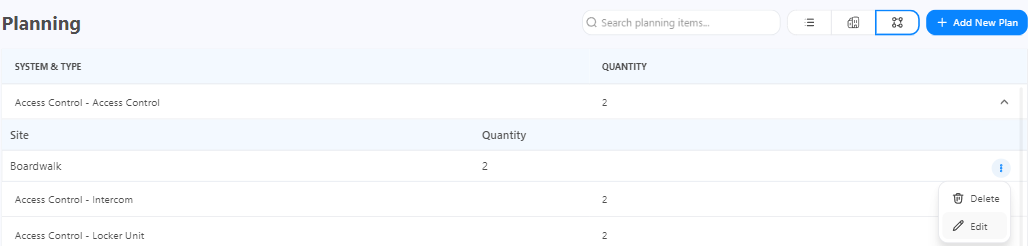
Adding a New Plan to Projects
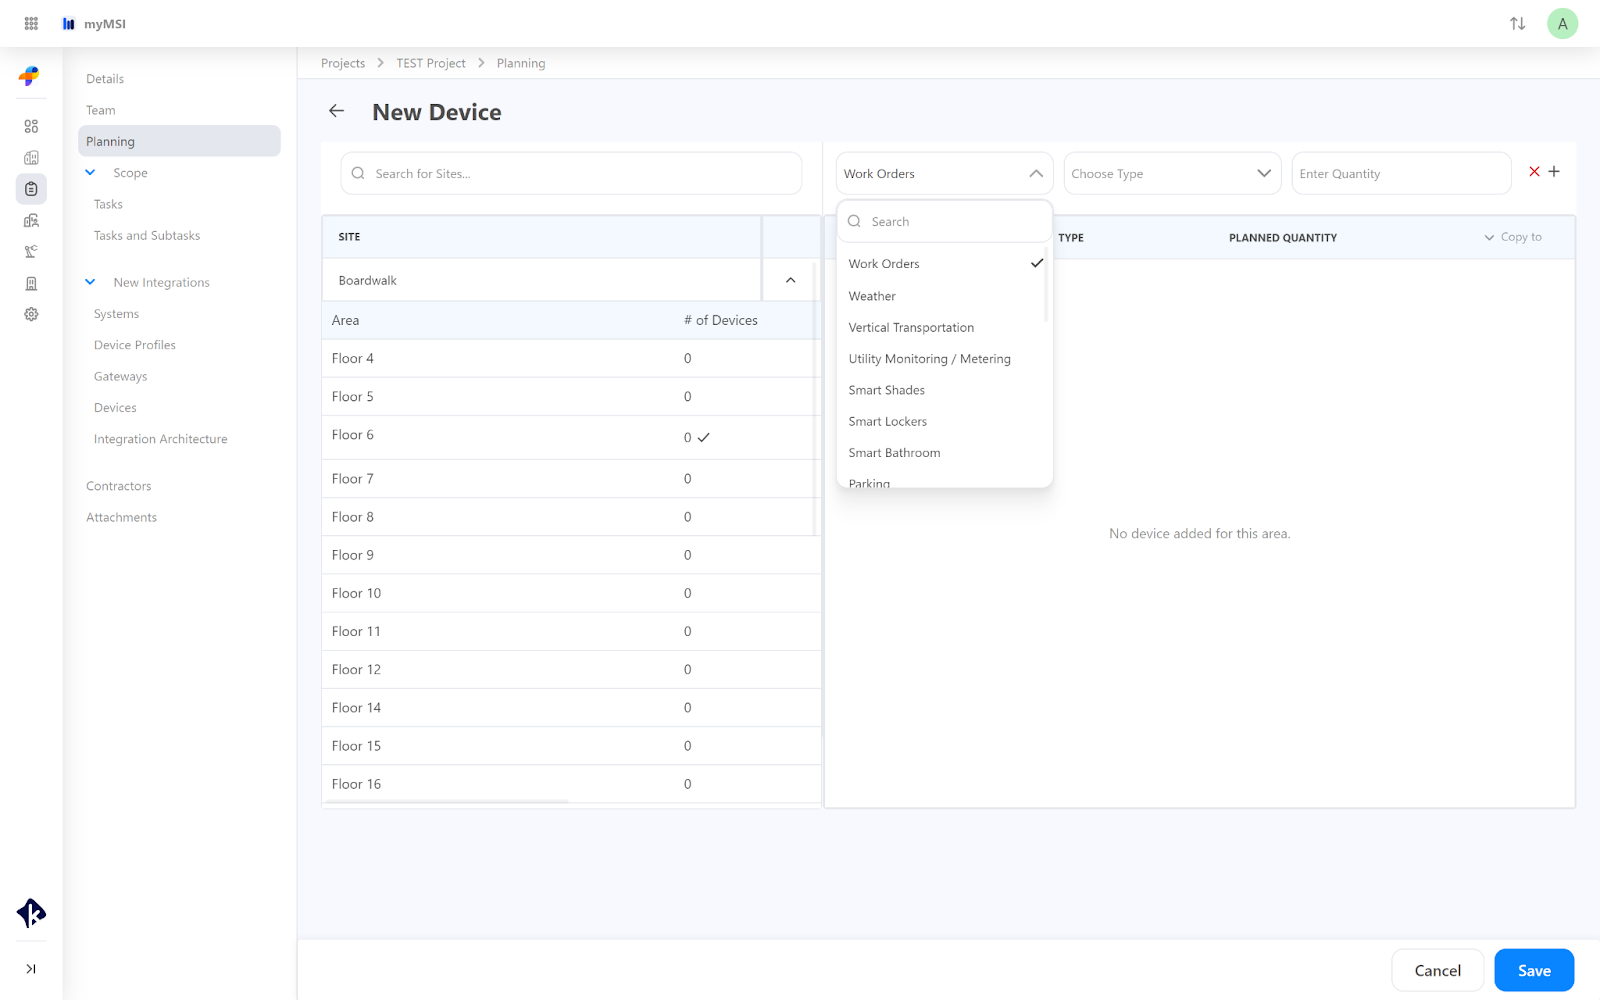
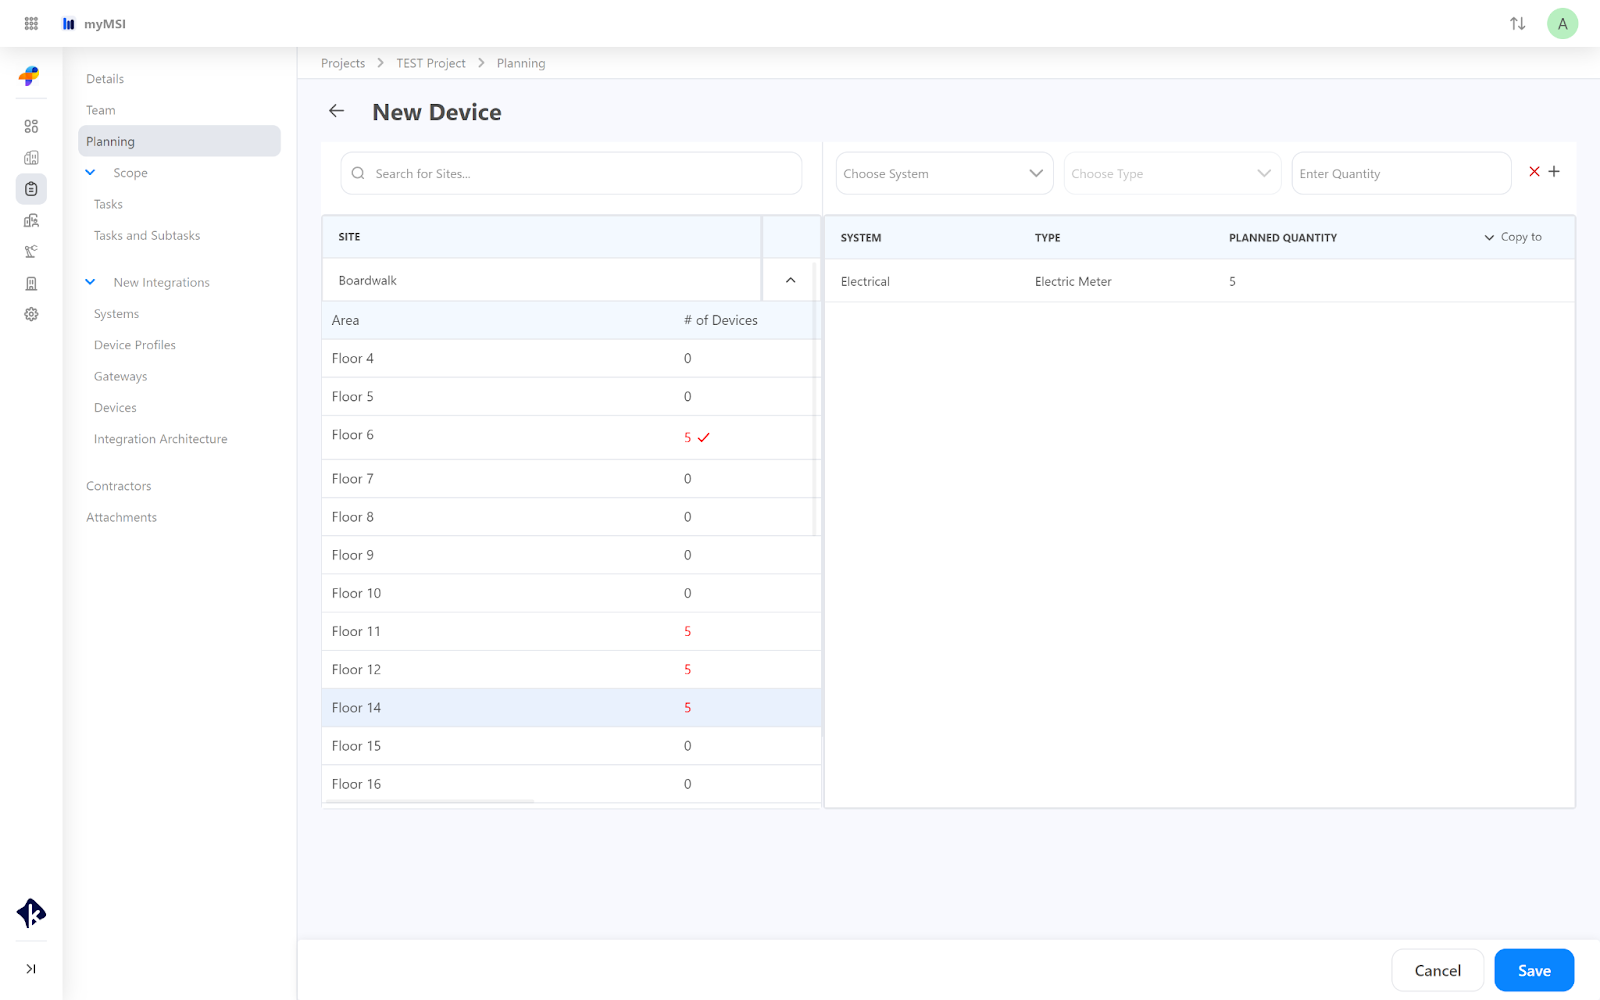
To add a new plan for devices, their category, type, and quantity, from the left section, select the area of your choice. On top of the right section:
Choose System(e.g. Electrical, Elevator, IoT, Mechanical, Plumbing, Temperature Controls).
Choose Type (e.g. Ahu, Vav, Heat Pump, Fan, BTU Meter, Network Thermostat, Chiller, Unit Heater, Boiler, Loop System, Tank).
Enter Quantity
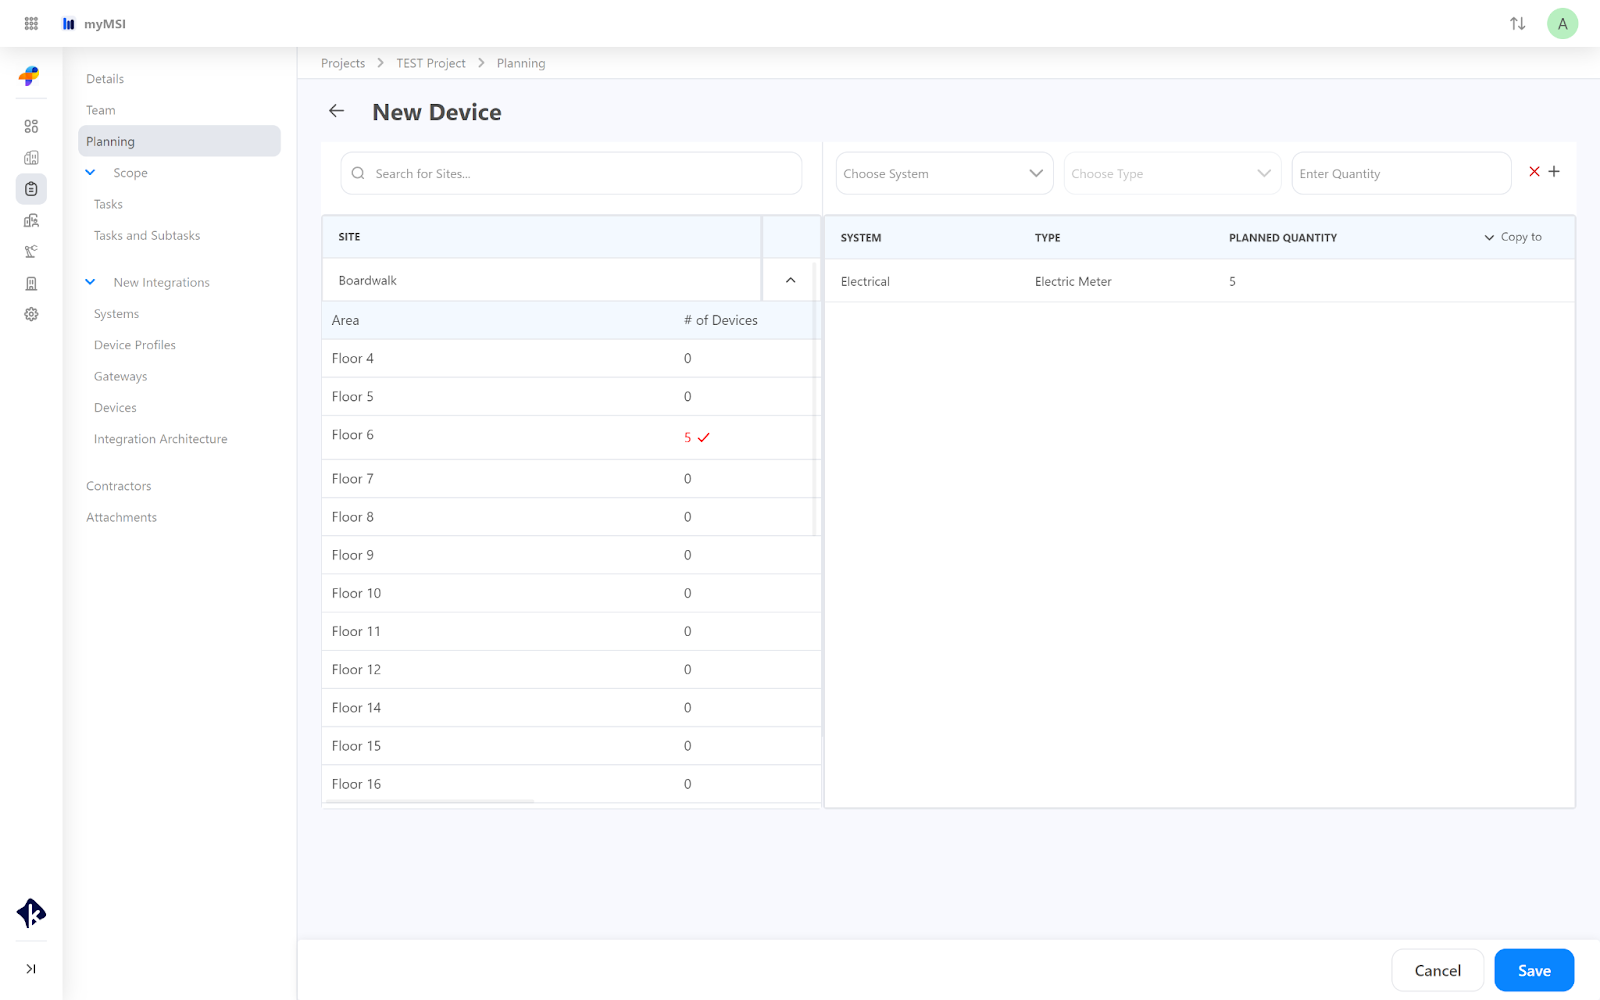
Click on the plus icon and your devices category will show up on the list. The right section will show you the quantity of all planned devices in red.
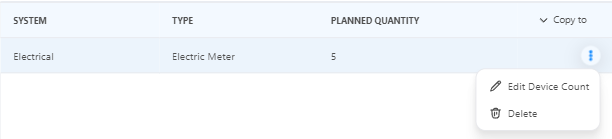
Edit and Delete Devices
To Delete a category of devices click on the trash canicon > click Yes, Remove. To Edit the device's number, click on the pencil icon and you can Edit the Device Count.

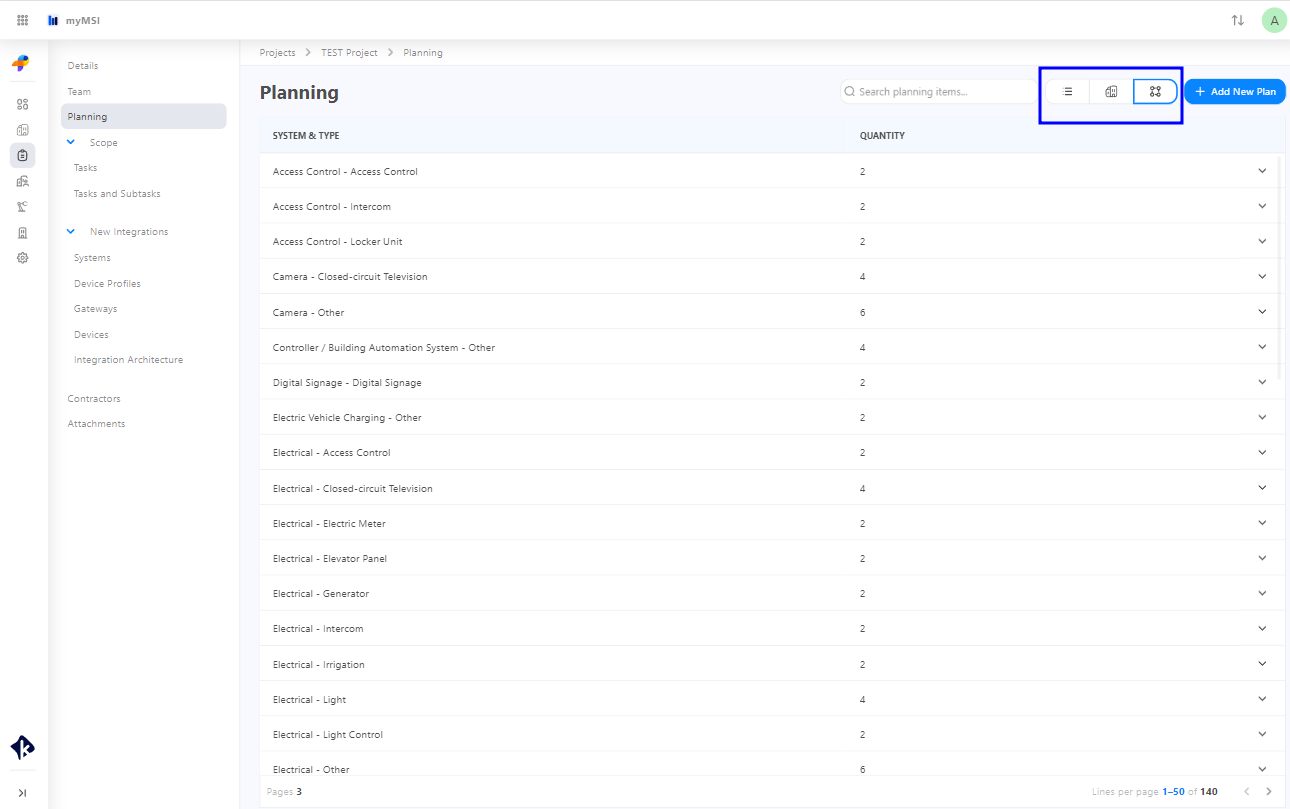
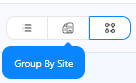
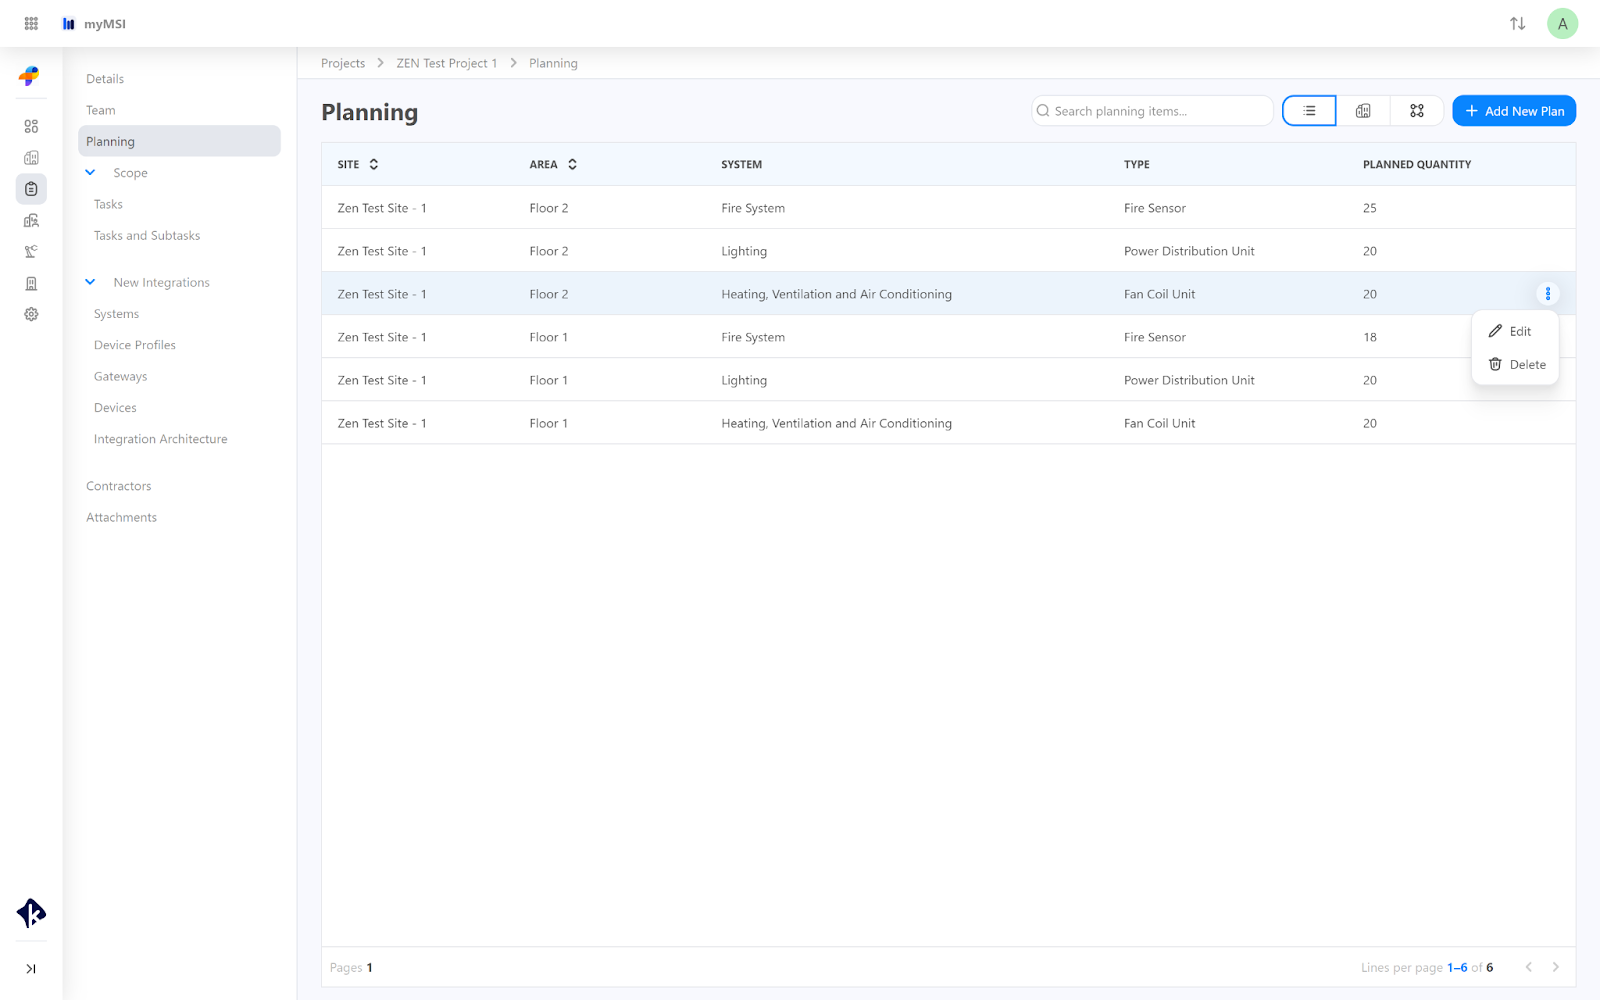
Planning Page Views
The default view is called “Group by System & Type.” Other available views include “List View” and “Grouped by Site.” These views are organized into different main pages:
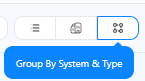
Group by System & Type
Grouped by Site
List View
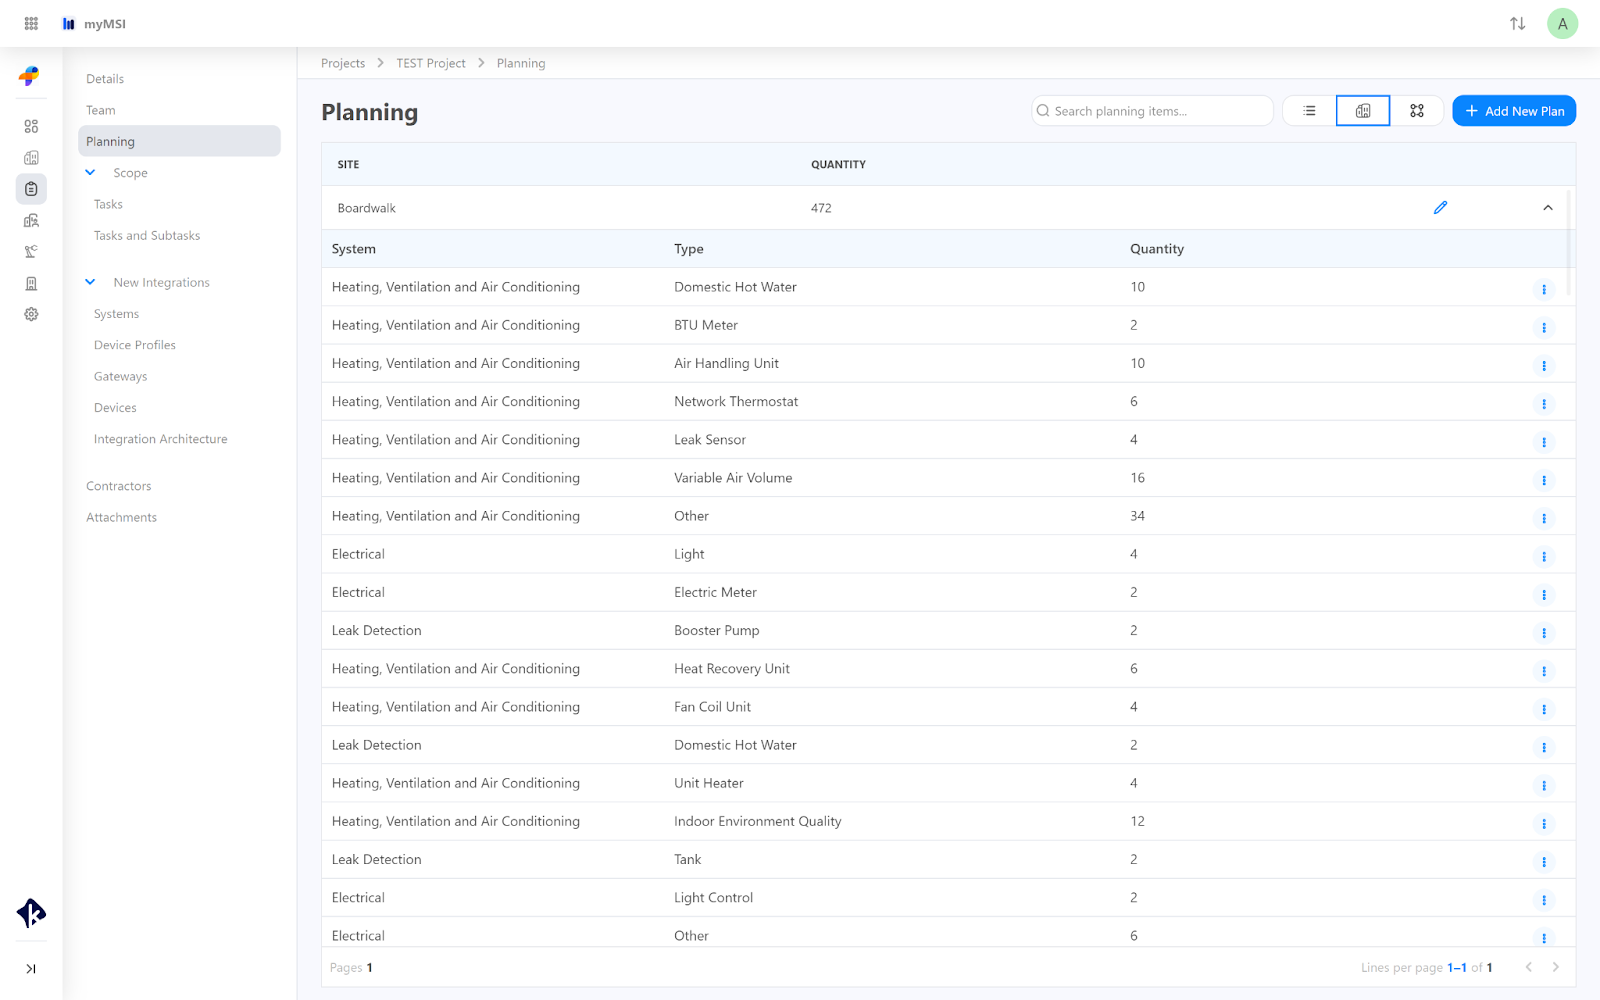
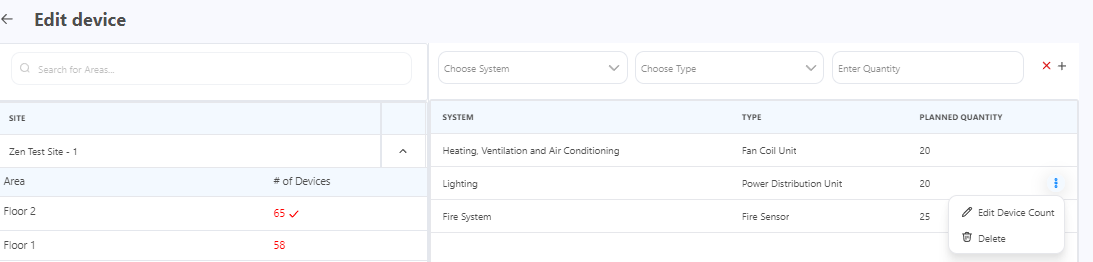
Group by System & Type View
Expanding each row will show you a drop-down list of all areas associated with the system & type and the planned quantity for each area. Click on the three dots on the right side and select "Edit" to change the quantity of devices for each site, or delete to delete the Plan.
 Please note that if you delete the plan this action will remove all the devices associated with this plan.
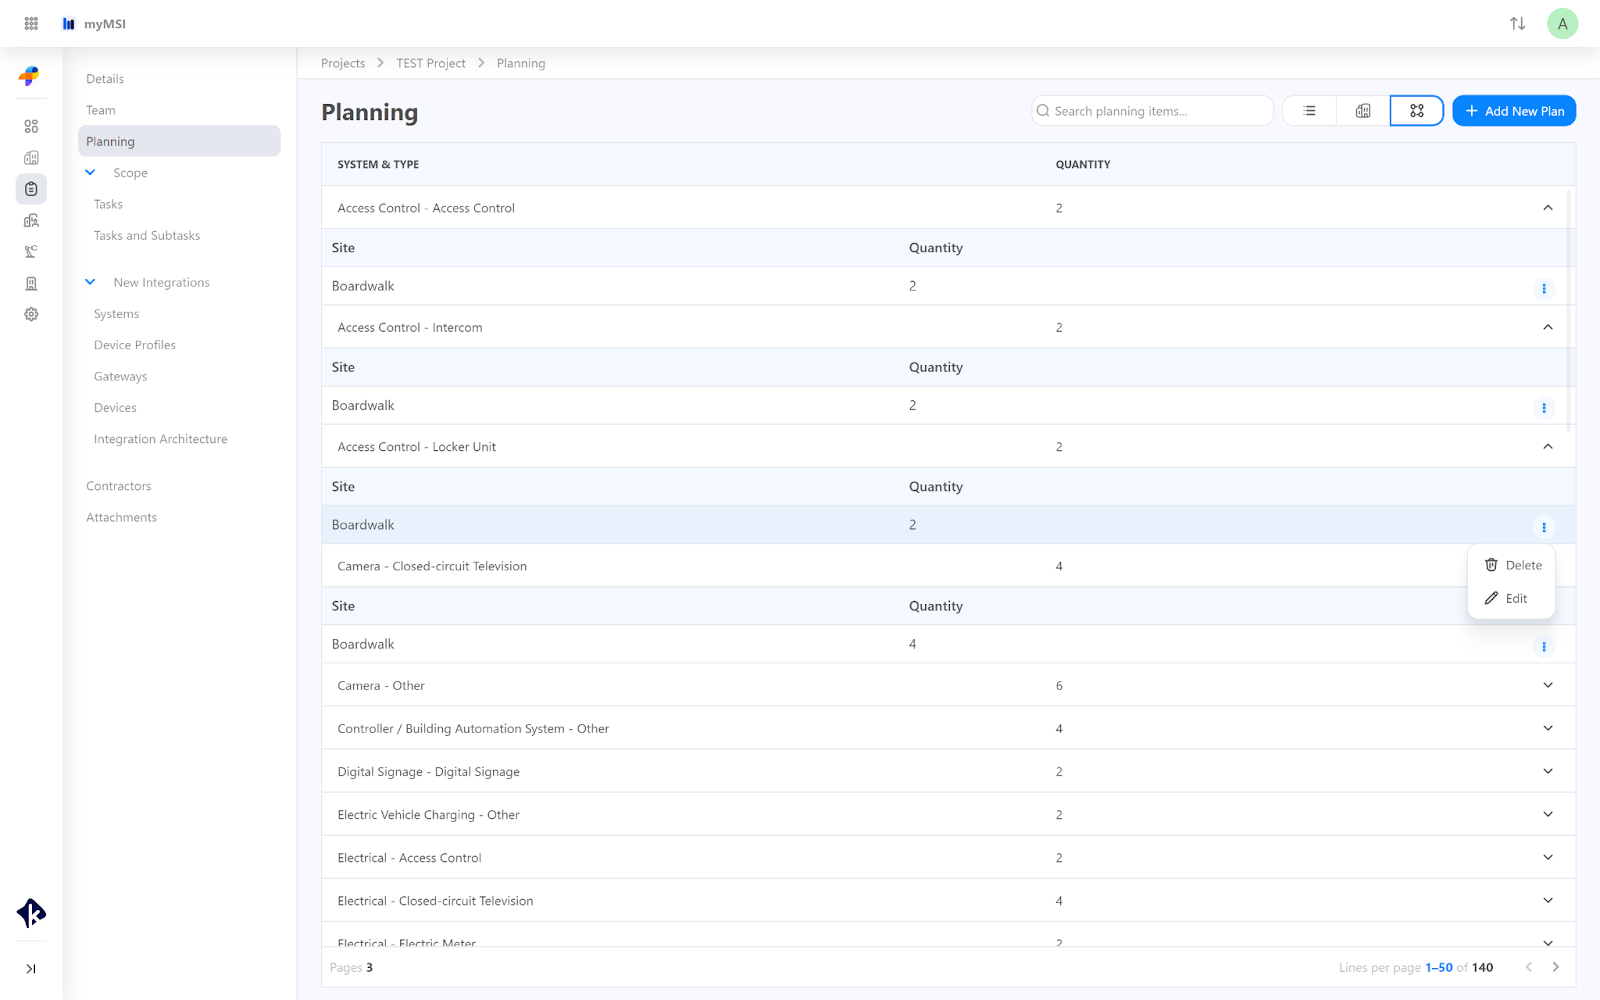
Grouped by Site View
Expanding the area will show you a drop-down page of devices and their:
System,
Type,
Quantity,
Edit Buttons.
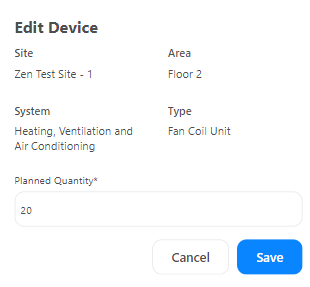
Click on the “Edit” button.
Write down the number of planned quantities of devices.
Click on the “Save” button to save the changes
Clicking on the pencil icon at the end of the device's row lets you adjust the planned quantity of devices. To delete the device count open three dots and click Delete.
List View
Editing and Deleting Device Quantities
Locate the Area:
Find the area in the list where you want to make changes.
Click the Three Dots:
At the end of the row for that area, click the three dots (page icon) to reveal additional options.
Select “Edit”:
From the page that appears, choose the “Edit” option.
Update Quantity:
Enter the new planned quantity of devices in the field provided.
Save Changes:
Click the “Save” button to apply the updated quantity.
Find the Area:
Locate the area with the device count you wish to remove.
Click the Three Dots:
Tap on the three dots (page icon) at the end of the row for that area.
Select “Delete”:
Choose the “Delete” option from the page.
Confirm Deletion:
Follow any prompts to confirm the removal of the device count.

These steps allow you to efficiently manage and adjust the quantities of planned devices in your project, ensuring your equipment plans are always up to date.
Related Articles
Scope Page
The Scope page shows how a project is progressing, including what’s needed and who is responsible. You can use filters to sort tasks and view detailed notes. The Tasks page lets you add new tasks or use existing templates for easier management. Track ...Attachments Page
The attachments module allows you to add and manage attachments for each project, streamlining your workflow by providing easy access to details and an organized view of device lists, drawings, or any site information. To access attachments, open ...New Integrations Page
The integrations module is a source for putting all your device's details. It helps you to go over the basic elements during the integration process. Once you go to the Integrations page you will see the list of all Systems. You can also navigate to ...Contractors Page
The Contractor tab provides an efficient way to manage contractors for your project. You can assign or remove contractors, as well as add new offices if needed. This feature helps streamline project management by keeping contractor details organized ...Navigating through a myMSI Project
The Projects feature of myMSI allows you to create, manage, monitor, and control your projects. This will include project details, project team, planning, scope, new integrations, contractors, and additional attachments. Accessing Projects To access ...