New Integrations Page
The integrations module is a source for putting all your device's details. It helps you to go over the basic elements during the integration process. Once you go to the Integrations page you will see the list of all Systems. You can also navigate to Device Profiles, Gateways, and Devices.
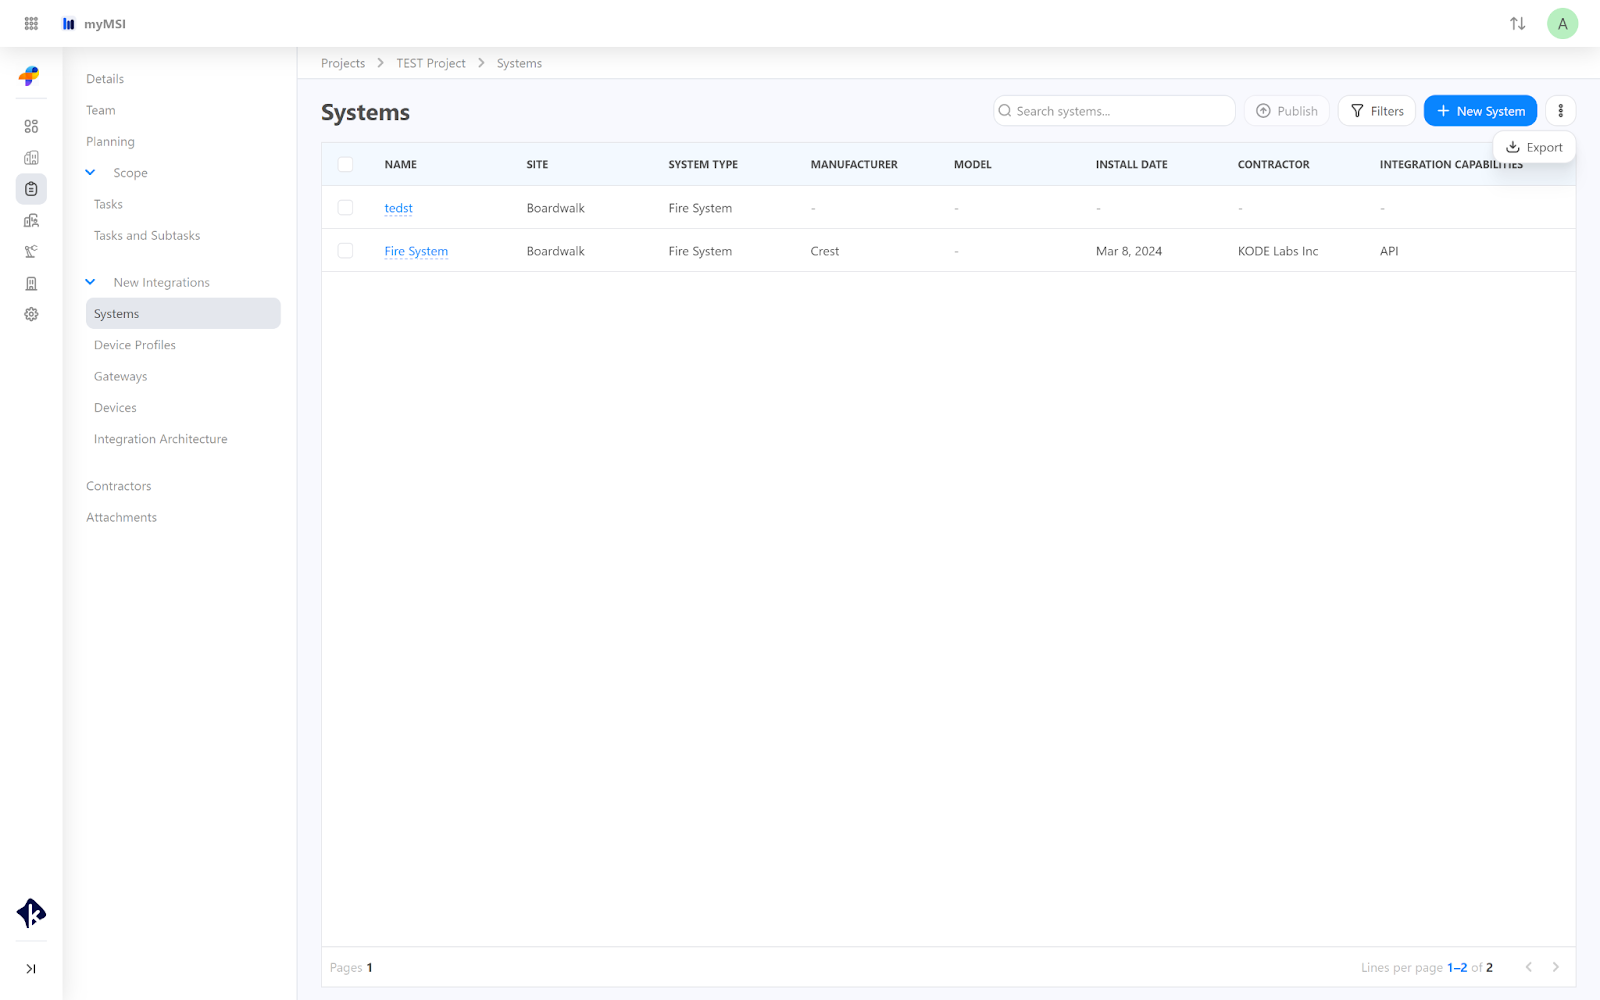
System
On the Systems page you will find listed all the systems associated with your project, from where you can see information about:
System Name,
Site,
System Type,
Manufacturer,
Model,
Install Date,
Contractor,
Integration Capabilities.
From this page on the top right corner, you can also:
Add a new system by clicking on the “+New System” and filling the information.
Filter the systems page by clicking on the “Filter” button.
Export the systems list by clicking on the “Export” button,
Publish the System by selecting the System and clicking on the “Publish” button.
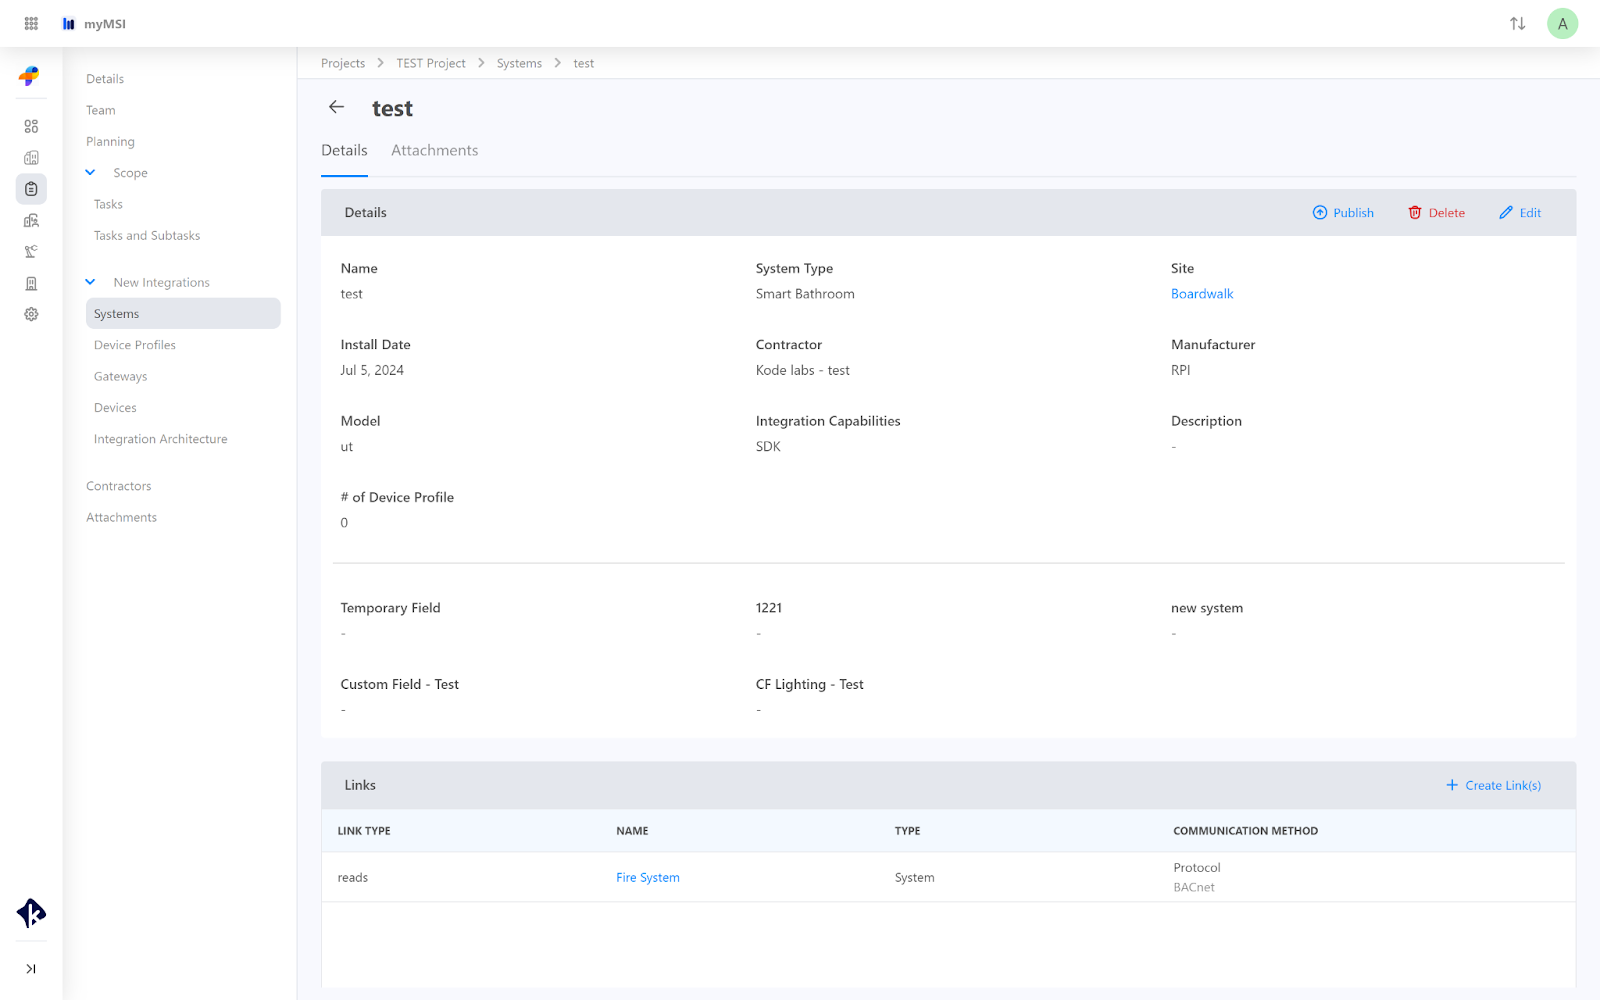
Selecting a System you will be directed to its details from where you can Edit, Delete, or Publish the System.
Additionally, you can link tasks by clicking the “+Link Task(s)” button, selecting the task you want to link within the system, and then clicking Save. You can also link the system with other systems by clicking the "+ Create Link(s)" button.
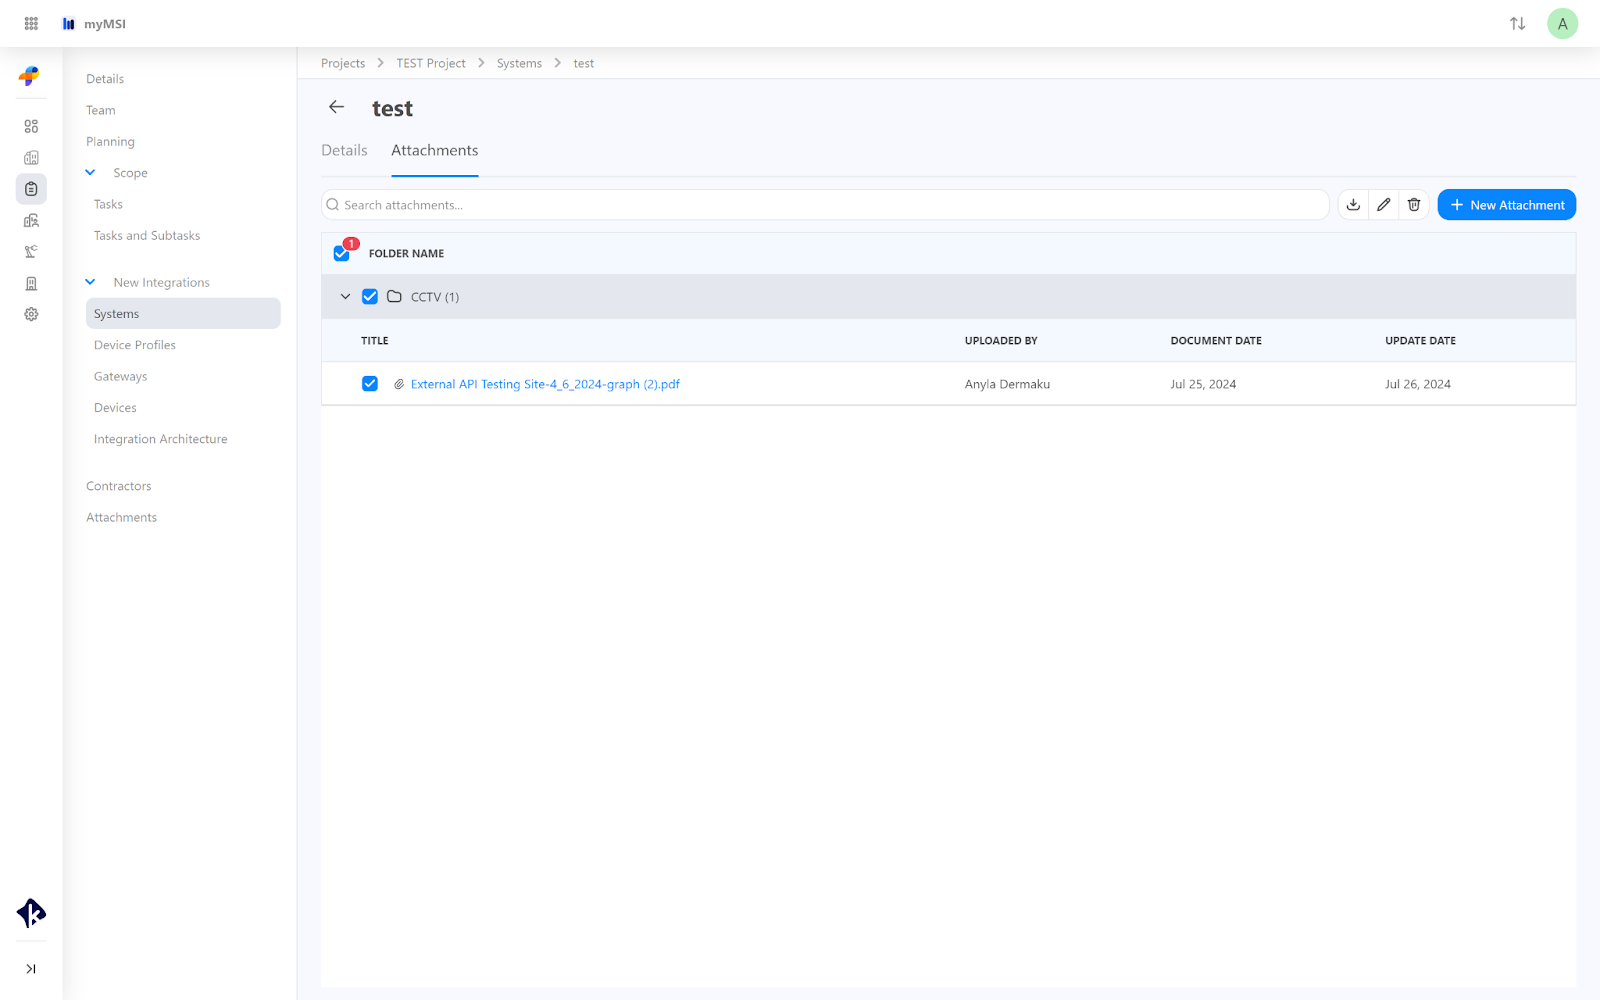
Edit Existing Attachments,
Delete Attachments,
Download Attachments.
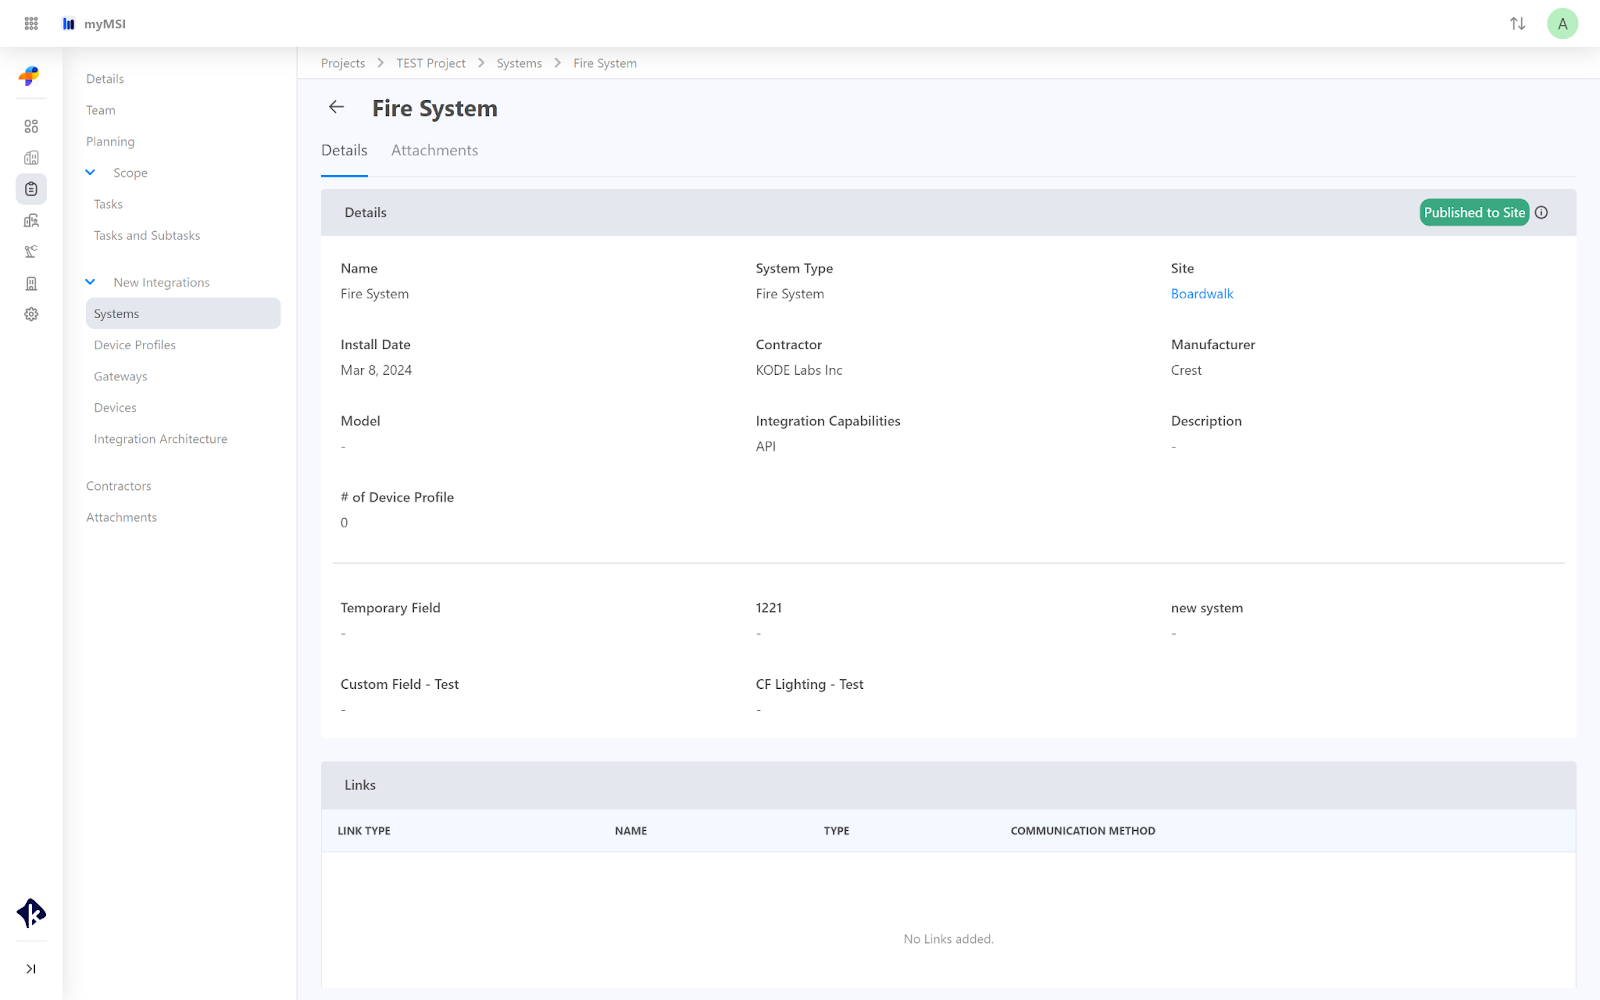
Please note that if you publish the System to the Site you can not change/update the Details and Links or Add any Attachments. You can only add Link Task(s).
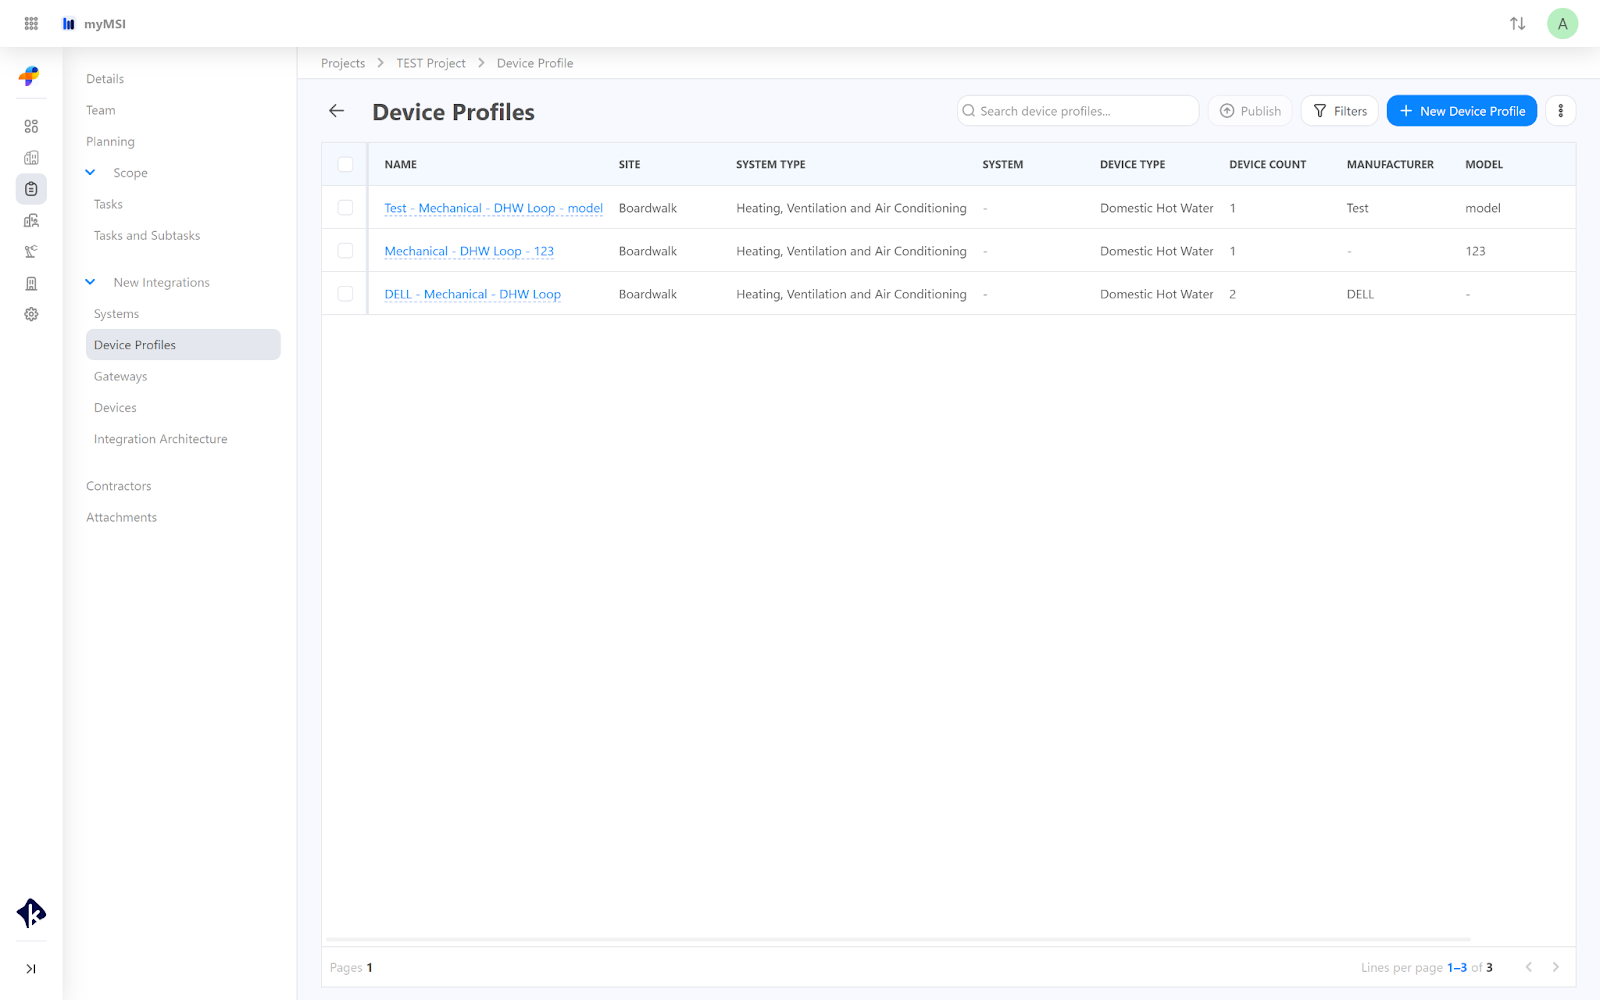
Device Profiles
On the Device Profiles page you will find listed all the device profiles associated with your project, from where you can see information about:
Device Profile Name,
Site,
System Type,
System,
Device Type,
Device Count,
Manufacturer,
Model,
Communication Protocol.
From this page, you can also:
Add a new device profile by clicking on the “+New Device Profile”
Export the device profiles list by clicking on the “Export” button.
Filter the device profiles page by clicking on the “Filters” button.
Create a new device profile by clicking on the “+ New System” button.
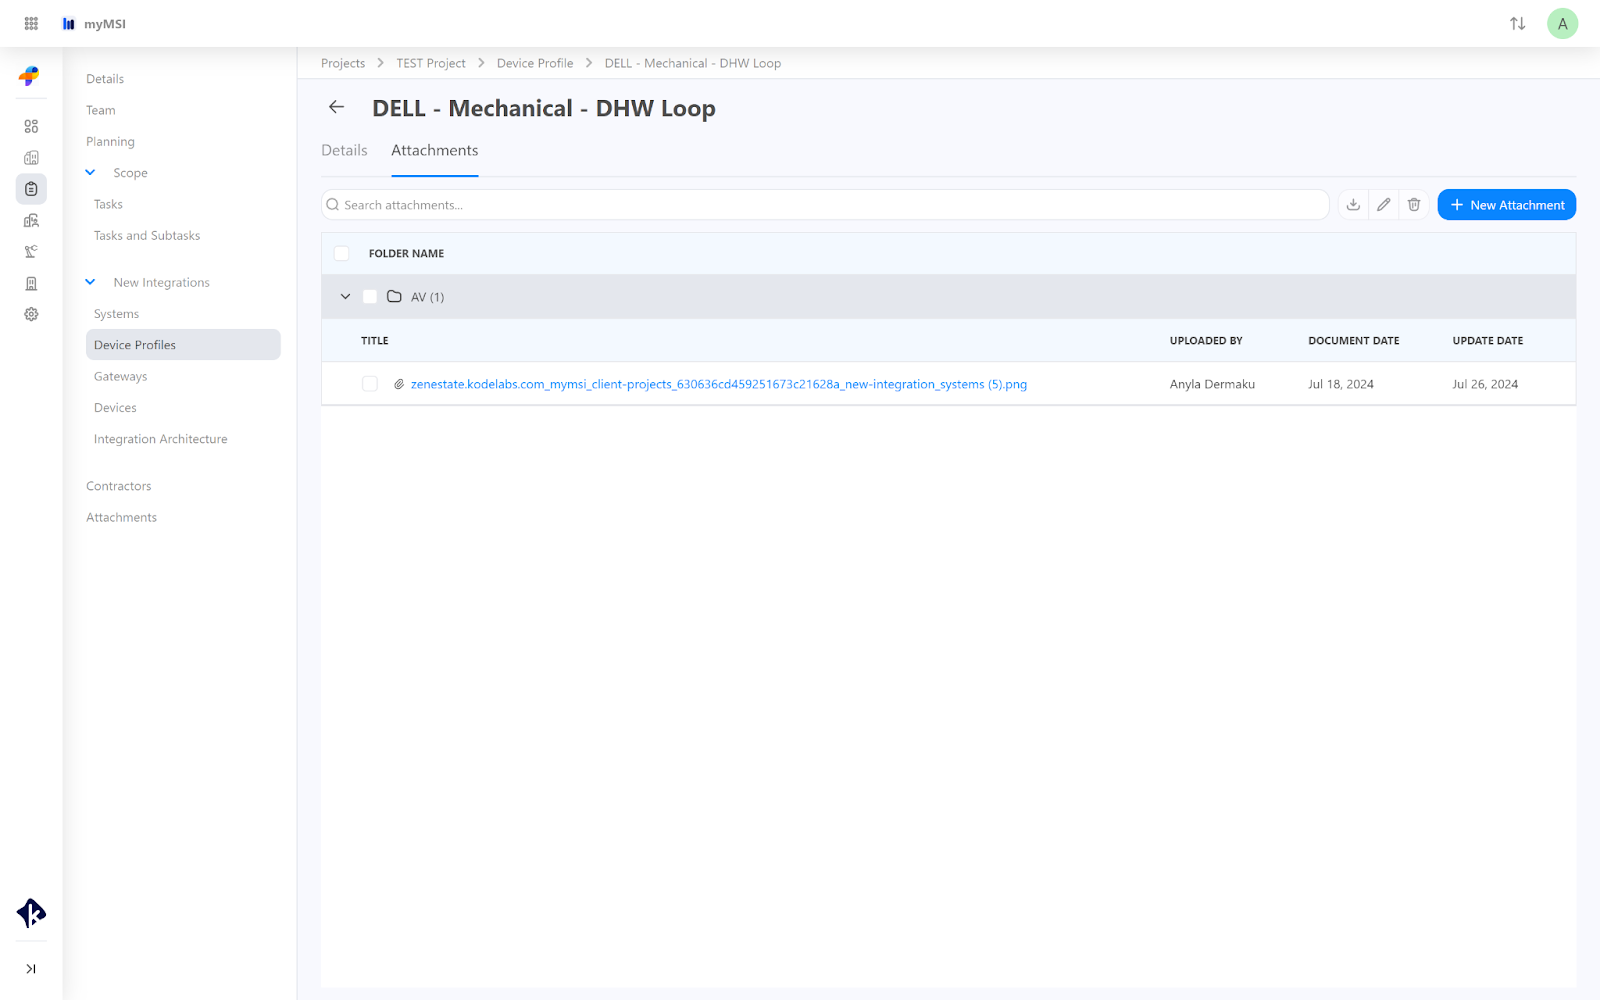
Selecting a Device Profile you will be directed to its Details and from where you can also Publish the Device Profile.

Add New Attachments,
Edit Existing Attachments,
Delete Attachments,
Download Attachments
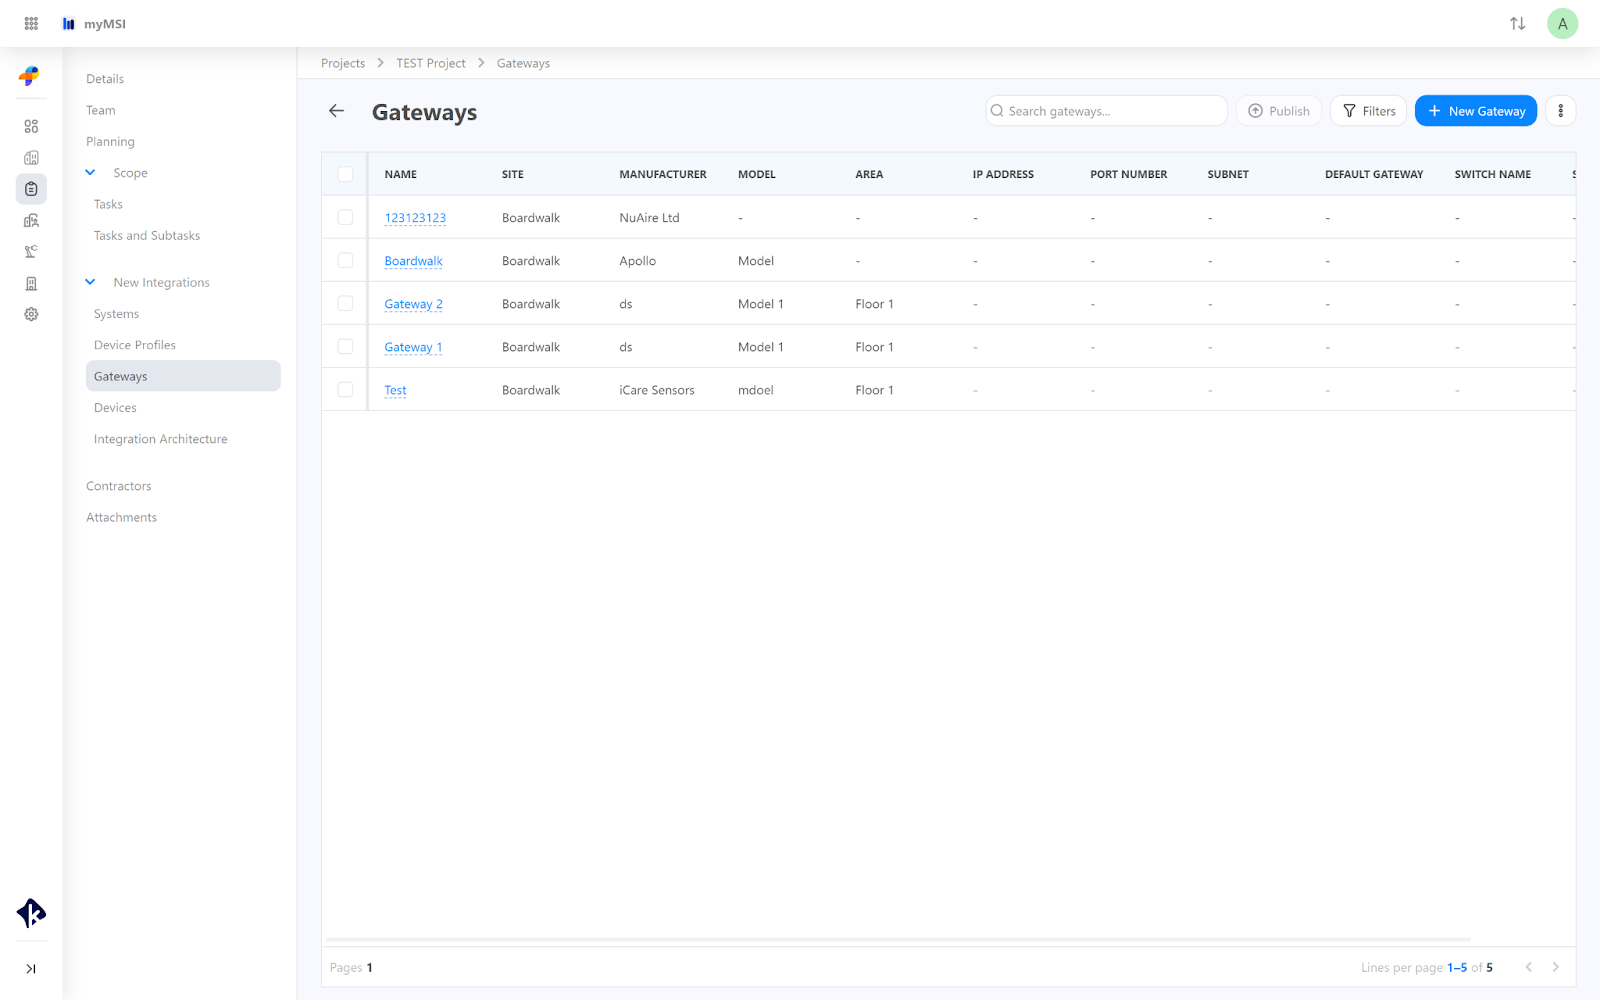
Gateways
Gateway Name,
Site,
System(s),
Manufacturer,
Model,
Area,
IP Address,
Port Number,
Subnet,
Default Gateway,
Switch Name,
Switch Location.
Export the gateways list by clicking on the “Export” button,
Import gateways list by clicking on the “Import” button,
Filter the gateways page by clicking on the “Filters” button.
Create a new gateway by clicking on the “+ New Gateway” button.
Selecting a Gateway you will be directed to its details from where you can Publish, Delete, Edit the Gateway, Add Trunk, Add System(s), Add Gateway(s).

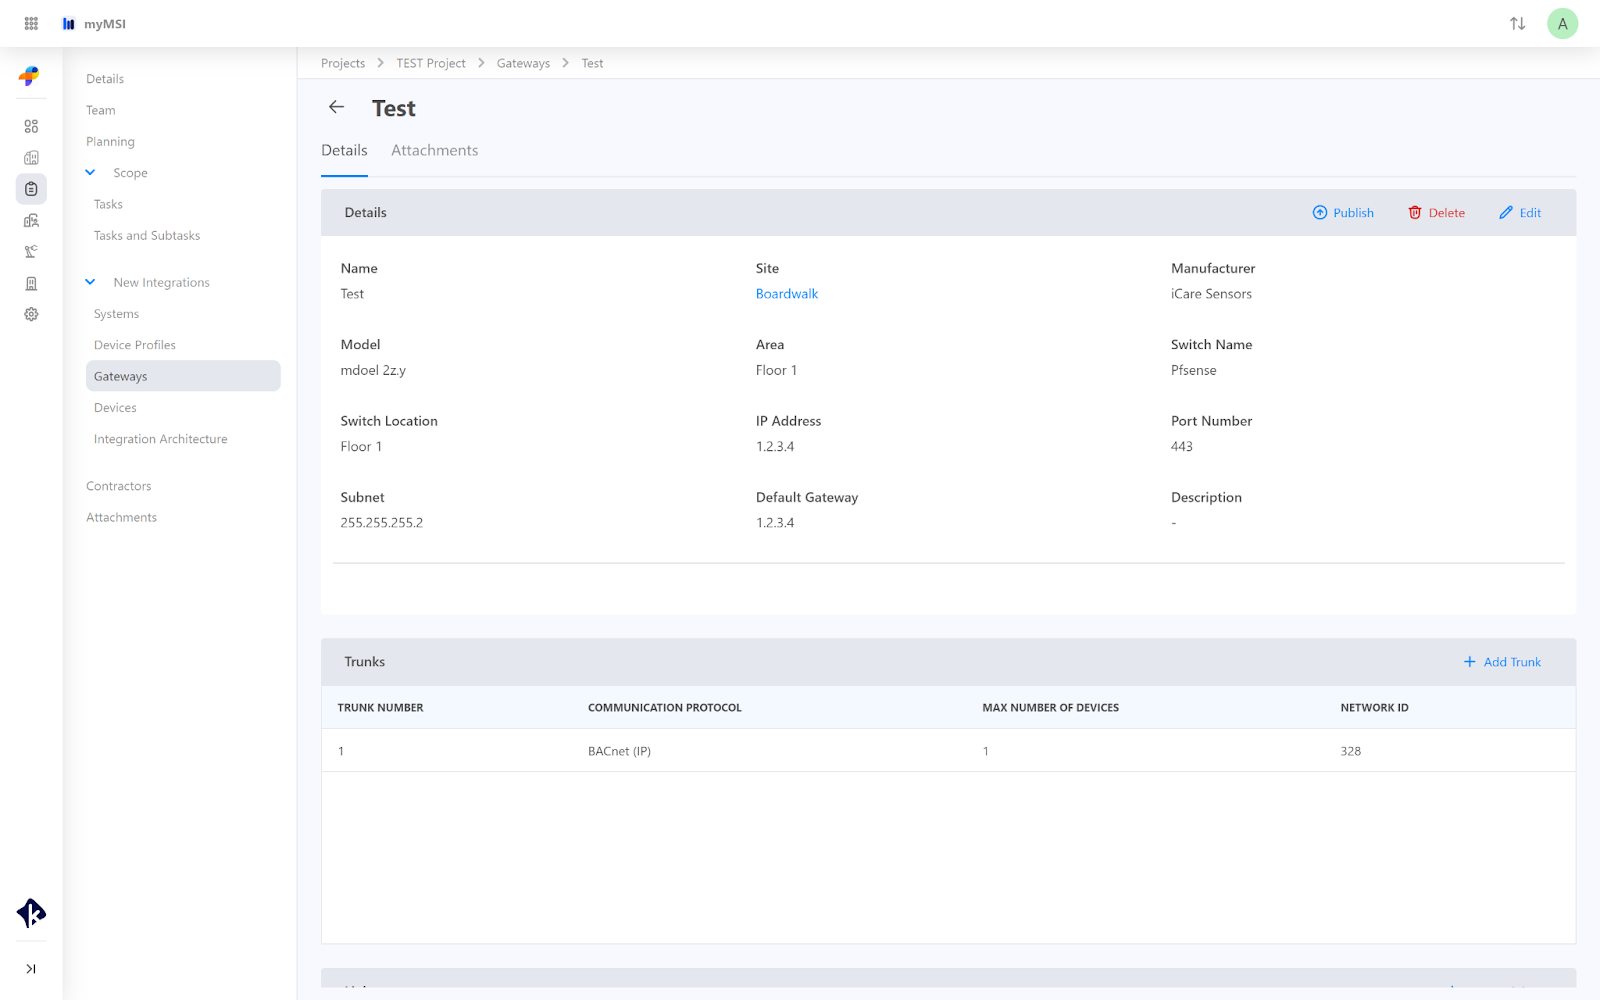
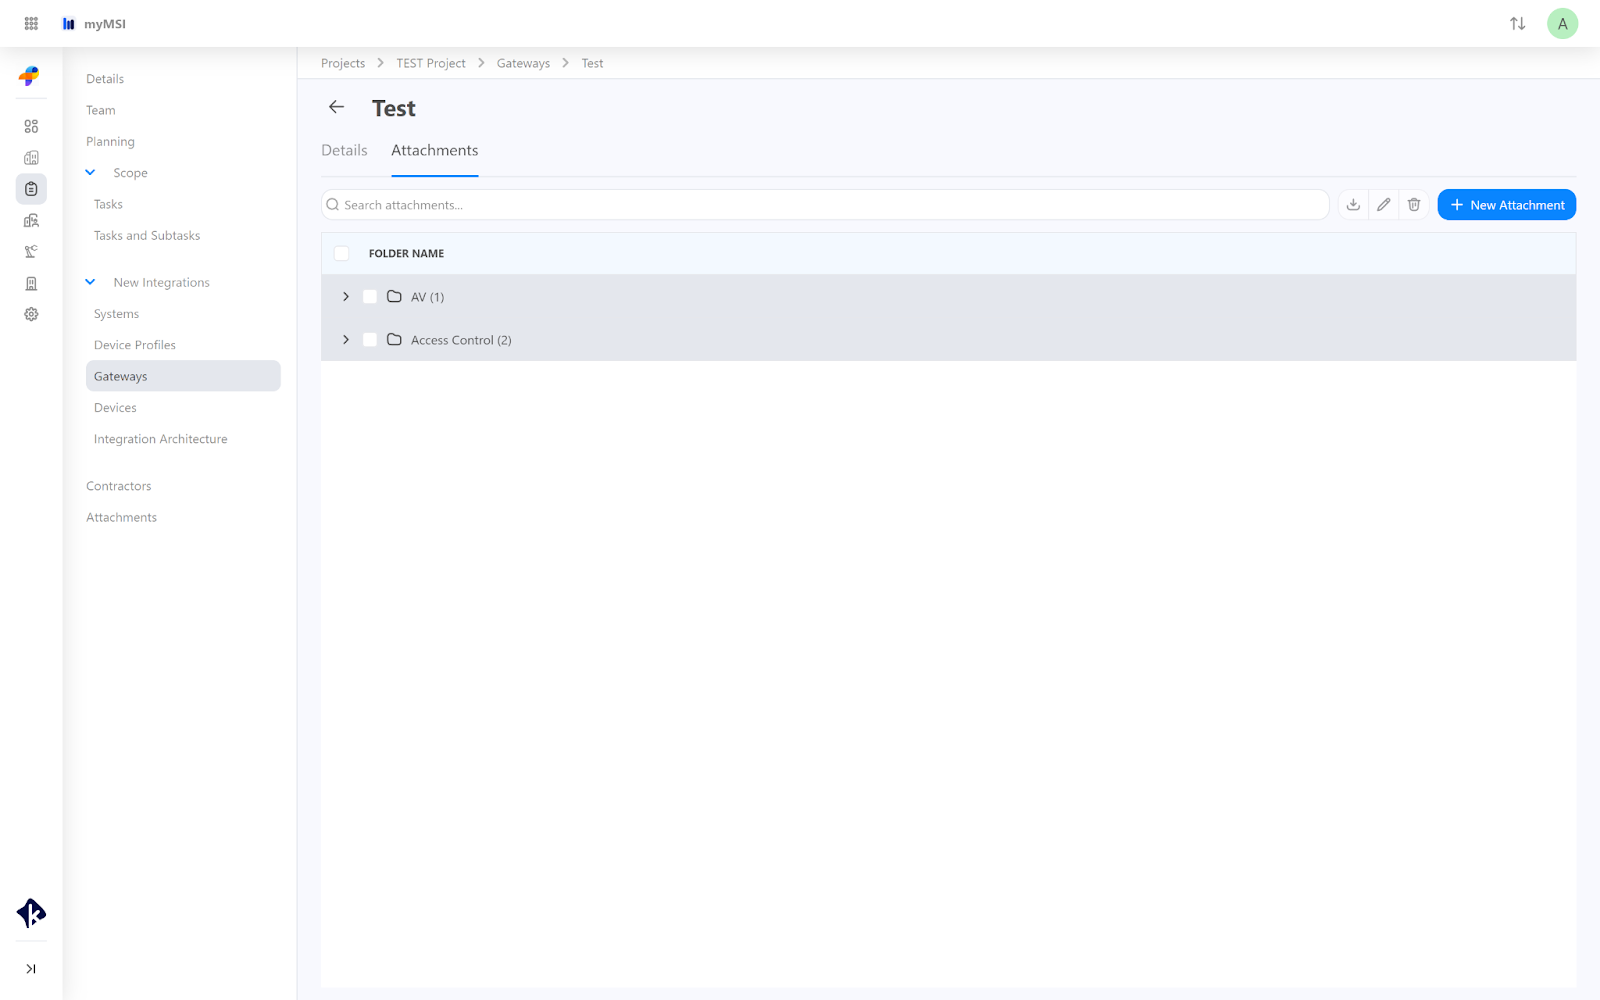
Going to the “Attachments” tab you will see the list of the existing attachments from where you can:
Add New Attachments,
Edit Existing Attachments,
Delete Attachments,
Download Attachments.
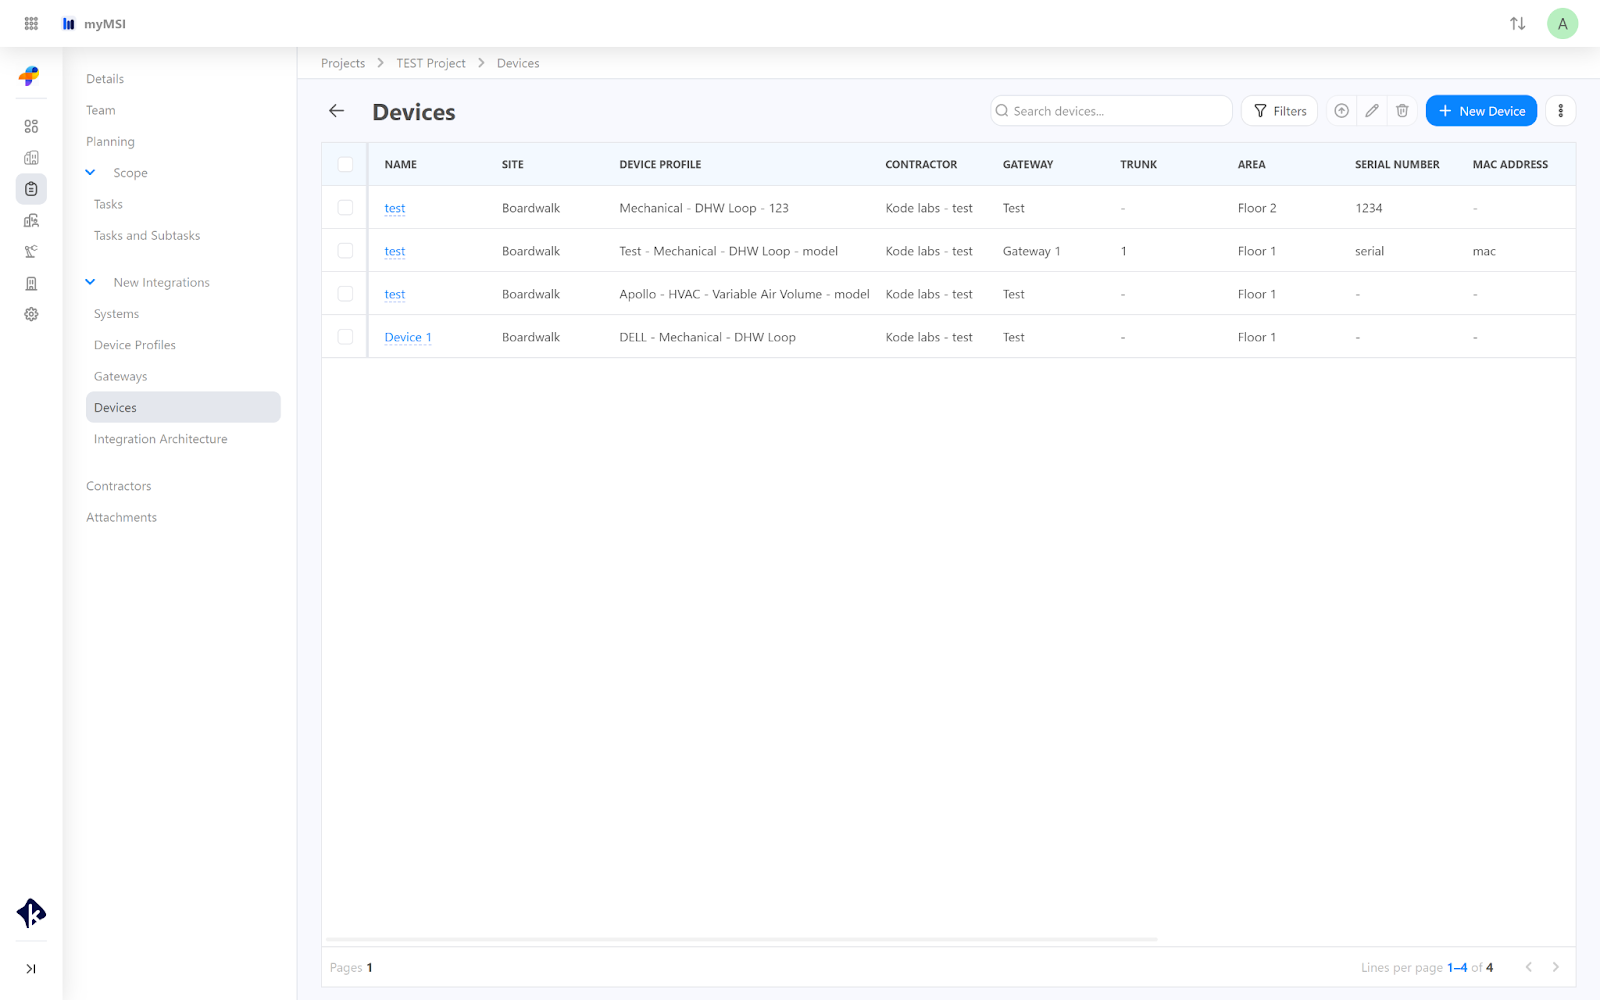
Devices
A device is a digitally enabled device or a controller representing a device that connects to a gateway. On the Devices page you will find listed all the devices associated with your project, from where you can see information about:
Device Name,
Site,
Device Profile,
Contractor,
Gateway,
Trunk,
Area,
Serial Number,
MAC Address,
IP Address,
Maintenance Interval,
Install Date,
Online Dat,
Warranty Date.
From this page you can also:
Export the devices list by clicking on the “Export” button,
Import devices list by clicking on the “Import” button,
Filter the devices page by clicking on the “Filters” button.
Create a new device by clicking on the “+ New Device” button.
Edit or Delete device(s) by selecting them and clicking on the “Edit” or “Delete” devices.
Selecting a Device you will be directed to its details from where you can Publish, Delete, Edit the Device.
Note: Devices added during the creation of a project for the site will only be displayed if they have been published.
Integration Architecture
Example: Linking a JACE Controller
Like in the example that was shown in the video, let's say the JACE controller communicates with both the HVAC and Lighting systems. You would:
Choose "Reads/Writes" as the link type.
Select the systems—HVAC and Lighting.
Choose "Building Protocol" as the communication method and "BACnet" as the protocol type.
Once this is done, you’ll see arrows in the Integration Architecture, showing that the systems are now linked to the JACE.
Adding More Links
You can add additional links using the same process. For instance, to link the JACE with Utility Monitoring and Fire systems:
Choose "Reads" as the link type.
Select the appropriate systems.
Use "Building Protocol" and "BACnet" for the communication method.
After creating these links, you’ll see even more systems connected within the Integration Architecture.
Connecting Systems via APIs
Some systems, like Air Quality or Parking, may be connected via APIs. Here’s how to link these systems to KODE OS:
Select the system (e.g., Air Quality) and choose "Is Read By" as the link type.
For the communication method, select "API," and for the API type, choose "Cloud API."
This creates a link showing that the Air Quality system is read by KODE OS through a cloud API.
You can do the same for other systems like Parking, selecting the appropriate API type.
Finalizing the Integration Architecture
After creating all necessary links, including between KODE OS and the JACE controller (using "API" and "Local API" as the communication method), your Integration Architecture will be complete. You’ll have a clear overview of how all the systems communicate with each other, from the Gateway to KODE OS and beyond.
Advanced Use Case: System-to-System Communication
In some cases, systems might communicate directly with each other. For example, you might want the Tenant App to read/write to the Parking system. To create this link:
Go to the Tenant App and select "Create Link."
Choose "Reads/Writes" as the link type and select "System" for the type.
Select Parking as the system name, and for the communication method, choose "API" and "Cloud API" as the API type.
This allows the Tenant App to communicate directly with the Parking system, providing a visual representation of the interaction in the Integration Architecture.
By using the Integration Architecture feature, you can easily visualize how systems, Gateways, and KODE OS are linked, helping you understand the data flow within your site. This feature is a valuable tool for both managing integrations and building use cases around the flow of information.
Related Articles
Planning Page
The Planning Page is where you manage the setup of equipment for each floor of your project. It allows you to view and adjust what equipment is planned, including different types and quantities. You can explore various views to see your plans grouped ...Scope Page
The Scope page shows how a project is progressing, including what’s needed and who is responsible. You can use filters to sort tasks and view detailed notes. The Tasks page lets you add new tasks or use existing templates for easier management. Track ...Attachments Page
The attachments module allows you to add and manage attachments for each project, streamlining your workflow by providing easy access to details and an organized view of device lists, drawings, or any site information. To access attachments, open ...Navigating through a myMSI Project
The Projects feature of myMSI allows you to create, manage, monitor, and control your projects. This will include project details, project team, planning, scope, new integrations, contractors, and additional attachments. Accessing Projects To access ...Contractors Page
The Contractor tab provides an efficient way to manage contractors for your project. You can assign or remove contractors, as well as add new offices if needed. This feature helps streamline project management by keeping contractor details organized ...