Navigate Launchpad as a Channel Partner
Introduction
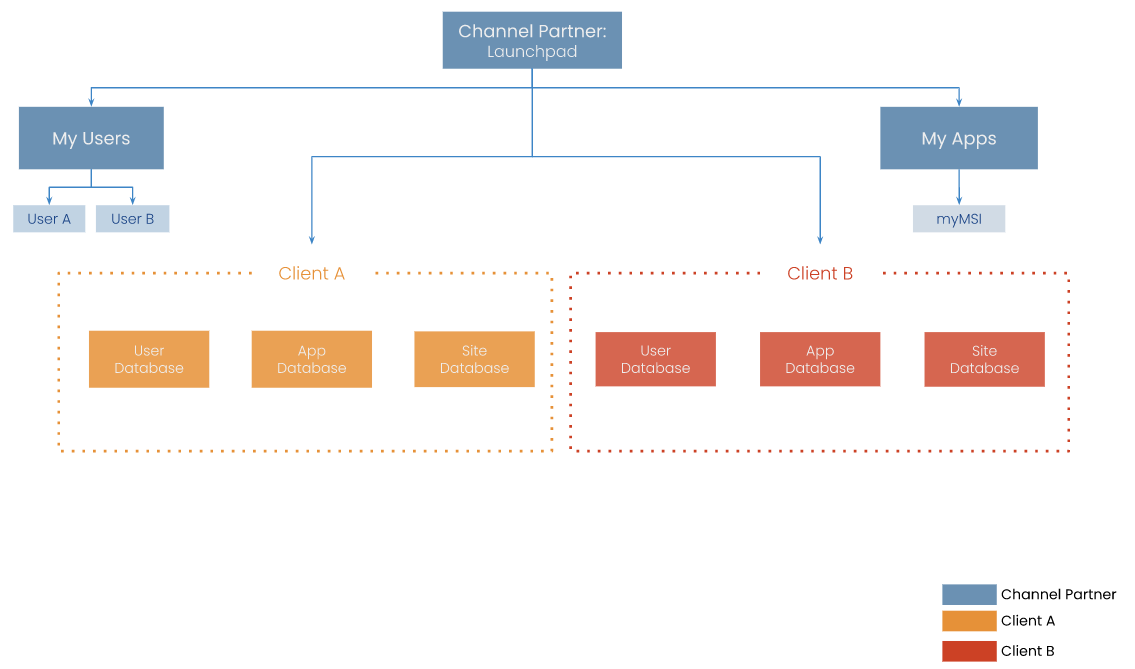
Welcome to the KODE OS Launchpad! After reading this short user guide, you will be able to manage your clients, products, and access for anything related to KODE OS. The Launchpad will enable you to ensure that all of your clients and users can have a peace of mind while using KODE OS as all administrative features will be handled by assigned personnel or by the partner itself.
The Launchpad as an integral component of KODE OS has a seamless and a fast user experience. Any instance or user can be added, changed, or deactivated in a matter of seconds. In addition, for every channel instance the Launchpad is able to be integrated with MyMSI to give you an extensive overview of BAS and BMS implementation in all of your buildings, campuses, and portfolios.
Login and Authentication
In order to login to your instance of the Launchpad, you need to access a link that will be provided to you by KODE Labs, Inc. or one of its channel partners. The link will be in the following format:
yourcompanyname.kodelabs.com
Accessing the link, you will be presented with a login screen where you will input your provided username and password. Upon providing the information successfully and selecting Login, you will be taken to the homepage view of the Launchpad.
If you belong to two or more organizations, you will be able to select the desired instance after the initial login. All of your instances will be accessible via the same username and password.
The Launchpad also offers the ability to add an additional layer of security during the login process via Two Factor Authentication (2FA). This can be set-up by navigating to the Manage Account option in the User Admin section. 2FA can be enabled via Text Messaging (SMS) or via a Third Party Authenticator.
Homepage
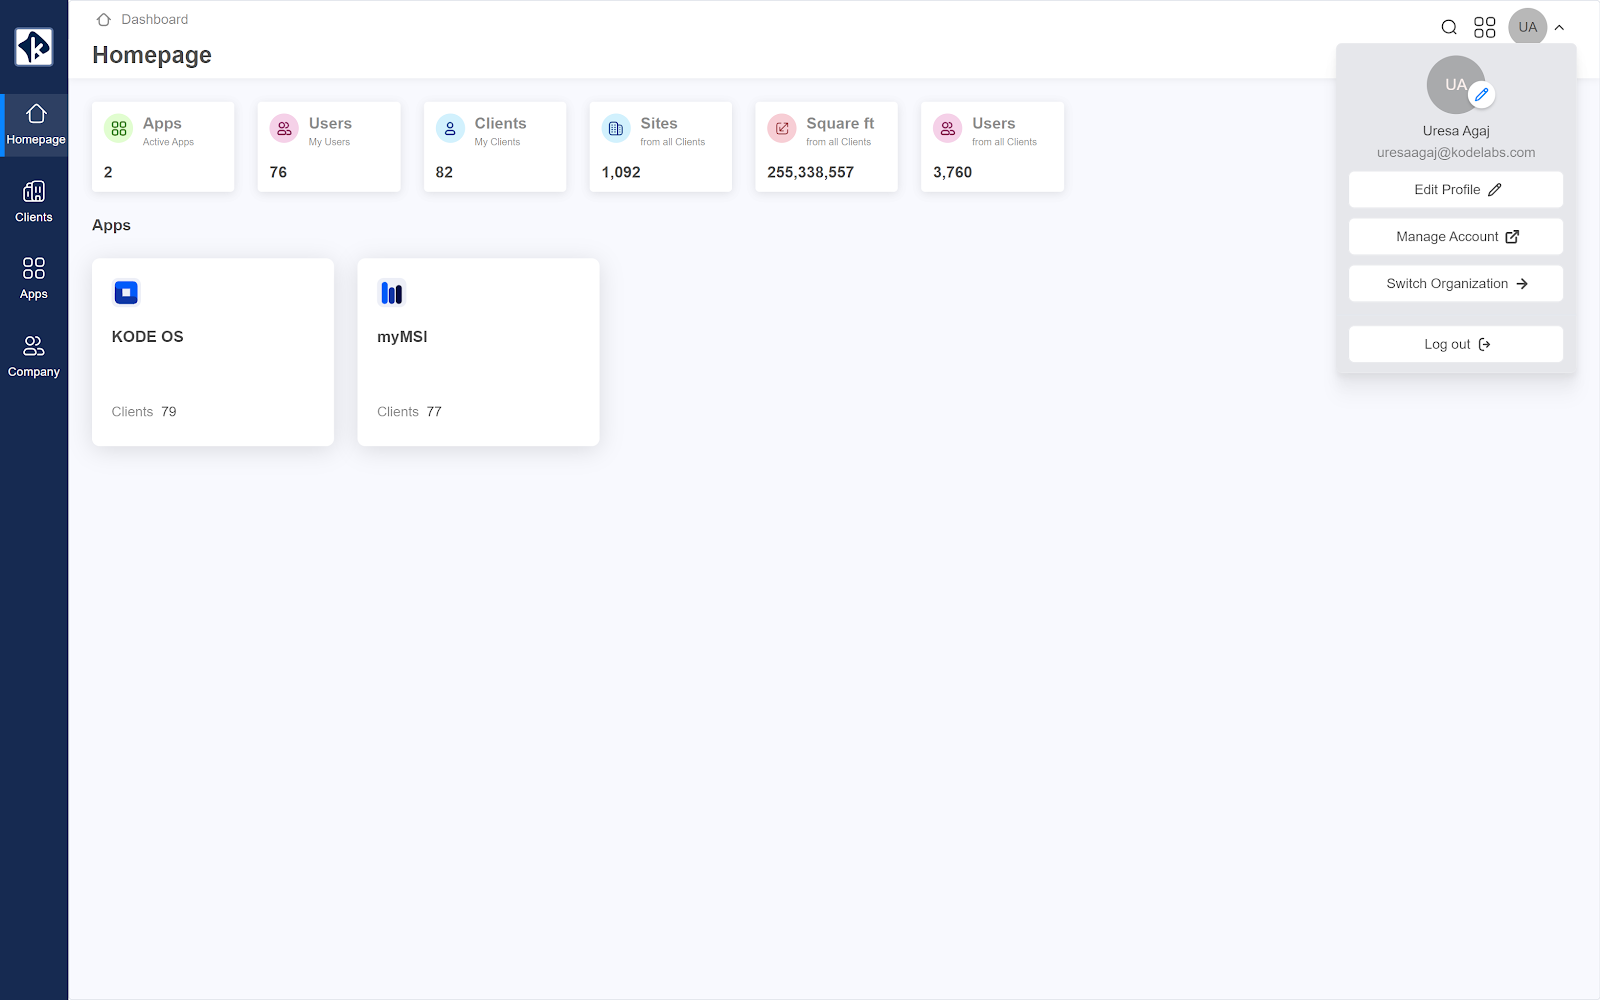
The homepage view is divided into three sections:
The left-handed sidebar which allows you to navigate to Clients, Apps, Company, and back to the Homepage.
The status section, where you can see various metrics such as clients, sites, total integrated square footage, total number of users, and the available individual apps to which access can be given or revoked.
User Admin section located in the upper right corner, where you can edit your user profile, manage your account, and safely log out.
Clients
In the Clients page as the name states, you can manage the clients which are subscribed to KODE OS and/or any of its products.
Upon selecting the feature from the left-handed sidebar, a list of your existing clients will appear.
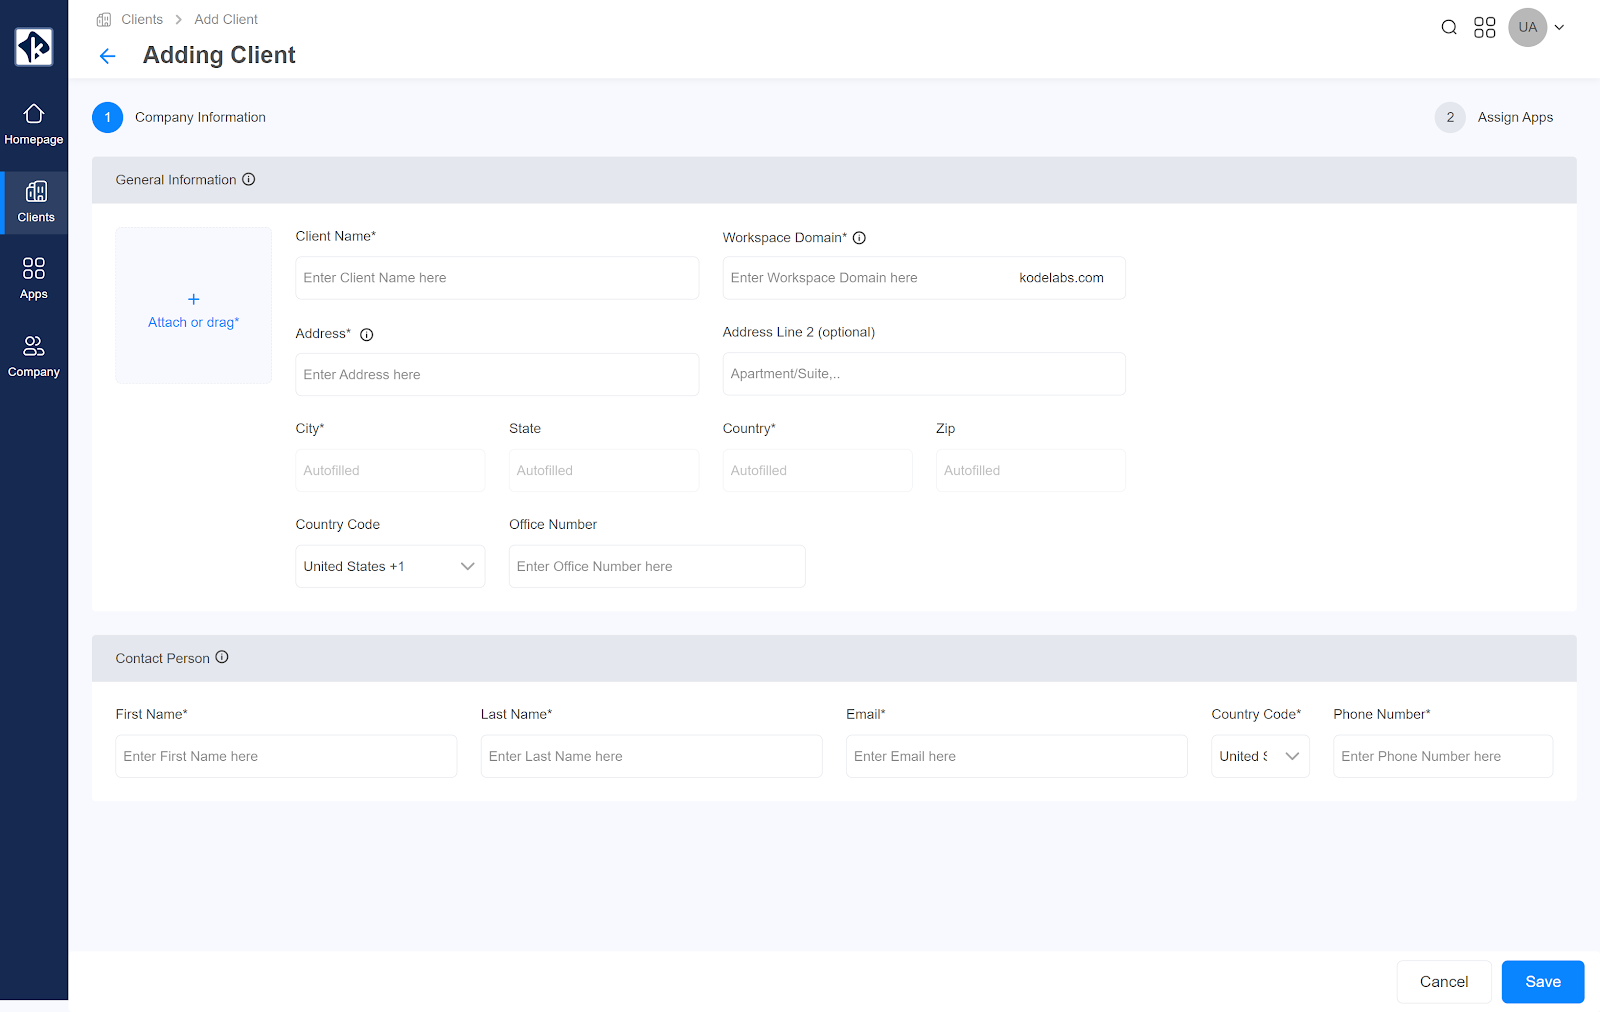
In order to add a new client, please select the Add Client button on the upper right hand corner. Upon making the selection, a new window will appear requesting you to fill out all of the relevant information including:
Client Logo
Client Name
Workspace Domain (must be unique)
Address, City, State, Country, and Zip
Contact Person Details
Workspace Domain is a unique URL that will be assigned to each client. The proper way to name it is by getting the domain name of their website. For instance, if a client named ZEN Estate has the website as zenestate.com, you would put their workspace domain as zenestate.kodelabs.com.
Filling out these details and selecting Save Client will take you to the second and final step of adding a client which is to Assign Apps. In this step all the products and/or features that have been contractually agreed upon with the client will be enabled for its use.
The completion of this process will prompt the Launchpad to send an email to the listed contact person with instructions on setting the client interface along with all assigned products.
Apps
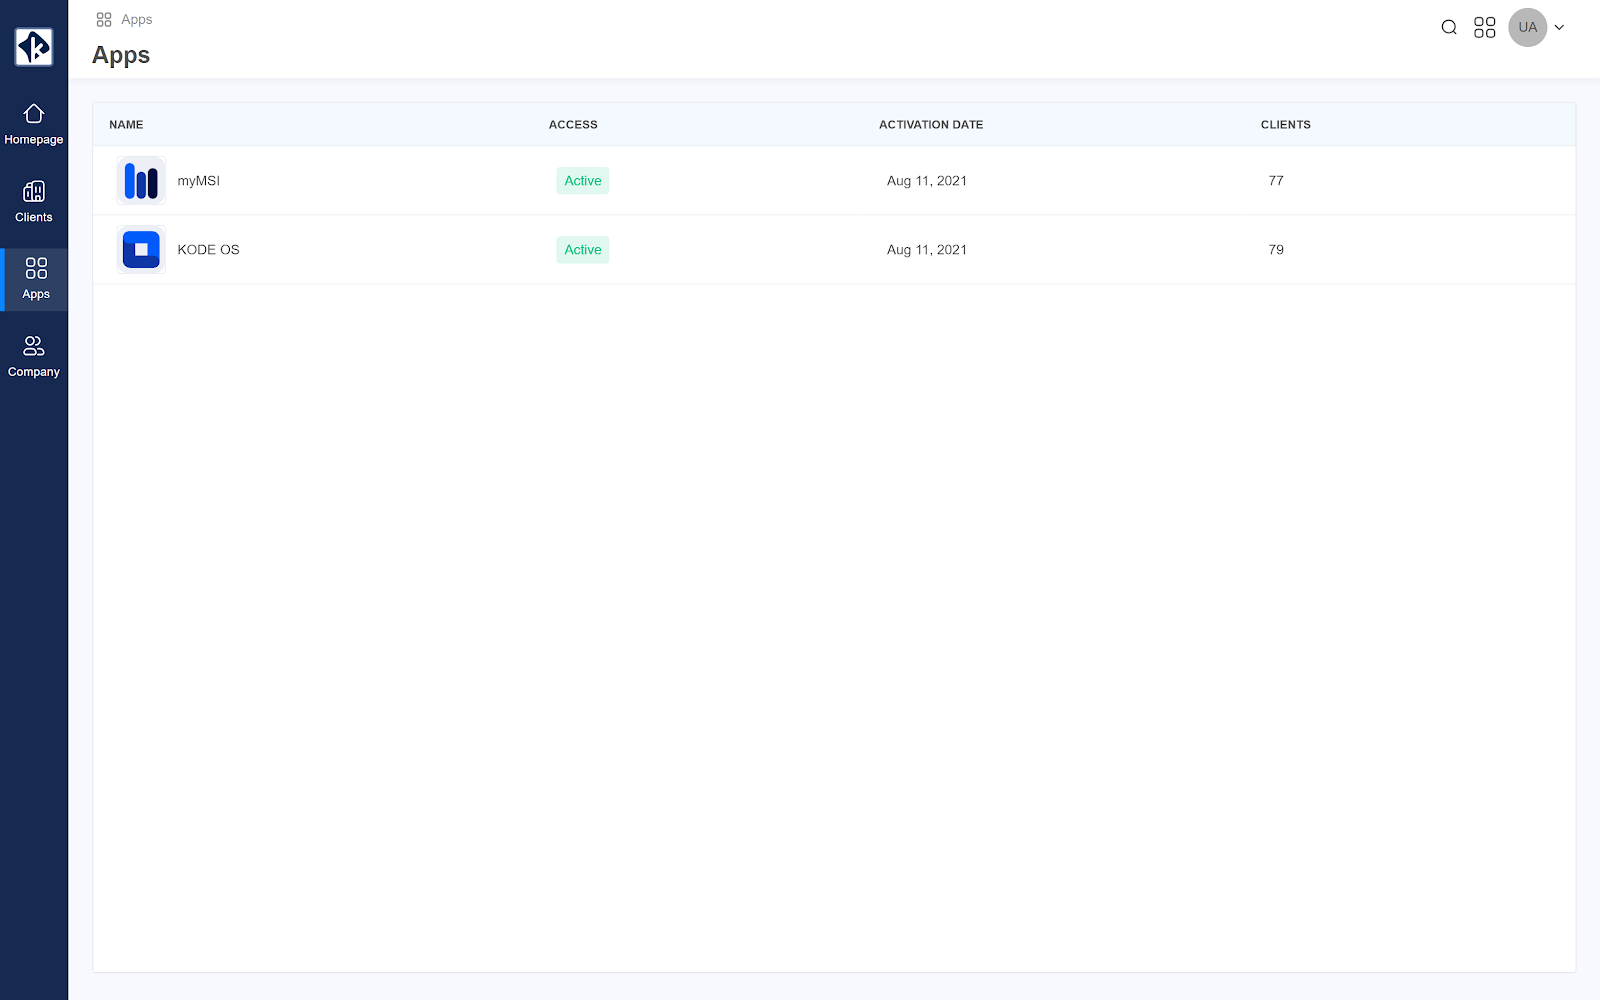
In the apps sub-menu, you can see all the possible products and/or features that are provided under the KODE OS umbrella along with information on its access status, activation date and number of clients currently using each product or feature.
Selecting any of the listed products will take you to an App Details window where you can see further details as well as assign the selected product or feature to additional clients.
For assigning, select the Clients tab from the App Details window and then select Assign Client on the upper right hand corner. Upon making the selection a pop-up window will appear where you can select the client to which you want to provide access to the additional product. Please note that for this to work, the client will have to be added in the Clients option.
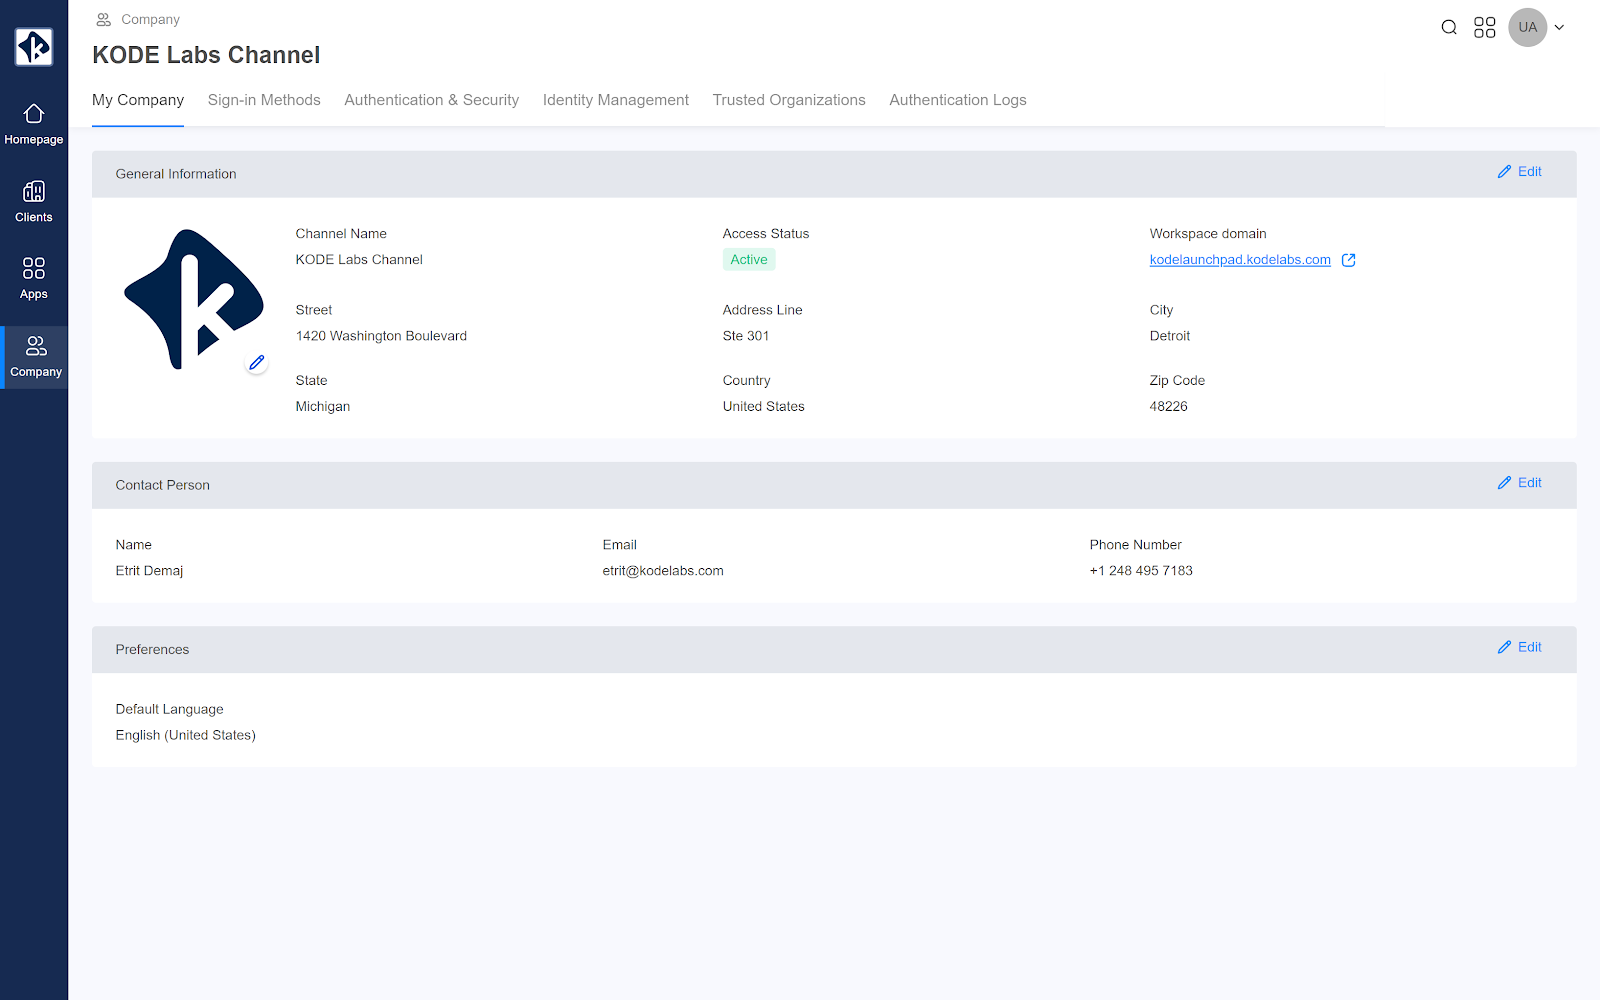
Company
In this section, you can:
View the organization's details, including the contact person
Manage Sign-In Methods
Handle authentication and security settings
Assign users with access to the Launchpad and MyMSI through identity management
View trusted organizations
Check authentication logs
Related Articles
Navigate to Launchpad Homepage
In order to access Launchpad you will need to access a link that will be provided to you by KODE Labs or one of its channel partners. Once you login to Launchpad you will be directed to the Homepage section from the left main navigation bar. Homepage ...Navigate Launchpad as a user
Introduction Welcome to the KODE OS Launchpad! After reading this short user guide, you will be able to manage your users, products, and access for anything related to KODE OS. The Launchpad will enable you to ensure that all of your users can have a ...Add a client
If you are a Channel Partner and you want to create a new client which will have access to Launchpad and KODE OS or/and myMSI you can do it by following these steps: First you need to Login to Launchpad Navigate to the Clients module using the left ...Manage roles and permissions
Dynamic Roles are built into Launchpad for the purpose of controlling permissions for various modules and features on KODE OS. In Launchpad you will find a default set of Roles and Permissions. An Administrator can grant or revoke various permissions ...Search for buildings
With the search function, you have the ability to look for clients and sites. Whether you’re a channel partner looking for clients, or a client looking for a specific site in your portfolio, you can find what you’re looking for in no time. How to Use ...