Marker Icons
The Marker Icons module is divided into three primary categories:
KODE OS Library
Custom Library
All Icons

KODE Library
At KODE Library you will find the list of the default icons and their values for each Category (e.g. Temperature, Fire, Parking, Battery Status).

Clicking on the Duplicate icon of each group you can duplicate the category and customize it to your liking.
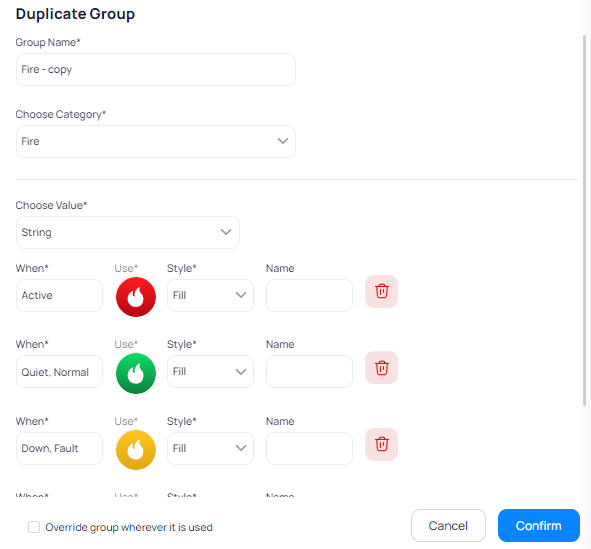
Give a name to the group
Choose a Category
Choose the Value (Number or String)
Add new values
Use the default icons or add new ones
Once you customize the group to your linking, click on Confirm and the group will be added to the Custom Library tab.
Custom Library
In the Custom Library you can Edit, Duplicate and Delete your custom groups or add a New group from scratch.
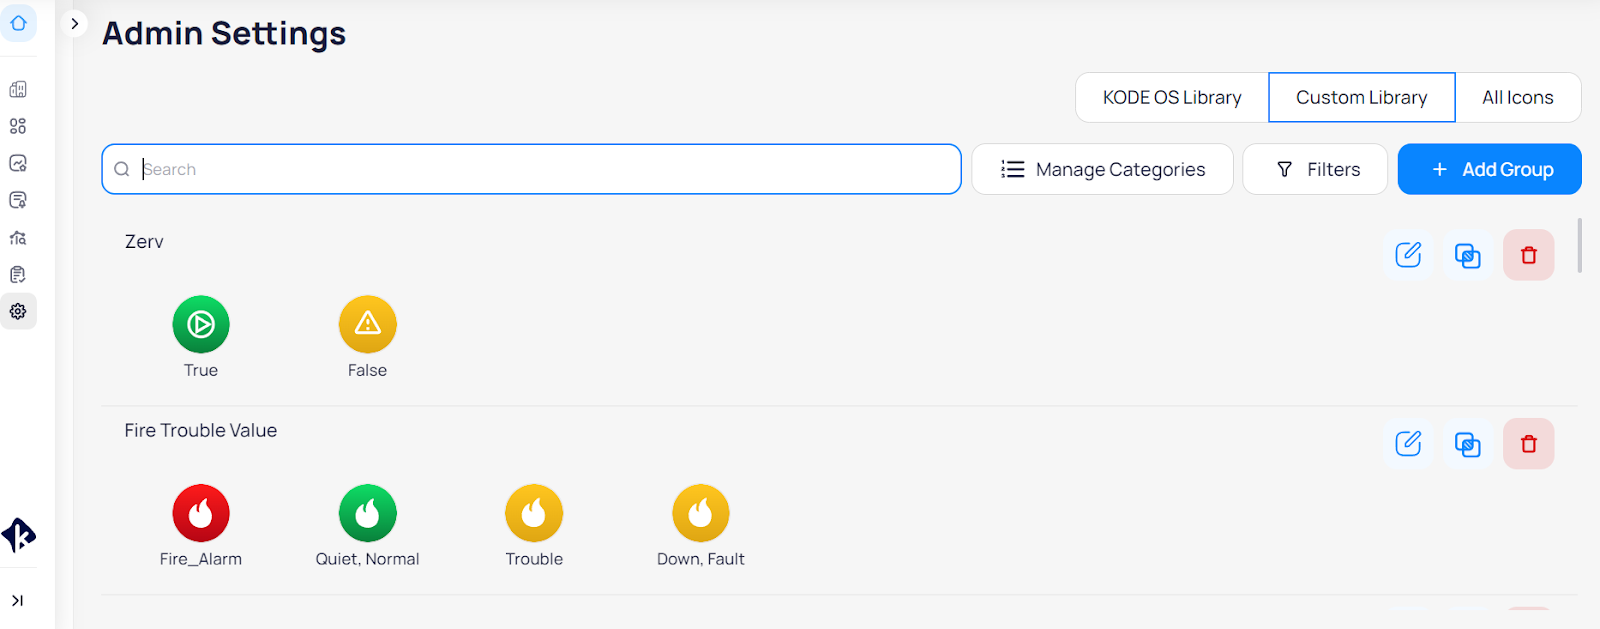
To add a new group click on the plus icon at the bottom right of the page.
On the “Create a Group of Graphics” page, add the group name (e.g Temp), choose the category (e.g. Temperature), value (e.g. Number), unit (e.g Celsius).

Clicking on the “+Add new value” button, you will add a new value between the other values.
Clicking on the “+Add down icon” button, you will add an icon which represents down devices into floor plans or systems.
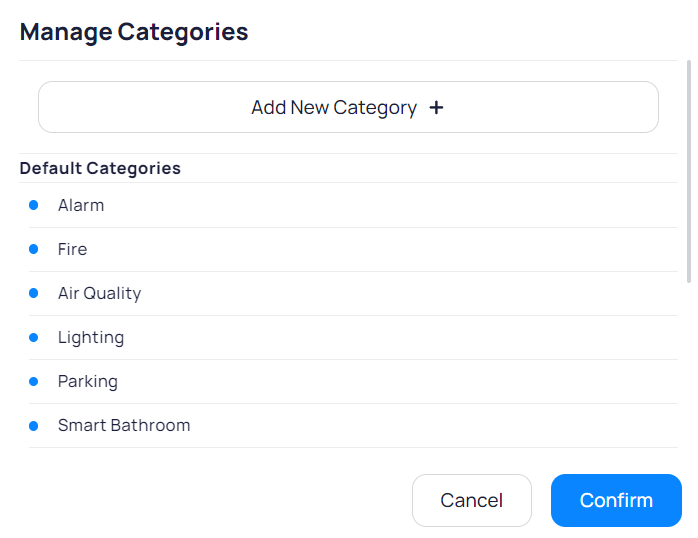
Manage Categories
To add a new Category, click on the “Manage Categories” button at the top right of the Custom Library page.
In the pop up page that opens up click “+Add new Categories”
Write down the Category Name
Click on the + Icon well next to the category name
Click on Confirm
All Icons
At the “All Icons” page you will see all Kode Library icons which are the default icons and all your custom icons from the Custom Library section.

Related Articles
Add Custom Icons
To add custom icons and ranges to represent each device type and value into a system or floor plan follow the below steps: Navigate to Admin module by clicking on the profile icon from the left main navigation bar. From the left side menu of the ...Customizing Markers and Icons
The Graphic Tool feature provides different tools which allow you to optimize and make floor plans more intensive from where you can view and spot devices’ performance with a single sight. This will give you an overall visual perspective of what is ...Graphics Summary
Module summary We’re thrilled to announce that Graphics creation as we know it has been completely transformed. There’s a graphics builder we’ve been cooking that gives you the ability to build System and Device Graphics and customize floor plans ...Navigating through KODE OS features
KODE OS navigation is organized into two primary ways. The left hand navigation bar provides access to modules and functionality. And then within each building there are widgets guiding you to details of the building operation. Below we walk through ...Graphic Tool Settings
In the settings of Graphic Tools (Global Configuration) you can find everything that is needed to configure like Layers, Smart Markers, Icons and also here you can upload different graphic files for floor plans, devices and systems to use later while ...