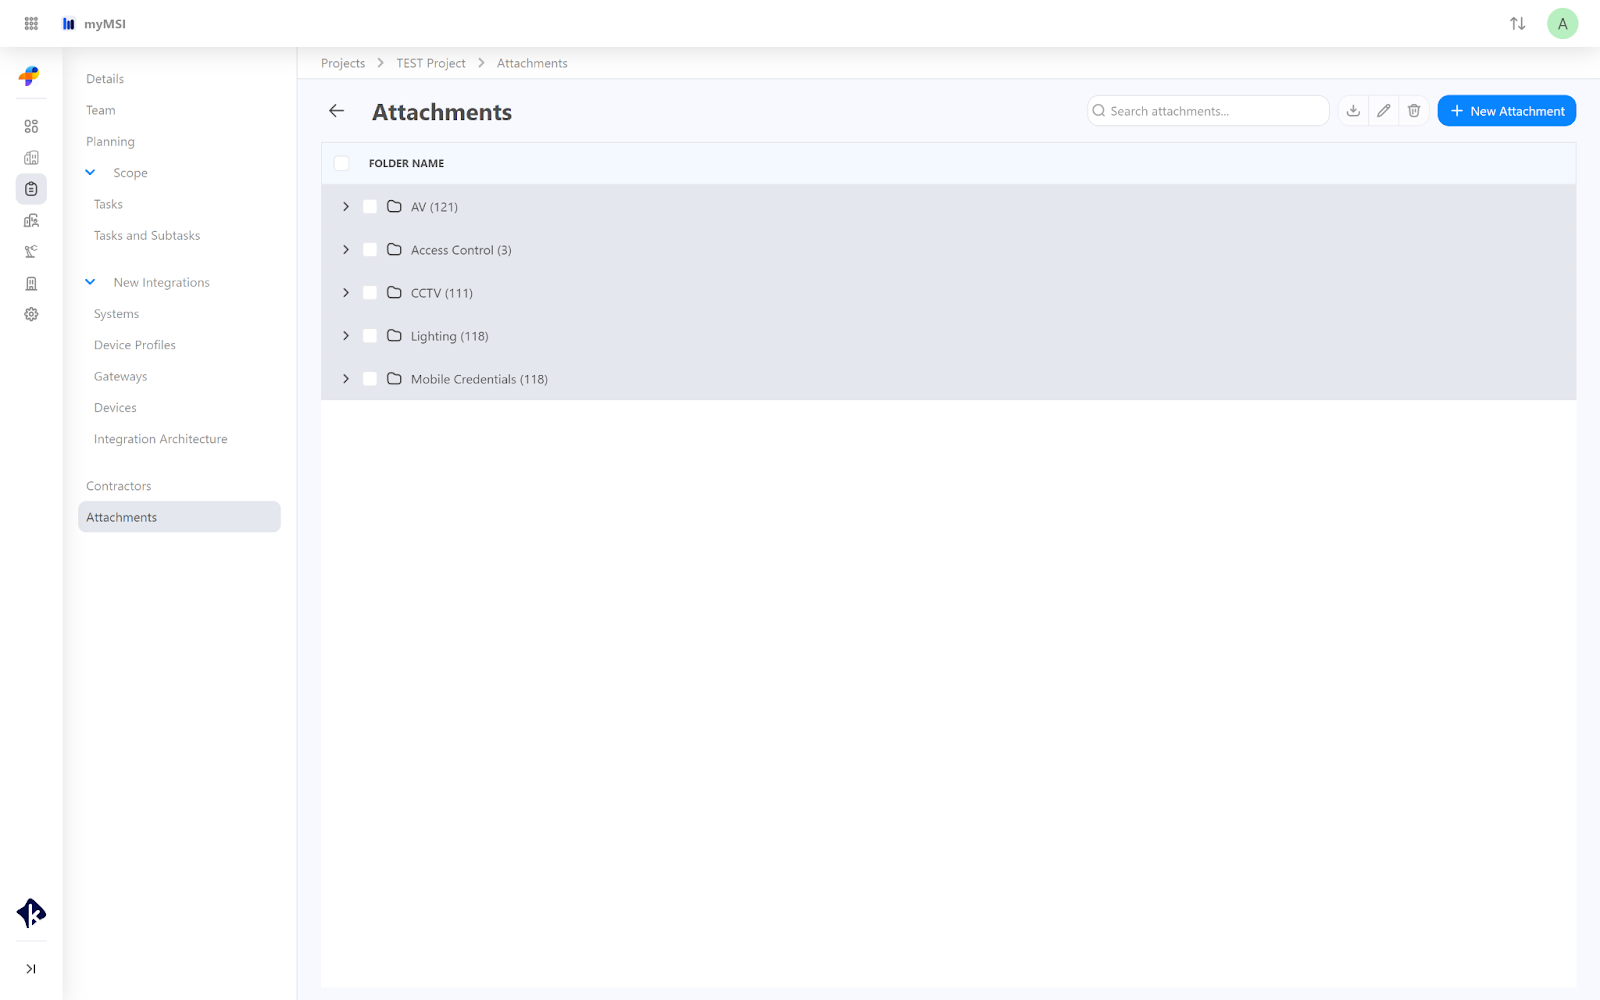
Attachments Page
Here, you will find a list of all folders and attachments available within the project. This section includes every folder and attachment, organized for easy navigation and access, making sure that all documents are available in one place.
Add new Attachment
Once clicking on the Add Attachment button on the top right of your screen it will open up a page from where you can add files from your computer.
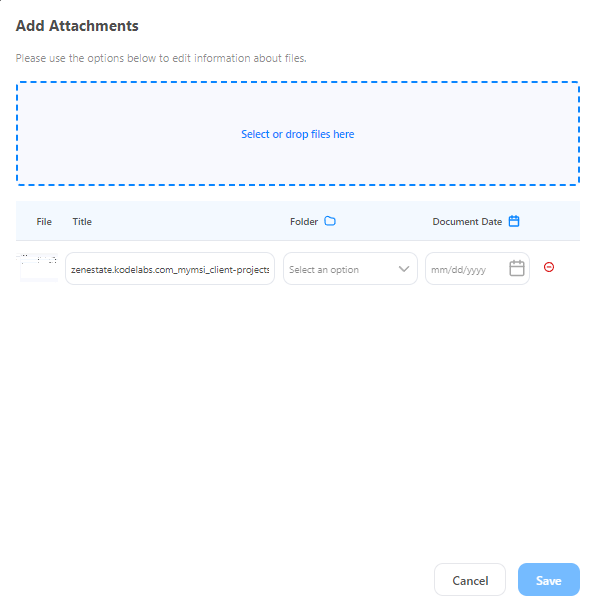
You can upload or drop files by clicking on the Select or drop files here section.
Add one or multiple files at once > Choose Folders Name > Pick up a Date > Click Save and the file/s will be uploaded.
To unselect the file from this view, simply click the Minus Iconin red.
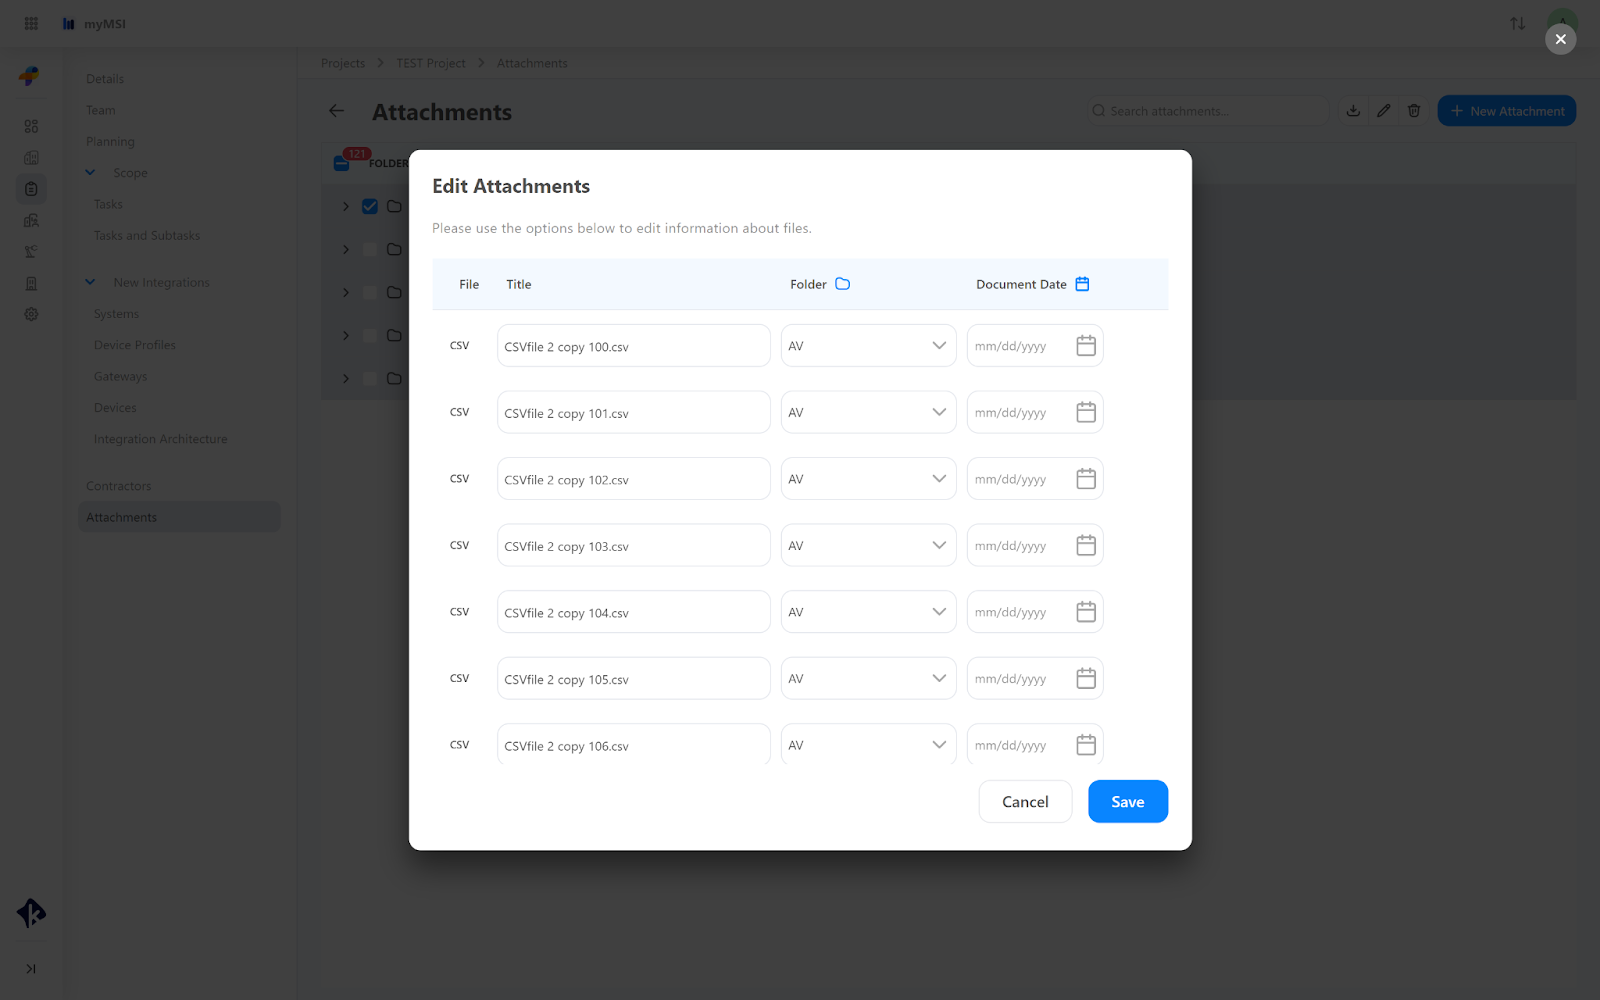
Edit, Delete, and Download Attachments or Folders
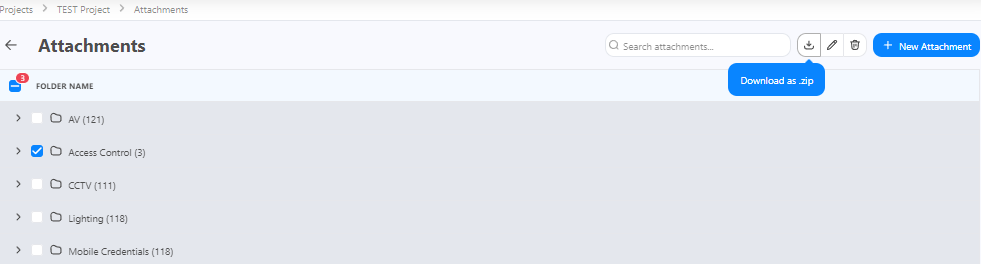
Folders
To manage an existing folder, select the desired folder and use the buttons: Download, Edit, or Delete located at the top right.
Edit: Clicking Edit will open a pop-up page displaying information about the attachments within the folder, such as File Type, Title, Folder, and Document Date. Here, you can change the title of the attachments, move attachments between folders, or update the Document Date. After making any changes, click Save.
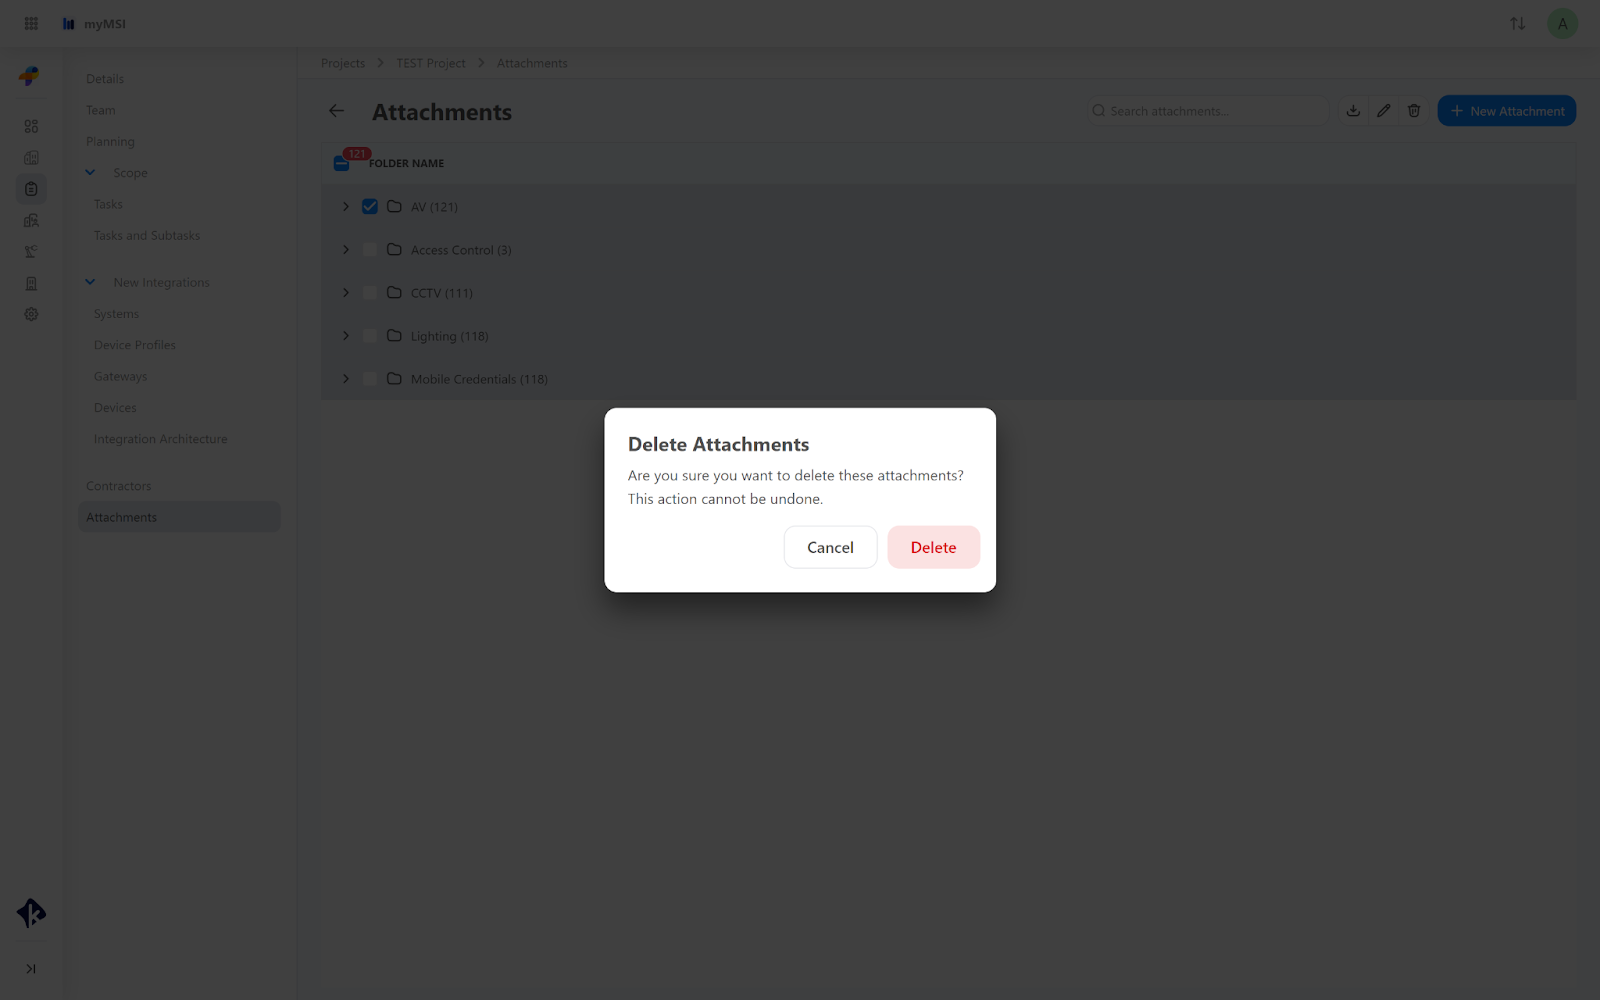
Delete: To delete a folder, click on the trash icon and confirm the deletion. This will remove the folder along with all its attachments.
Download: To download the folder, simply click Download, and the folder will be saved to your computer.
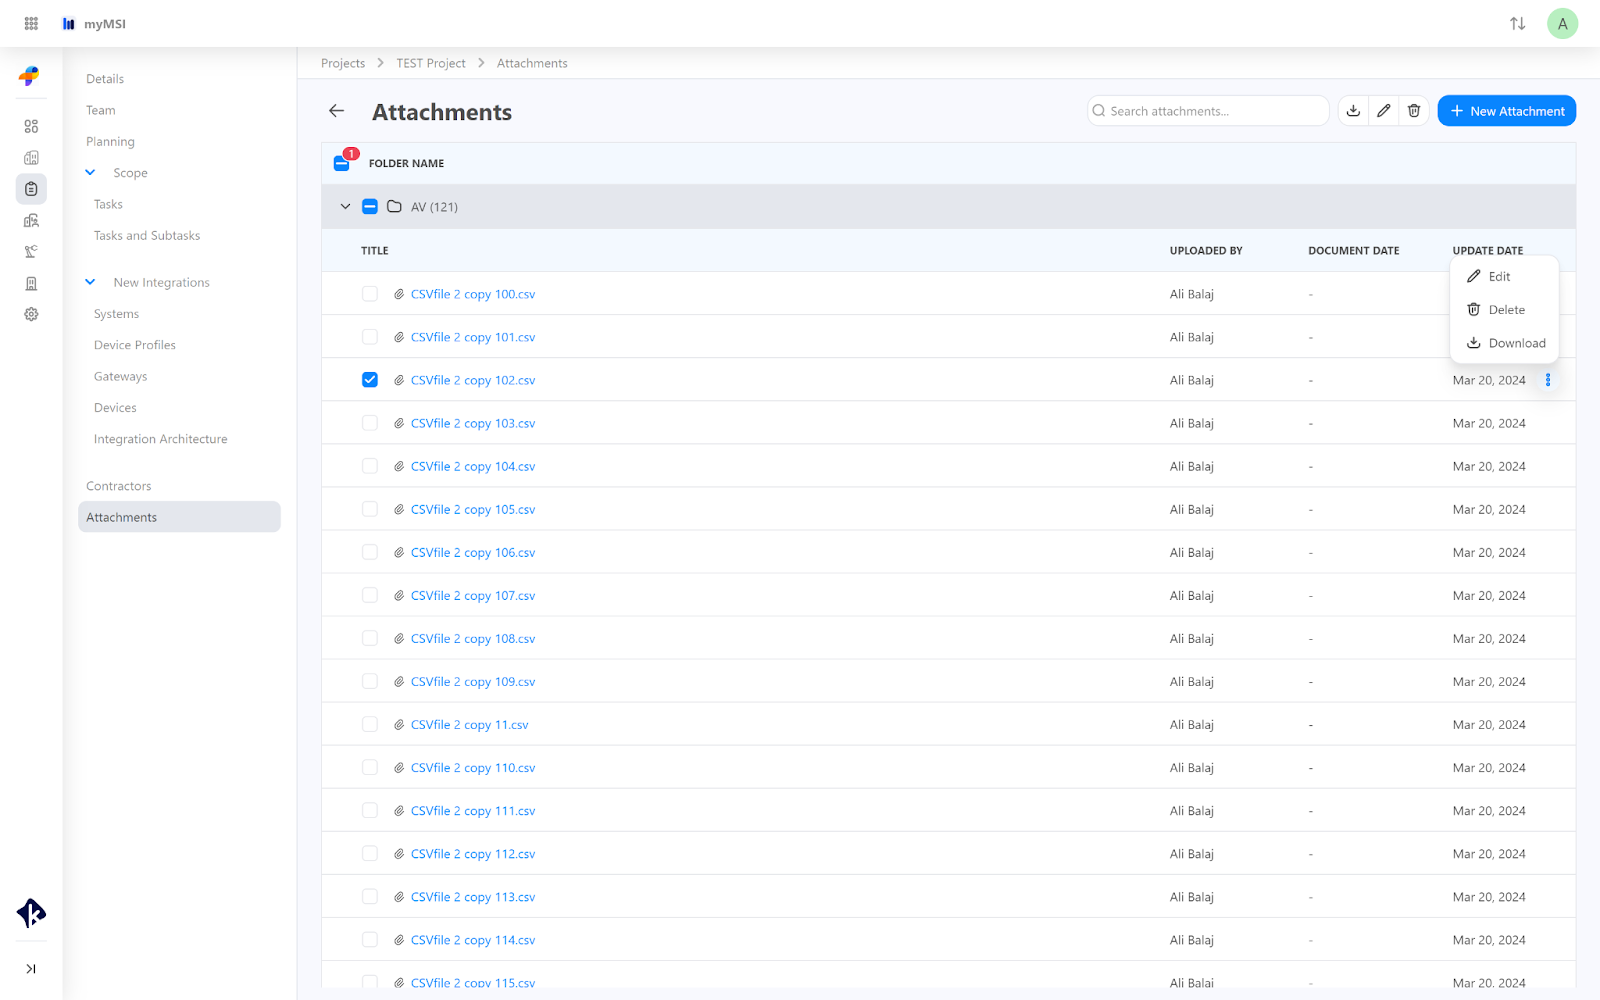
Attachments
To manage an existing attachment, click on the three dots at the end of the row for the respective attachment. This method allows you to edit, delete, or download the attachment directly from the attachments section.
Related Articles
Scope Page
The Scope page shows how a project is progressing, including what’s needed and who is responsible. You can use filters to sort tasks and view detailed notes. The Tasks page lets you add new tasks or use existing templates for easier management. Track ...New Integrations Page
The integrations module is a source for putting all your device's details. It helps you to go over the basic elements during the integration process. Once you go to the Integrations page you will see the list of all Systems. You can also navigate to ...Planning Page
The Planning Page is where you manage the setup of equipment for each floor of your project. It allows you to view and adjust what equipment is planned, including different types and quantities. You can explore various views to see your plans grouped ...Contractors Page
The Contractor tab provides an efficient way to manage contractors for your project. You can assign or remove contractors, as well as add new offices if needed. This feature helps streamline project management by keeping contractor details organized ...Exploring myMSI
Managing projects and organizational tasks requires a structured approach, and myMSI offers a design to simplify complex workflows. This article dives into each component of the myMSI, highlighting their functionalities and benefits for effective ...