Areas
Accessing Areas
To access Areas just go on the left pane and click at “Areas” .
Once you are in the Floor Plan view you will be prompted with several options and features that you can benefit in order to enhance your experience.
Depending on the type of devices in a building, on the floor plan widget, you will see tabs for each device type, including but not limited to:
HVAC (temperature, devices)
Lighting
Fire Detection
Finding your Way Around the Floor Plan Widget
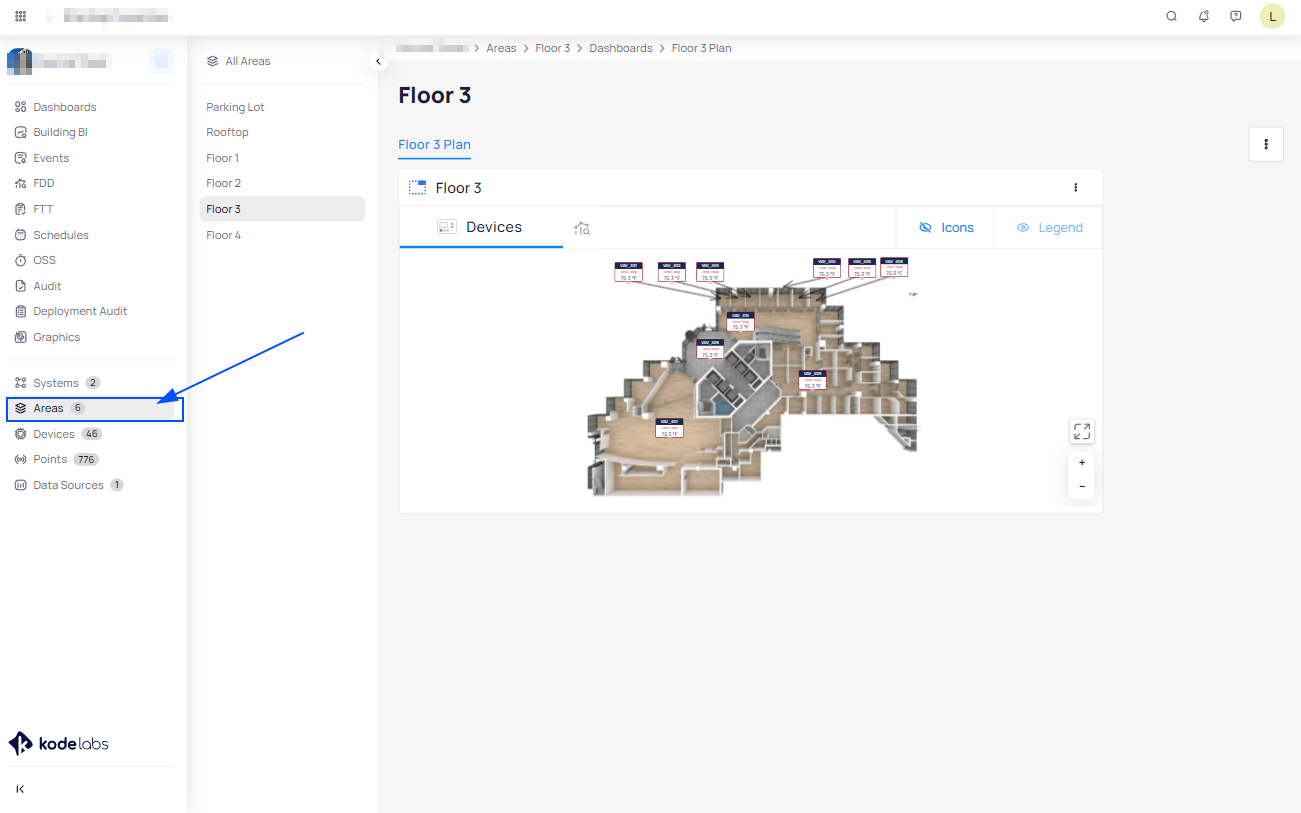
In the Temperature tab, all HVAC devices on a floor are displayed, showcasing their names and the current emitted temperature.
Clicking on a device's name directs you to the Device Details, while clicking on the temperature leads you to the Write Point option, allowing interaction to modify values.
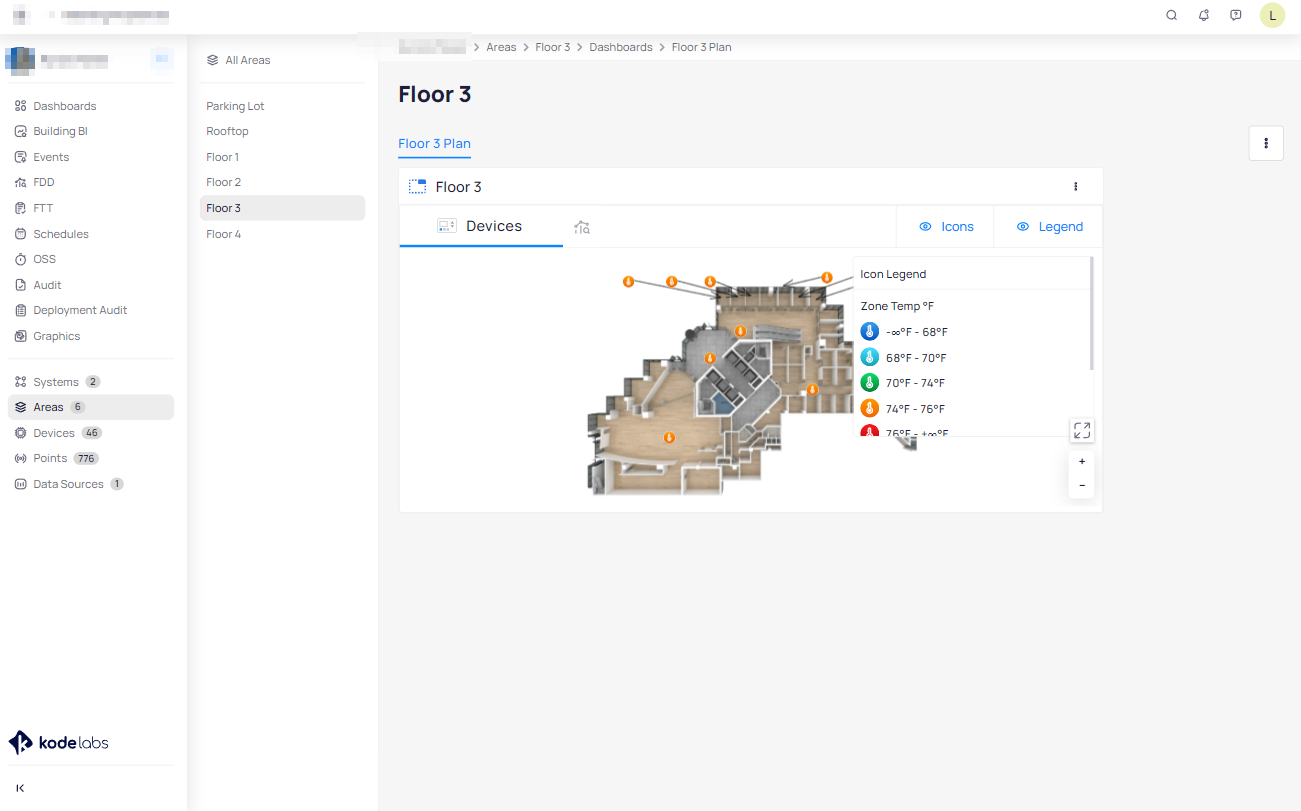
For floors with numerous devices, consider activating the Icons option in the upper right-hand corner. Enabling icons displays each point value as an icon based on predefined thresholds.
Alongside Icons is the Legend option, providing flexibility to hide or show the icons legend based on your preference.
Navigation
Moving around the floor plan is seamless by holding the floor plan graphic with the left mouse button and dragging it.
To zoom in and out, use the "+" or "-" buttons in the lower right-hand corner.
Restoring the view to the original position can be achieved by selecting the four outward arrows in the upper right-hand corner.
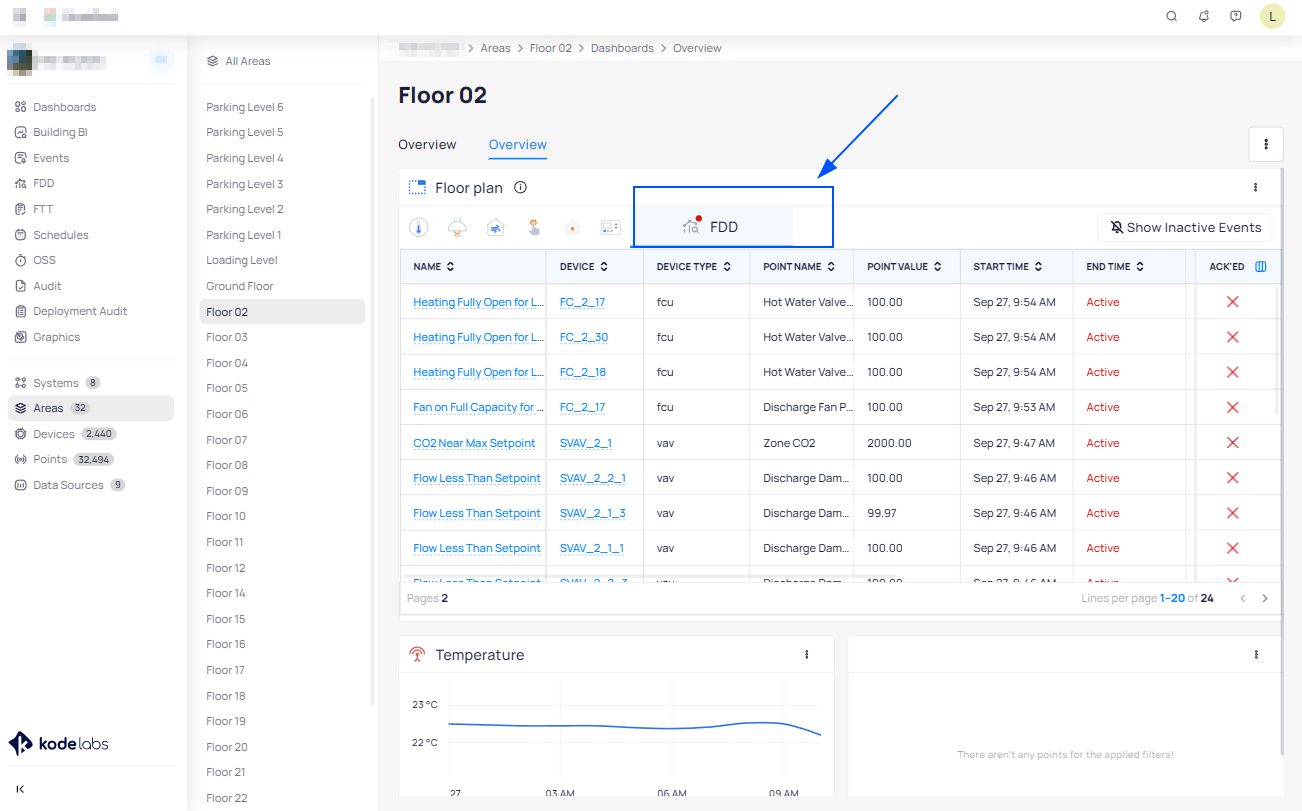
Area Events
Each Floor Plan allows you to access associated events by selecting the FDD tab.
The FDD Events window showcases all area events, mirroring the information available in the events feature, with the only difference being that you will only see events related to the selected area.
How to add new Areas to my Building
To add areas to your building follow these steps:
Go to KODE OS.
From the left main navigation bar select Settings.
On the Settings > Buildings page you will see the list of the buildings you are assigned to.
Choose the building you want to add the areas to.
You will be directed to the building details, from where you will see 4 tabs:
Details
Areas
Users
Files
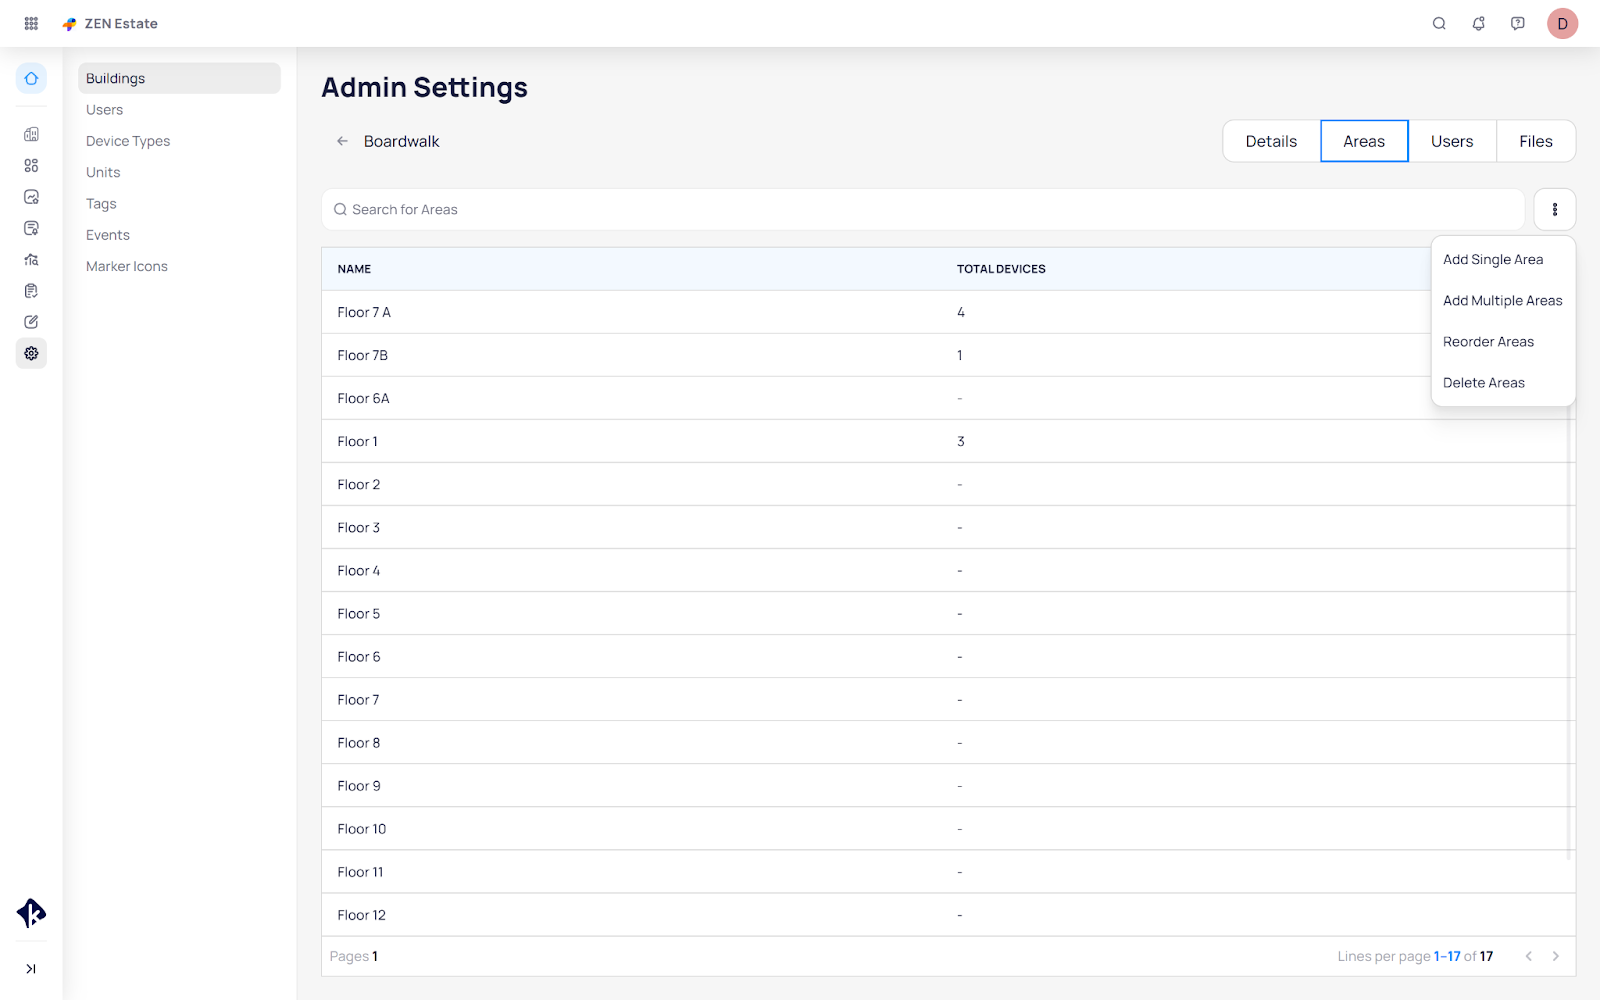
Clicking on the Areas tab you will be directed to the list of all existing areas. On the top right hand corner of the page you will see the 3 dots icon, clicking on it you will see 4 options:
Add Singe
Add Multiple
Delete Areas
Reorder Areas
Add Single
To add areas one by one click on the Add Single button. On the pop-up page, type the name of the area you want to add (e.g. Floor 1) and then click Save.

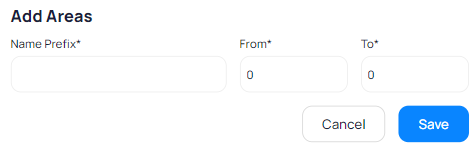
Add Multiple
To add multiple areas at once click on the Add Multiple button . On the pop-up Add Multiple page, type the prefix name (e.g. Floor) and then the floor number (e.g From 1 to 5).
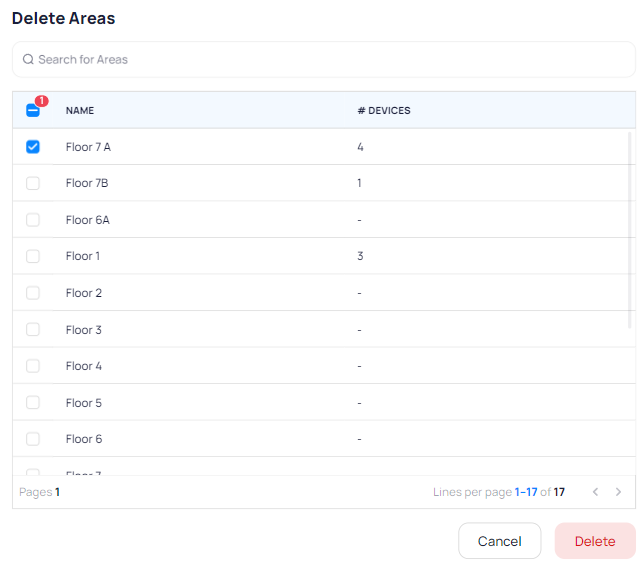
Delete Areas
If you want to delete multiple areas click on the Delete Areas button . On the pop-up Delete Areas page, select the areas you want to delete and then click Delete.
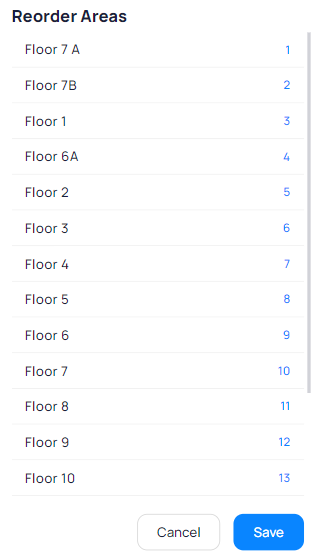
Reorder Areas
To reorder the existing areas click on the Reorder Area button. On the pop-up Reorder Area page, drag and drop the areas to the proper order and then click Save.
Related Articles
Bookmarks
You can use bookmarks to quickly find and jump back to a specific device, or floor plan widget instead of scrolling through multiple pages. With Bookmarks, you can use it as a navigational tool, as well as a link or reference. Bookmarks are marked as ...Floor Plan & System Graphics
Placing devices into floor plans The goal of floor plan placement is to put each of the equipment in its intended location in the building for quick and easy viewing. Follow the below steps for further instructions. Navigate to a building of your ...Navigating to Area Insights - Mobile App
To obtain a visual representation of device placement across floors and other areas, and to interact directly with the devices, you can rely on Floor Plans. Each area will have its own Dashboard with various widgets. When you enter the Floor Plan ...Navigating to Device Details - Mobile App
Device Details helps you to determine device performance, status, history and allows you to interact with devices in order to adjust their functioning with the aim of increasing optimum performance. There are a few ways on how you can get to device ...Devices
To access Devices just click on devices on the left pane after you selected the desired building. Here you can see a list with all devices that are available in the selected building. You can perform a search to narrow the list to desired devices or ...